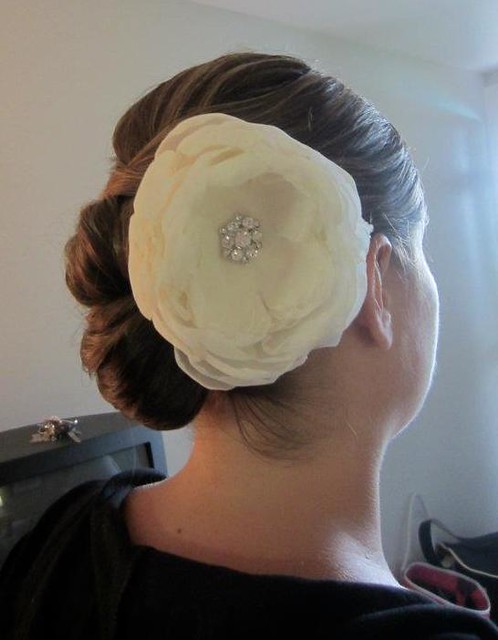
First things first, I want to throw out a few qualifiers for this post. These would be a really great and pretty easy treat for a bridal shower (or baby shower). They're cute and single serving size and they're also pretty healthy so you don't have to feel bad about eating 2 in one sitting... not that I know this from experience, I'm just, you know, guessing... Anyway, so I made these last Monday when it was almost 100 degrees out. I was a woman possessed and really wanted some cheesecake. It was really hot out and then I thought it was a good idea to turn on the oven. That said, if you make this recipe, take the 30 seconds I didn't to wipe down the sides of the ramekins once you've filled them, and before you pop them in the often. I was too hot and humid, and I just wanted to throw them in the oven and leave the kitchen asap. I also may have been slightly delirious by that point.
I should also mention that I'm kind of a, well, I'm a cheesecake snob. It's not really my fault though. See, when I was a kid we had a family friend who would make the most amazing out-of-your-mind cheesecake. It was lite and smooth and had a subtle lemon flavor and it was pretty much glorious. This cheesecake spoiled me to the point that I never order cheesecake in restaurants and generally really only eat it if it's homemade (there are obviously occasional exceptions).
I knew when I came across this recipe I needed to give it a try. Plus, I've kind of been on a huge Greek yogurt kick lately so that made the recipe even more appealing. The filling for this recipe is adapted from the Lemon Cheesecake Yogurt Cups by Skinny Taste. I mostly adjusted to my tastes and also to take into consideration the ingredients I had in my house at the time. I changed up the crust completely though because I wanted to use graham crackers in the pantry and also because I love ginger and lemon together.

Ingredients:
- 7 ½ graham crackers (if they come in sheets of 4 rectangles, mine come in 2 rectangle pieces which is different & awesome)
- 2 Tbsp Butter, melted
- 1 ½ Tbsp minced crystallized ginger
- 8 oz fat free cream cheese, softened (If it's not softened it won't mix well into the rest of the cheesecake.)
- 1/4 cup sugar
- 2 tsp vanilla
- 6 oz fat-free Greek yogurt
- 2 large egg whites
- 3 Tbsp lemon juice, with pulp (pulp optional, but I love lemon flavor)
- 1 Tbsp lemon zest
- 1 Tbsp all purpose flour
- Strawberries (optional)
Directions:
Pre-heat oven to 350°.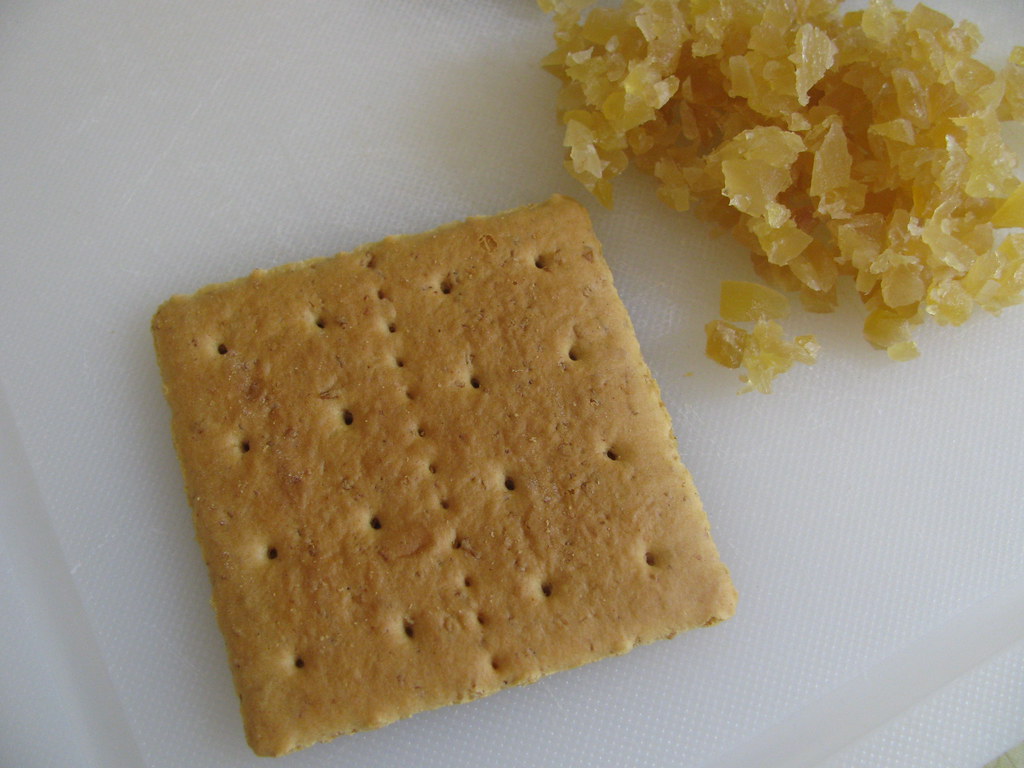
You can make these in little cupcake liners (12) or small ramekins (8), I used the later. First things first though, start by making the crust. In a food processor toss in the graham crackers and ginger and pulse until the crackers are pulverized. Next, mix in the butter and pulse to mix. (You could also make this in a gallon bag and bash the crackers with a rolling pin or meat hammer.) The mixture should look slightly moist.

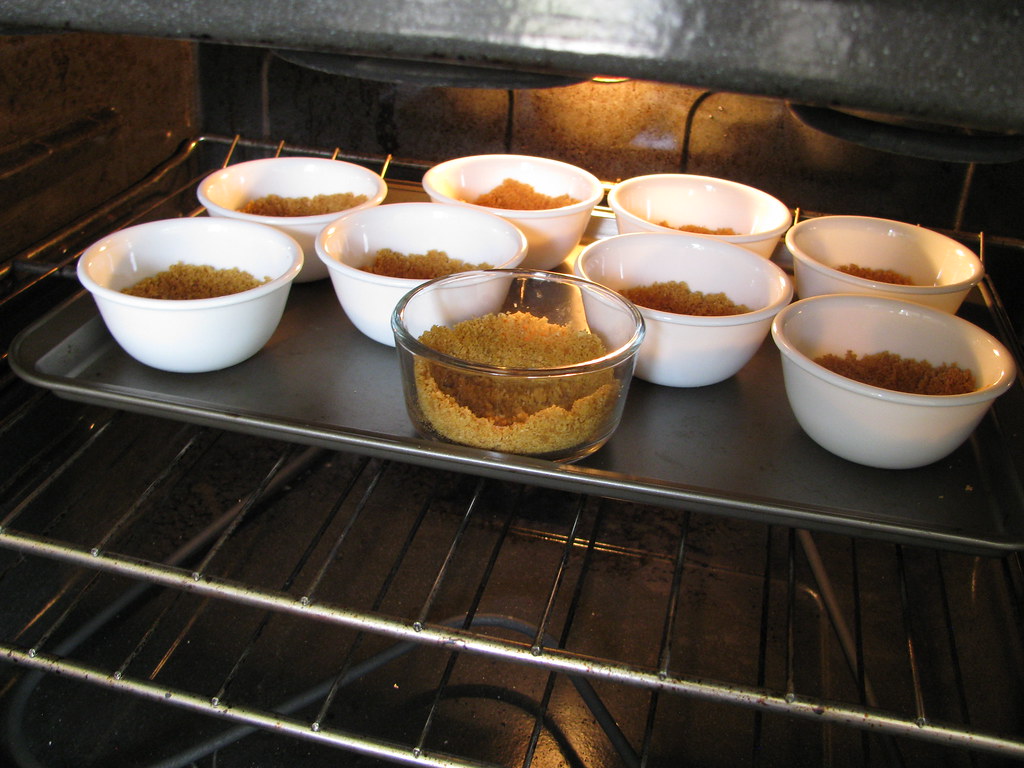
Spoon a heaping table spoon into each ramekin – if you use cupcake liners you might want to use a little less. Tap the crust down and up on the sides a little if you’re using ramekins.
While you’re baking your crusts you can get started on the filling. Skinny Taste warns to mix the ingredients together gently and not to over mix so keep that in mind as you mix the ingredients together.


Distribute the filling evenly into your cups and then bake for about 20 minutes until the center is almost set. Remove from the oven and let cool to room temperature before you put them in the fridge to chill.
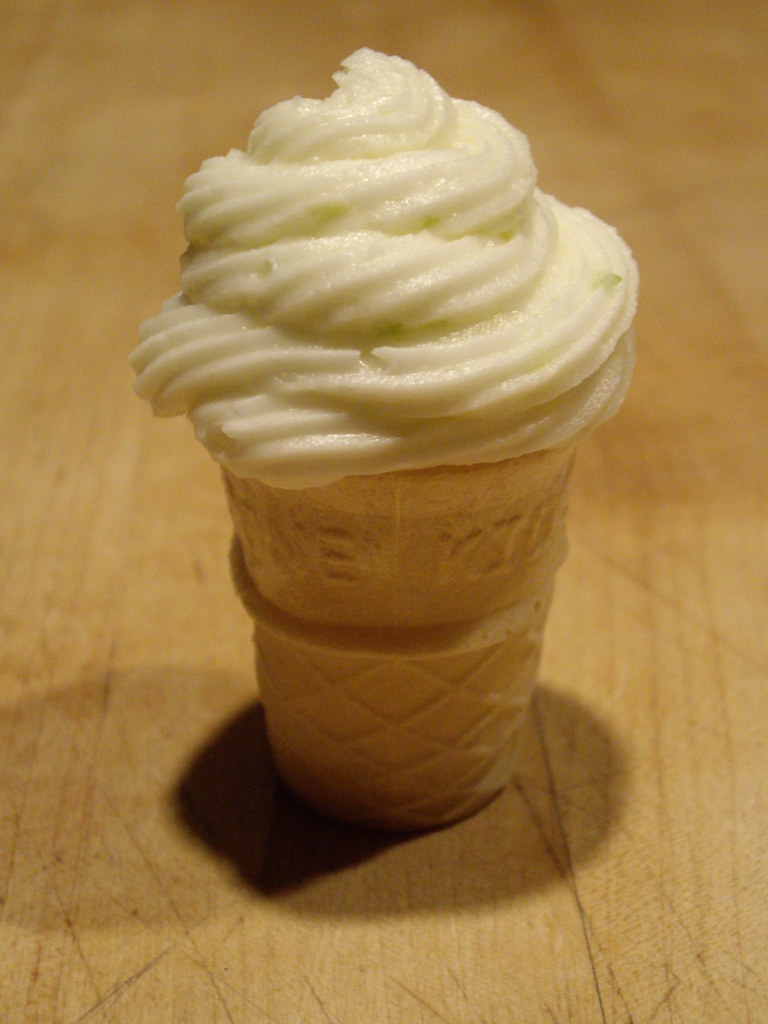
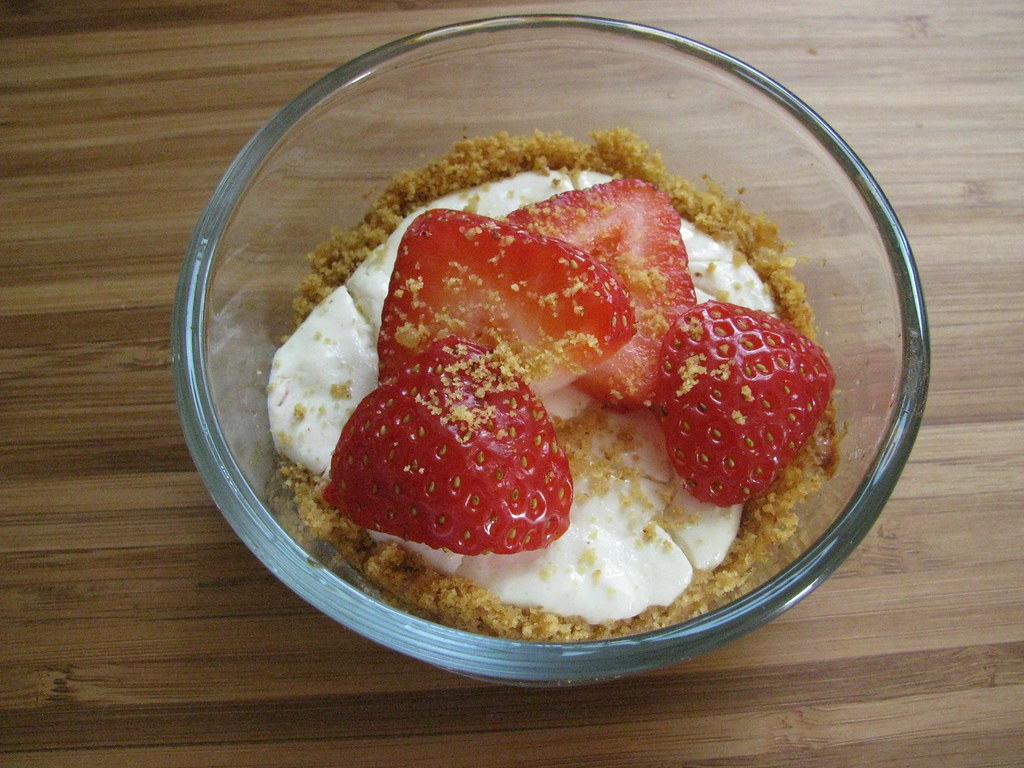
When they're done they'll look like this:
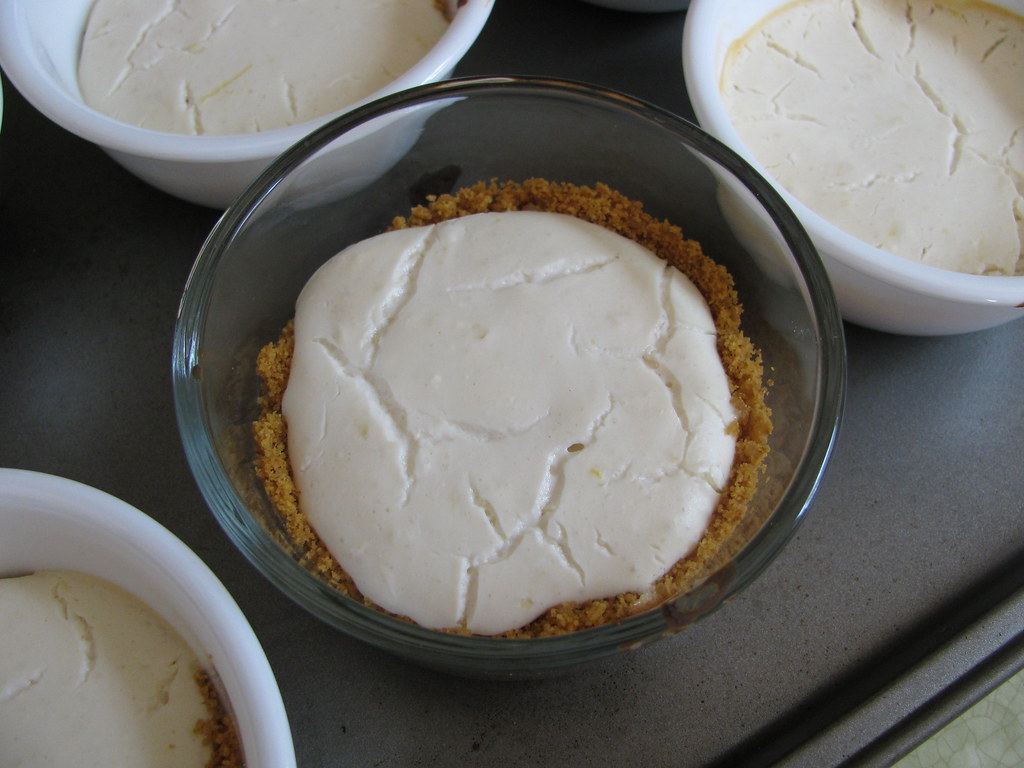
You can serve with fresh fruit on top. I choose strawberries because I love strawberries. The creamy cheesecake goodness is light and slightly lemony and when paired with the ginger graham cracker crust it's a super.mega yummy flavor explosion in your mouth. Don't take my word for it - you should make this - stat!

Lemon Cheesecake Yogurt Cups w/ Ginger Graham Cracker Crust
Ingredients:
Heat oven to 350°.
You can make these in little cupcake liners (12) or small ramekins (8), I used the later. First things first though, start by making the crust. In a food processor toss in the graham crackers and ginger and pulse until the crackers are pulverized. Next, mix in the butter and pulse to mix. (You could also make this in a gallon bag and bash the crackers with a rolling pin or meat hammer.) The mixture should look slightly moist. Spoon a heaping table spoon into each ramekin – if you use cupcake liners you might want to use a little less. Tap the crust down and up on the sides a little if you’re using ramekins. Gently place the cups on a baking sheet and bake the crusts for 10-15 minutes until they change color slightly. You’ll also most likely start to smell them as they get close to being done. This basically sets the crust before you fill them and bake them again.
While you’re baking your crusts you can get started on the filling. Skinny Taste warns to mix the ingredients together gently and not to over mix so keep that in mind as you mix the ingredients together. Mix together the cream cheese, sugar, and vanilla until smooth using an electric mixer. Slowly mix in the yogurt, egg whites, lemon juice and zest, and the flour. Once it is all incorporated stop mixing – you don’t want to over mix. Distribute the filling evenly into your cups and then bake for about 20 minutes until the center is almost set. Remove from the oven and let cool to room temperature before you put them in the fridge to chill. You can serve with fresh fruit on top.
You can serve with fresh fruit on top. I choose strawberries because I love strawberries. The creamy cheesecake goodness is light and slightly lemony and when paired with the ginger graham cracker crust it's a super.mega yummy flavor explosion in your mouth. Don't take my word for it - you should make this - stat!
Lemon Cheesecake Yogurt Cups w/ Ginger Graham Cracker Crust
Ingredients:
- 7 ½ graham crackers (if they come in sheets of 4 rectangles)
- 2 Tbsp Butter, melted
- 1 ½ Tbsp minced crystallized ginger
- 8 oz fat free cream cheese, softened
- 1/4 cup sugar
- 2 tsp vanilla
- 6 oz fat-free Greek yogurt
- 2 large egg whites
- 3 Tbsp lemon juice, with pulp (optional, but I love lemon flavor)
- 1 Tbsp lemon zest
- 1 Tbsp all purpose flour
- Strawberries (optional)
Directions:
You can make these in little cupcake liners (12) or small ramekins (8), I used the later. First things first though, start by making the crust. In a food processor toss in the graham crackers and ginger and pulse until the crackers are pulverized. Next, mix in the butter and pulse to mix. (You could also make this in a gallon bag and bash the crackers with a rolling pin or meat hammer.) The mixture should look slightly moist. Spoon a heaping table spoon into each ramekin – if you use cupcake liners you might want to use a little less. Tap the crust down and up on the sides a little if you’re using ramekins. Gently place the cups on a baking sheet and bake the crusts for 10-15 minutes until they change color slightly. You’ll also most likely start to smell them as they get close to being done. This basically sets the crust before you fill them and bake them again.
While you’re baking your crusts you can get started on the filling. Skinny Taste warns to mix the ingredients together gently and not to over mix so keep that in mind as you mix the ingredients together. Mix together the cream cheese, sugar, and vanilla until smooth using an electric mixer. Slowly mix in the yogurt, egg whites, lemon juice and zest, and the flour. Once it is all incorporated stop mixing – you don’t want to over mix. Distribute the filling evenly into your cups and then bake for about 20 minutes until the center is almost set. Remove from the oven and let cool to room temperature before you put them in the fridge to chill. You can serve with fresh fruit on top.