Showing posts with label weddings. Show all posts

Friday, August 3, 2012

Flowers in Action: Congratulations!!

From time to time I hope to share flowers in action - or rather pictures of my customers in their hair pieces!! One of the greatest elements of creating hair pieces is knowing that they will most likely be worn by people during really happy times or activities.  I've had the opportunity to create custom hair pieces for brides to wear on their big day as well as fun and funky pieces for prom.

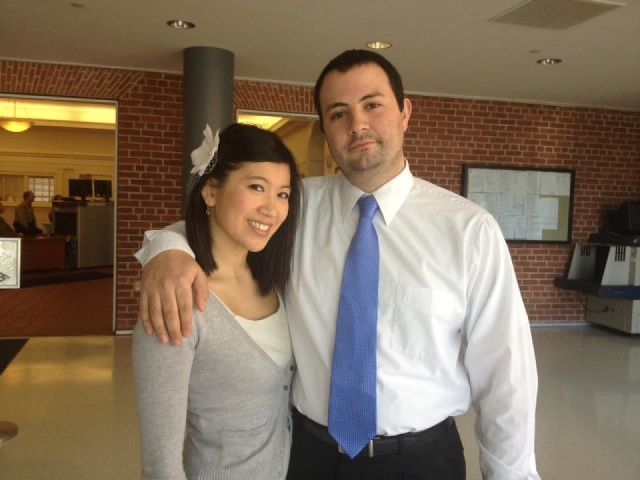
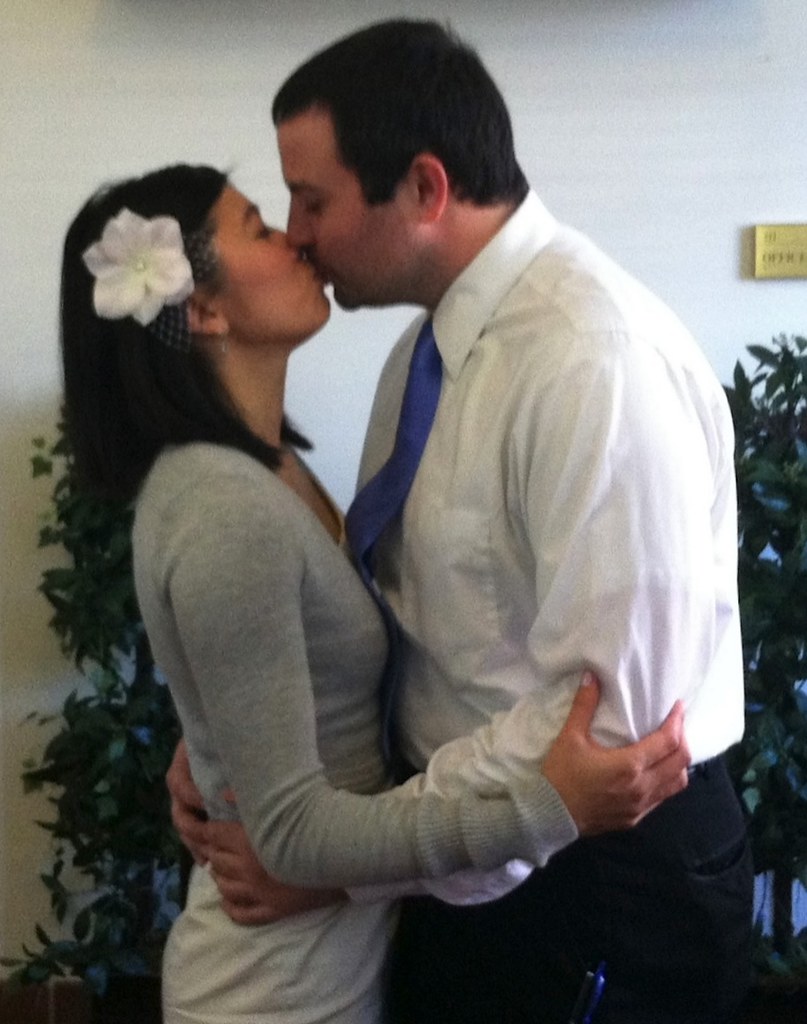
Today I wanted to feature my friend Jen! Jen and I met while we were both working on our Master's degrees at the University of Massachusetts Boston. The two of us used to get up to all kinds of crazy fun adventures all over Boston!! Shortly after I made a Facebook shop page earlier this year Jen JUMPED on buying a hair piece which was so incredibly sweet of her.  Like literally jumped on it - I posted it and went to bed and when I woke up she'd already placed an order - that girl is ON TOP of Facebook postings! :)

 Jen & her now hubs CJ had a sweet and intimate courthouse ceremony in February with a few close friends and are planning a church ceremony and reception in April 2013! Knowing Jen, I'm sure it will be an absolute blast!!
Congrats to Jen & CJ!!


Friday, July 20, 2012

Flowers in Action: Congratulations M & E!!

Warning: This post is a bit photo heavy...with awesomeness, of course.  I wanted to share a bit of the development process in how I go about making custom pieces. 

My sister-in-law, Meghan got married two weekends ago to her now hubs Eric M.  Their big day was really lovely from start to finish and it felt extra special because they asked both my husband (Meghan's brother) and me to be in their bridal party, so we got to be involved in all of the action!

Earlier this year Meghan emailed me to ask if I'd make a hair piece for her big day - of course I was super flattered and, moreso, really excited to get to create something she'd wear on such an important day. Her dress was top secret - as in she swore me to secrecy about the dress!!  I was not to show it to anyone.  I took this seriously and didn't even show it to her brother!! Since her wedding has now passed I'm pretty sure she wouldn't mind me sharing the process and the details now...

The way that my brain works is really visual.  When I'm making a custom piece for a specific event it really helps me to see the dress (or outfit) to start to develop designs in my head.  I like to see the material, texture, color, and style and design of the dress so I can try and do my best to evoke that in the hair piece.  The designer for Meghan's wedding dress was Sottero and Midgley (sidebar: I LOVE Maggie dresses, I wore one myself!) and the style is called Sidney.  The dress is made of ivory chiffon so I used that as a starting point for the fabric I was going to use for the hair piece.  It was also a material I'd never used before so it was a great new challenge... Plus, let's be real - this was for my SISTER-IN-LAW'S WEDDING - it was kind of a super big deal.

Here's a close up on the detail on her lovely dress:


Photo credit: Probably by my MIL

The details are great, right? And that's not even the whole dress (which you can check out here)!!

I spent a lot of time tracking down a rhinestone button center that closely resembled the rhinestones on her dress.  I needed to find something similar so it looked like it flowed with the dress and didn't stick out by being too different aesthetically.

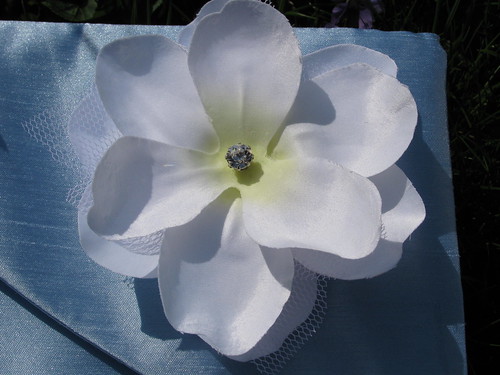
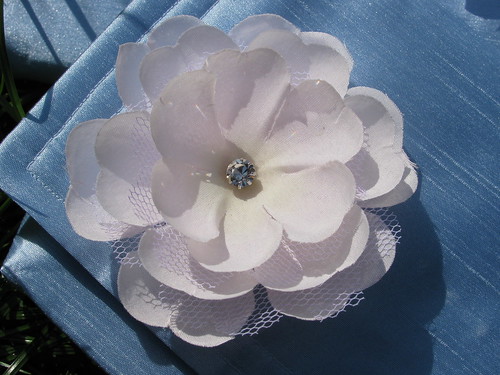
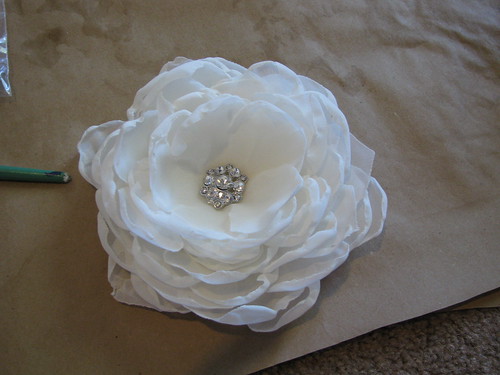
The hair piece is actually quite time intensive as it involved cutting and then molding each individual petal layer. This piece has about 15 layers all together.  When I was getting done with fiddling with all of the petal layers I played around with the shape and volume and sent Meghan photos so she could see the designs I came up with.  She gave me a lot of free reign on the design, so I also wanted to make sure I met the vision she had in mind. This is always the scariest part of making custom pieces for me.  Just because something gets translated in my brain a certain way doesn't mean it will speak to the person I'm making it for in the same way.  In the photo below you can see the different layers stacked up.  The flower with the rhinestone was a less full version I fiddled with.  We ended up going with a much fuller version which I think worked better anyway!!

I also got to get a little creative with the supplies I used to shape the petals themselves.  When poking around my kitchen for the perfect shapes I ended up pulling out an antique champagne glass to help me get the smaller center petal layers just the shape I was looking for!


This is the finished product:

I have a similar piece in my shop right now in my shop on Etsy

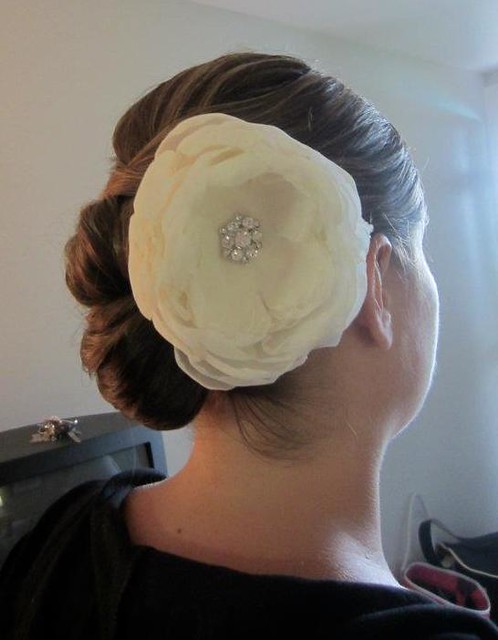
And this is the final product on my SIL after she got her hair done on her wedding day.  Thankfully her MOH remembered to snap a photo of the flower in action because I was running around and it totally slipped my mind!!
Photo used with permission from MOH


<3

Congratulations Meghan & Eric!!
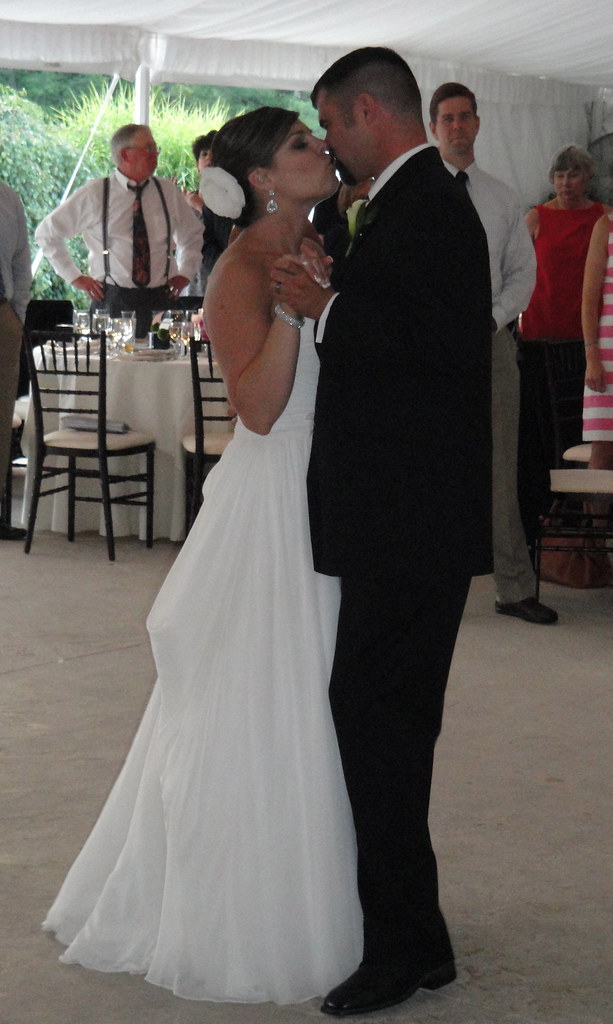
First dance as husband and wife! Just look how cute they are!! 
Photo borrowed with permission from David L.

---

I have another DIY tutorial coming up next week. It's going to be hosted over at Bridesmaids and Weddings first so be sure to check back for more info!!

Other wedding craft:

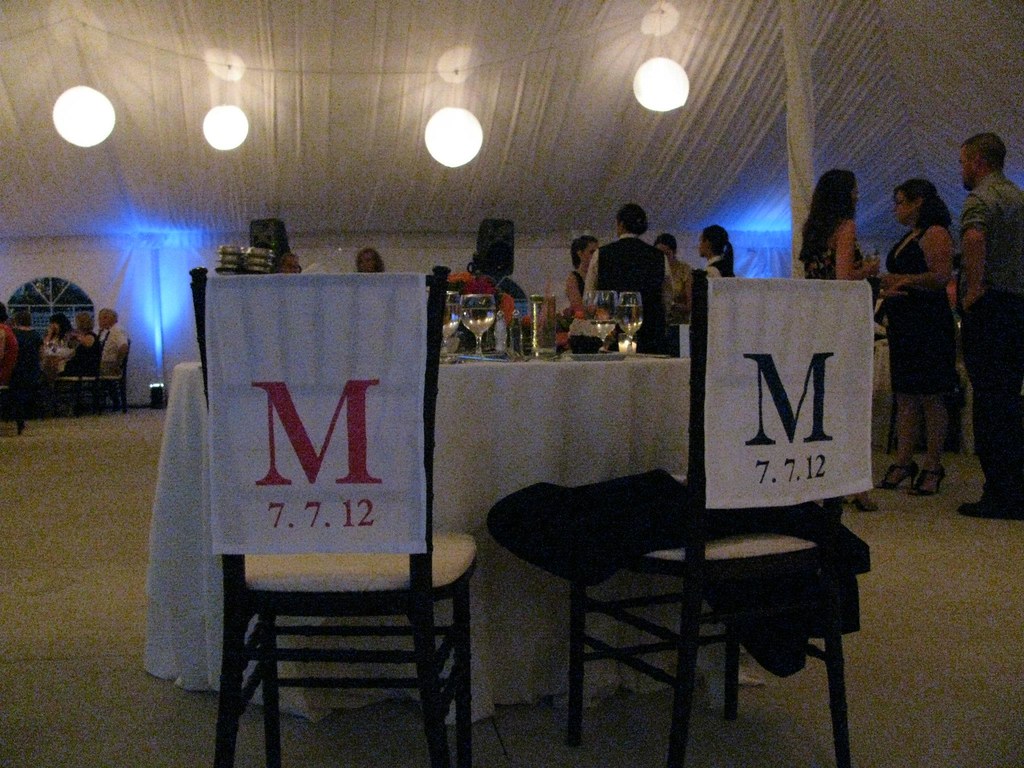
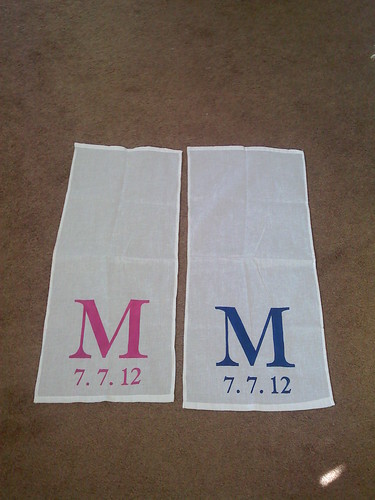
I made these for my SIL's bridal shower and they ended up using them for their wedding day, too! I think they look super cute on the back of the new couple's chairs!!  If anyone is interested ordering these I can make them via custom order in my Etsy shop.


Tuesday, June 26, 2012

Happy Anniversary Babe...

Today is our 1 year anniversary!!  
It's been one incredible year!!

Photo Credit: Metzger Studios

Our wedding was the inspiration for starting my Etsy Shop.   I made a lot of crafts by hand, but when I made the hair pieces for myself and my bridesmaids it felt like it could be something I could continue to do.  I started my shop Lavender Paper Hearts less than a month after our wedding day!!


Monday, June 4, 2012

The Waiting Game Has Me Crafting Up a Storm!

This is my second submission for the Dollar Store Crafts Wedding Crafts Contest!!

I'm in a weird waiting period between the time that I've submitted my dissertation to my committee and when I actually will hold my defense (which is actually tomorrow.  This post got pushed back a bit. Wish me luck!!) Since I've done everything else I can think of for my dissertation (bibliography, appendices, discographies, miscellaneous paperwork, etc.) I've been using the rest of my time reading bad (read: AWESOME) books and crafting up a storm for a variety of different projects.

E and I attending and or are in a few weddings this summer so these were the first few projects I tackled.  Recently I made some banners (using freezer paper) for my cousin's wedding and a hair piece that my sister-in-law will wear on her wedding day. See my Etsy Shop Lavender Paper Hearts for hair pieces! I'll have a similar hair piece coming very soon!!


This was my first freezer paper project which I made a few months back for my SIL's bridal shower. They were used as mini-table runners for her shower and looked sweet under her cake.  My SIL is also going to use them to hang on the backs of their chairs on their wedding day!! They could even be made into little door hangs, or if you added a small dowel and grabbed a cute Sheppard's hook from the Dollar Tree you've got an instant welcome yard sign for any event!! 

I also used freezer paper on the wrapping paper for my cousin's wedding present.  I had to press it VERY LIGHTLY so that it didn't tear off the paper when I removed the stencil, but I think it looks pretty cute (if I do say so myself!)  You can find the paper bow tutorial here. I'm kind of in love with it!!

Seriously, if you haven't tried freezer paper stencils you totally should.  These stencils are actually pretty easy to do if you have a little time and patience. You can use them on all kinds of things too! We even had a little baby onesie decorating party for a baby shower this last January!!


Freezer Paper Stencil Tutorial - For Banners or Monograms


For this project I used the following supplies:
  • Freezer Paper -I found mine at my local big box store for $7. I have enough to make stencils for the rest of my life.
  • Flour Sack Towels from the Dollar Tree - If you don't want to sew be sure to check out the towels. I found that sometimes they have all 4 sides hemmed, sometimes just 3, sometimes just two.  It saves a little time if you can find some that are hemmed on all four sides, but it's a quick zip through a sewing machine if they're not finished. 
  • Paper clips or binder clips - on hand
  • Acrylic Paint(s) & Brush(s) or Sponges (I used sponges from the Dollar Tree) - on hand 
  • Paper, computer, printer - Basically you need these to get your stencil - if you draw it by hand even easier!
  • X-acto knife - on hand
  • Iron - on hand
  • Cardboard - on hand - I don't know about you, but I LOVE to keep the cardboard that comes with dresses and shirts that I buy online. I may have a supply hoarding problem.
  • Sewing machine (optional)- If you find a flour sack with hemmed sides you're golden OR if you like the rustic chic look be bold and don't bother to hem!!
Step 1: Basically what you want to do first is figure out what awesomeness you want to create into a stencil.  I used a free online downloadable monogram from Wedding Chicks (who have amazing free downloads!)  Because I knew my cousin wasn't into anchors for her wedding day I used photoshop to modify the design and I added two sea stars which were more her speed.  (Yay for beach weddings!!)  Since the flour sack towels are 3ft by 3ft I blew up my image in Publisher so I could print it poster size. I then taped the sheets together.  (Just to give you an idea - I had 16 sheets total for the larger monogram in this tutorial.)


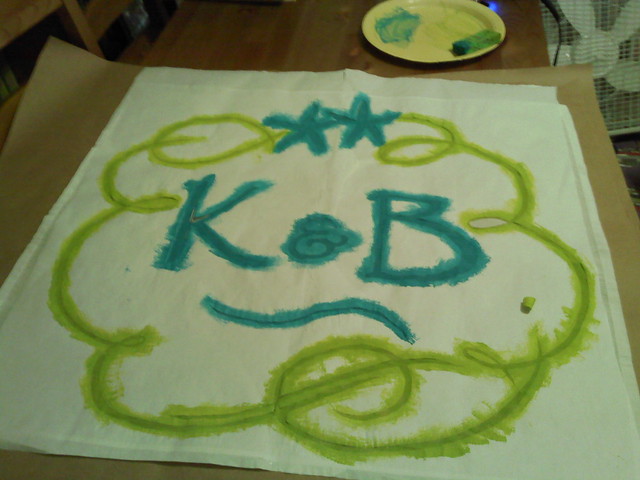
TA-DAAAA - one ginormous stencil!! You can see in the top right hand corner that I am apparently not very good at matching up lines. I had to fudge part of the swirl by drawing it in my hand in order to make them meet... it seemed easier than taking the whole thing apart and retaping. 

Step 2: Now, because the stencil was so big, I had to tape together two strips of freezer paper. I don't have a photo, but I just laid the two sheets on top of the stencil to see how big they needed to be and then got out my tape and stuck the sheets together.  Note: The shiny side is the part that sticks to the fabric so you want to draw on the dull side. When you open up the package of freezer paper this will be very obvious. Next you'll need your pencil or sharpie and you just start tracing away so that you copy your design onto your freezer paper. *Helpful hint: I also paper clipped the stencil and the freezer paper together since it was such a large job and I didn't want it to shift! I would say it took me about 15 minutes of laying on my kitchen floor to trace this onto the freezer paper.

Step 3: Next I got out a thick piece of cardboard and my x-acto knife and I started to carefully cut out the stencil.  **REMEMBER TO SAVE THE LITTLE FILLER BITS - I don't have a photo of this step, but you can see in the photo below how I had to fill in the bubble part of the letter B. These are strips/shapes that you cut out but you need to remember to save them because they fill in the letter - without them my B would look like a weird D.  I had a few more of these filler bits from some of the swirls too so I laid them out in order as I cut them out so I would remember where they went.


Step 4: Once you've cut out your entire stencil you want to iron your flour sack to make sure it has no creases. This will REALLY help you out when you try to iron on the stencil - I promise!! (I tried to cheat this on my second flour sack and it was terrible and required a lot of fixing. Learn from me - don't be lazy!)  Then carefully lay out your gimongo stencil on top of the flour sack and fiddle with it for a bit until it lays down exactly how you want it.  Leave out the filler bits for now.  After setting your iron to medium high heat with no steam start in one corner and carefully begin to iron on the stencil.  Take your time because you want to make sure it's iron down correctly. If you make a mistake you can carefully pull up the paper (CAREFULLY) and re-iron it into place.  Once you've ironed the whole stencil go back and place in the little filler pieces one by one and press them with the iron onto the flour sack.  Your finished work should look sort of like the image above.

Step 5: Now that you've got your stencil in place it's time to paint.  Put a piece of cardboard behind your fabric/stencil so that it won't leak onto whatever surface you're painting on. For good measure I clipped my fabric to the cardboard so that it wouldn't wiggle and smudge paint on the back side.

Using a brush or a sponge (I used a sponge I cut in half) carefully begin to blot on your paint.  You don't want to add too much at first because the fabric will soak it up. 


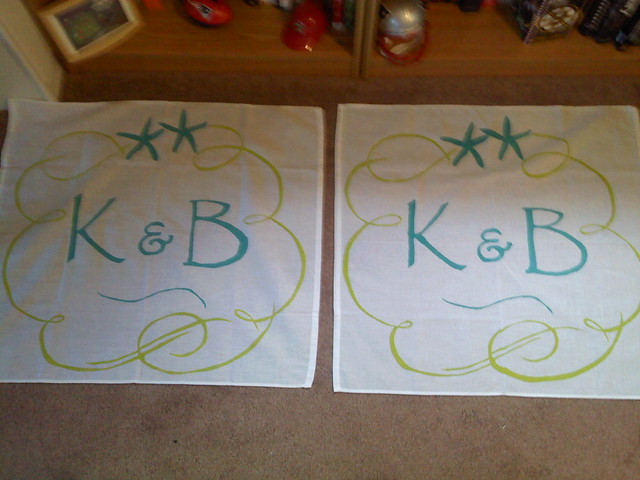
Step 6: Once you've applied all of your paint let the whole thing dry for a while.  I let mine dry for about 30 minutes before I attempted to peel the stencil off. I wanted to reuse the stencil for a second flour sack to save me some time so I peeled it away really carefully.


You can reuse the stencils about 2-3 times before they start to not really work any more.  To reapply the stencil I used a sheet of packing paper between the stencil (which now had paint on it) and my iron so I wouldn't hurt my iron - it worked perfectly!

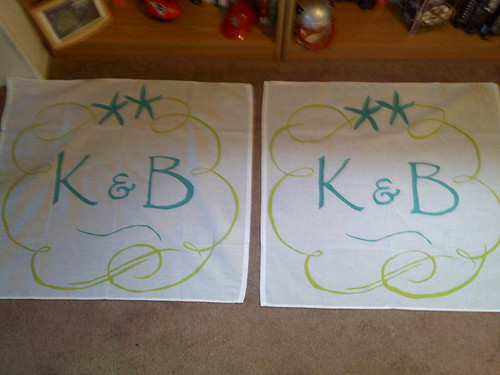
If it's a smaller less detailed stencil you can just cut a new one. For the little monogrammed banners I made for my sister-in-law I just cut a new stencil.  You also might notice that those are smaller - I only used one flour sack that I cut in half and then I hemmed up the raw edges with my sewing machine.

These banners are going to be used as decoration for my cousin's wedding.  They can be hung up on a bar, draped across a table - you could even get a dowel and some yarn and hang them from a sheppard's hook (the Dollar Tree usually has really cute ones in the summertime!!)

---

Lastly, be sure to check back frequently - I'm really excitedly working with a fantastic wedding blog, Big Day for 10k, to  host a giveaway for one of my hair pieces in the next few weeks!! I'll make a post as soon as it's all nailed down!! :)

Please follow me on this blog or 'Like' my shop on Facebook for product updates in my shop and other fun posts from my blog!


Friday, June 1, 2012

Craft Challenge: Wedding Crafts for Dollar Store Crafts

Okay - So this post is a two-fer.  It's a great excuse to share a tutorial on this blog, but it's also an entry I'm submitting for the Dollar Store Crafts Wedding Crafts Contest.  A little known secret is that I freaking LOVE the Dollar Tree... Okay, well this isn't really a secret because I'm pretty sure I mention it all the time to pretty much anyone who will listen!!  I always find really great things there to use and/or repurpose for crafts and a LOT of the projects I used for my own wedding as well as other miscellaneous crafts have been made with materials from the awesome Dollar Tree I have down the street.

The craft I wanted to share with you (and submit to the contest) is a tutorial for clutches that I made for my bridesmaids for my wedding.  I've been in a handful of weddings and I always feel like there is "stuff" I want to carry whether that's my phone, camera, lipstick, band-aids, etc. I thought it would be a nice gift for my ladies to store their own stuff on our big day!!

 Close up of the clutch I made for my MOH & super awesome sister!  I made flowers for each clutch (with a pin and clip) that my bridesmaids also wore in their hair on our wedding day.  Similar flowers can now be found in my Etsy Shop
  
Easy Peasy Pretty Placement Clutch Tutorial

This project is SUPER easy. I think they’re pretty darn cute AND useful (if I do say so myself)!

What you need:

  • Pretty placemats!! Mine were $1 each and I found them at The Dollar Tree. 
  • Depending on the thickness of your placemat you might consider using iron on-heavy weight interlining. This makes your clutch feel like it’s got a bit of thickness/body and help keep its shape. The clutch will feel thin without it.  Feel your clutch and decide how thick you want yours.  I used Pellon 809.  I found this at Joann’s and with a coupon one yard was $1.99.  This is enough to use double layers of interlining on 4 clutches.
  • Silver magnetic snap closure. I got 3 for $1.99 at Joann’s (also with a coupon).
  • Sewing Machine
  • Scissors
  • Ruler
  • Sewing pins
  • Iron & board
  • Cardboard and extra fabric on hand (optional)
  • Flower or brooch for decoration (optional) 
 Step 1: Decide which side of the placemat you’d like to be on the outside of the clutch and which side you’d like on the inside.  Play around folding the placemat with the “good/outside” clutch fabric inside, to decide how deep you want your clutch to be.  A good rule of thumb is folding the clutch so it’s close to thirds.  If you want to box out the bottom, you might want to make the top/flap portion of your clutch a little bit smaller compared to the bottom 2/3rds (the pocket portion).  Once you’ve played around and found a shape you like, with your iron, gently press your clutch shape.  This helps you to see the shape you’re working with moving forward. This is not necessary, but really super helpful. Now rip the seam on the top end of your placemat, where the top flap of your clutch will be.


Step 2: Next, cut the interlining so that it will fit just within the seams of your placemat.  If you use two pieces of interlining you can iron them together so they won’t slide around.  Place the interlining inside the placemat and iron again.  If you’re using a magnetic snap closure on the clutch, fold the placemat in half to find the middle of the clutch.  Measure about 4 inches down on the body part of the clutch, and follow the directions on the package to attach the first magnet button.

...oops, I forgot to take a photo of this step. 

Step 3: Now you’re going to sew up the sides of your clutch by sewing along the sides of the placemat. Remember that the "pocket" portion of the clutch needs to be turned inside out so that the seam will be hidden in the final product. I wanted my clutch to be a bit narrower than the size of the placemat so I lined up my foot about ¼ inch from the placemat’s already stitched line. 


 Step 4: Once you’ve sewed the seams on either side of the clutch, you can either leave the bag as it is (which will create an envelope type clutch) OR you can box out the corners of the clutch to give a little space for all of your stuff.  Either option is lovely, but I like to be able to carry around random “necessary” junk, so I went with boxed corners. 


 To box the corners, stick your finger inside one corner and fold the seams on either side until you get a triangle at the top.  Iron the seam open, making sure that the seam is truly centered (it should look like a perfect triangle) by laying a ruler on the seam.  Mark a line, depending on how wide you want the box at the bottom of your seam, and sew along this line.  If you’re not sure, start with a smaller triangle.  You can always re-sew the line further out to make your clutch bottom bigger.  (For reference, I made my triangles about 1.25 inches.)

Step 5: Turn your clutch right side out.  Now you’ve got to focus on the top/flap portion of the clutch.  You can pick any design you want.  Rectangular flap, turn in triangles, severe triangle… the possibilities/combos are endless.  I made each of my clutches a little different so no one girl has the same true pattern.  Once you’ve laid out a design you like, iron it down and pin to secure.  Be sure to add your second magnetic snap at this point, just before you pin the very top seam.  Sew along top portion of the clutch.  You might want two lines, depending on style and or to secure your pattern.  


Step 6 (optional):
1. You can make the bottom of the clutch a little stiffer by tracing the bottom of the clutch on some cardboard, wrapping some leftover fabric scraps around the cardboard and then sliding it into the bottom of the clutch.  I did this with all of the clutches but it's an extra/optional step so I did not photograph it.

2. Add a pin or flower or leave them plain.  I ended up making hair pieces for my bridesmaids which also had pins on them so they could double as brooches. I added them to the clutches when I gave them to the girls, but they took the flowers off on the day of to wear them in their hair.

Enjoy!!


Stay tuned for another tutorial later in the week!!  :)