This is my second submission for the
Dollar Store Crafts Wedding Crafts Contest!!
I'm in a weird waiting period between the time that I've submitted my dissertation to my committee and when I actually will hold my defense (which is actually tomorrow. This post got pushed back a bit. Wish me luck!!) Since I've done everything else I can think of for my dissertation (bibliography, appendices, discographies, miscellaneous paperwork, etc.) I've been using the rest of my time reading bad (read: AWESOME) books and crafting up a storm for a variety of different projects.
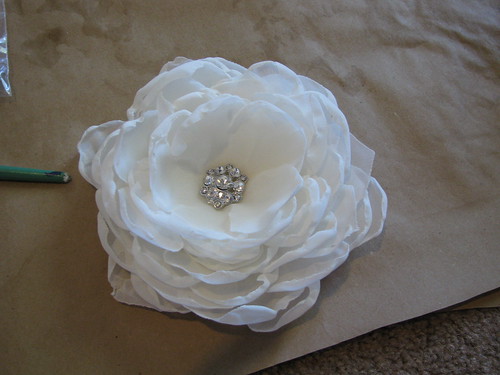
E and I attending and or are in a few weddings this summer so these were the first few projects I tackled. Recently I made some banners (using freezer paper) for my cousin's wedding and a hair piece that my sister-in-law will wear on her wedding day. See
my Etsy Shop Lavender Paper Hearts for hair pieces! I'll have a similar hair piece coming very soon!!
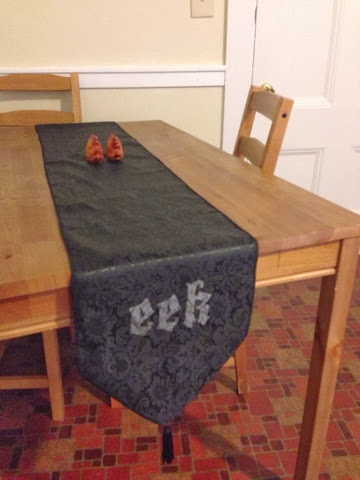
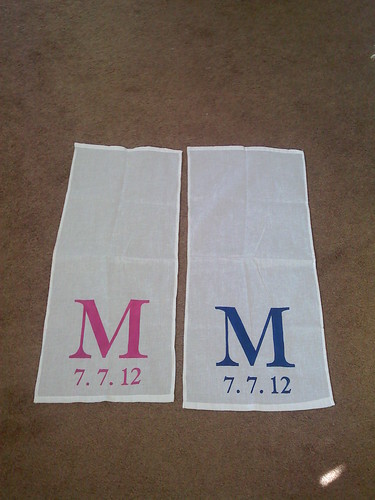
This was my first freezer paper project which I made a few months back for my SIL's bridal shower. They were used as mini-table runners for her shower and looked sweet under her cake. My SIL is also going to use them to hang on the backs of their chairs on their wedding day!! They could even be made into little door hangs, or if you added a small dowel and grabbed a cute Sheppard's hook from the Dollar Tree you've got an instant welcome yard sign for any event!!
I also used freezer paper on the wrapping paper for my cousin's wedding present. I had to press it VERY LIGHTLY so that it didn't tear off the paper when I removed the stencil, but I think it looks pretty cute (if I do say so myself!) You can find the paper bow
tutorial here. I'm kind of in love with it!!
Seriously, if you haven't tried freezer paper stencils you totally should. These stencils are actually pretty easy to do if you have a little time and patience. You can use them on all kinds of things too! We even had a little baby onesie decorating party for a baby shower this last January!!
Freezer Paper Stencil Tutorial - For Banners or Monograms
For this project I used the following supplies:
- Freezer Paper -I found mine at my local big box store for $7. I have enough to make stencils for the rest of my life.
- Flour Sack Towels from the Dollar Tree - If you don't want to sew be sure to check out the towels. I found that sometimes they have all 4 sides hemmed, sometimes just 3, sometimes just two. It saves a little time if you can find some that are hemmed on all four sides, but it's a quick zip through a sewing machine if they're not finished.
- Paper clips or binder clips - on hand
- Acrylic Paint(s) & Brush(s) or Sponges (I used sponges from the Dollar Tree) - on hand
- Paper, computer, printer - Basically you need these to get your stencil - if you draw it by hand even easier!
- X-acto knife - on hand
- Iron - on hand
- Cardboard - on hand - I don't know about you, but I LOVE to keep the cardboard that comes with dresses and shirts that I buy online. I may have a supply hoarding problem.
- Sewing machine (optional)- If you find a flour sack with hemmed sides you're golden OR if you like the rustic chic look be bold and don't bother to hem!!
Step 1: Basically what you want to do first is figure out what awesomeness you want to create into a stencil. I used a free online
downloadable monogram from Wedding Chicks (who have
amazing free downloads!) Because I knew my cousin wasn't into anchors for her wedding day I used photoshop to modify the design and I added two sea stars which were more her speed. (Yay for beach weddings!!) Since the flour sack towels are 3ft by 3ft I blew up my image in Publisher so I could print it poster size. I then taped the sheets together. (Just to give you an idea - I had 16 sheets total for the larger monogram in this tutorial.)
TA-DAAAA - one ginormous stencil!! You can see in the top right hand corner that I am apparently not very good at matching up lines. I had to fudge part of the swirl by drawing it in my hand in order to make them meet... it seemed easier than taking the whole thing apart and retaping.
Step 2: Now, because the stencil was so big, I had to tape together two strips of freezer paper. I don't have a photo, but I just laid the two sheets on top of the stencil to see how big they needed to be and then got out my tape and stuck the sheets together. Note: The shiny side is the part that sticks to the fabric so you want
to draw on the dull side. When you open up the package of freezer paper
this will be very obvious. Next you'll need your pencil or sharpie and you just start tracing away so that you copy your design onto your freezer paper. *Helpful hint: I also paper clipped the stencil and the freezer paper together since it was such a large job and I didn't want it to shift! I would say it took me about 15 minutes of laying on my kitchen floor to trace this onto the freezer paper.
Step 3: Next I got out a thick piece of cardboard and my x-acto knife and I started to carefully cut out the stencil. **REMEMBER TO SAVE THE LITTLE FILLER BITS - I don't have a photo of this step, but you can see in the photo below how I had to fill in the bubble part of the letter B. These are strips/shapes that you cut out but you need to remember to save them because they fill in the letter - without them my B would look like a weird D. I had a few more of these filler bits from some of the swirls too so I laid them out in order as I cut them out so I would remember where they went.

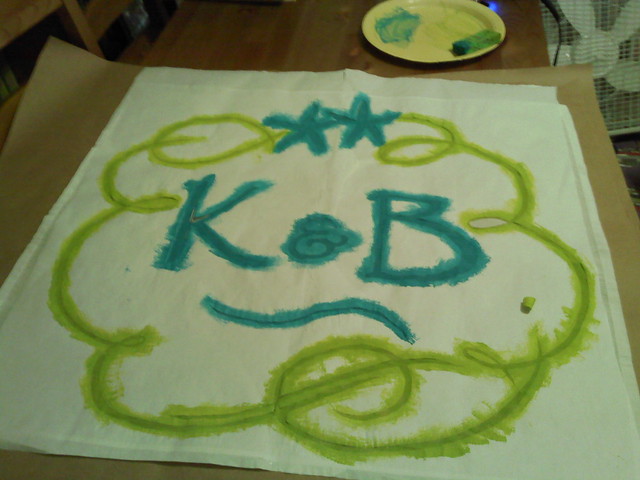
Step 4: Once you've cut out your entire stencil you want to iron your flour sack to make sure it has no creases. This will REALLY help you out when you try to iron on the stencil - I promise!! (I tried to cheat this on my second flour sack and it was terrible and required a lot of fixing. Learn from me - don't be lazy!) Then carefully lay out your gimongo stencil on top of the flour sack and fiddle with it for a bit until it lays down exactly how you want it. Leave out the filler bits for now. After setting your iron to medium high heat with no steam start in one corner and carefully begin to iron on the stencil. Take your time because you want to make sure it's iron down correctly. If you make a mistake you can carefully pull up the paper (CAREFULLY) and re-iron it into place. Once you've ironed the whole stencil go back and place in the little filler pieces one by one and press them with the iron onto the flour sack. Your finished work should look sort of like the image above.
Step 5: Now that you've got your stencil in place it's time to paint. Put a piece of cardboard behind your fabric/stencil so that it won't leak onto whatever surface you're painting on. For good measure I clipped my fabric to the cardboard so that it wouldn't wiggle and smudge paint on the back side.
Using a brush or a sponge (I used a sponge I cut in half) carefully begin to blot on your paint. You don't want to add too much at first because the fabric will soak it up.
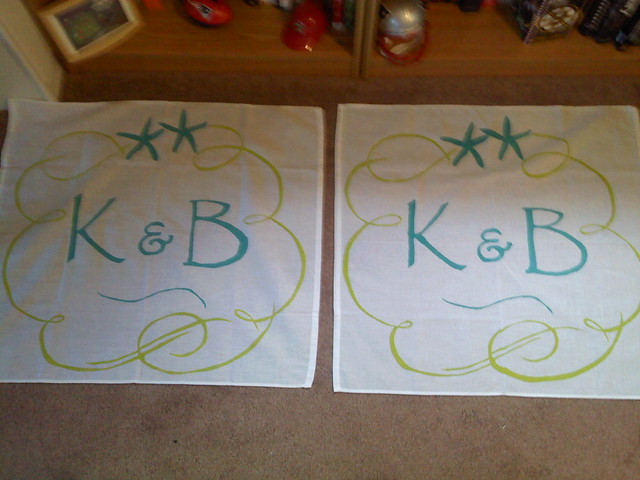
Step 6: Once you've applied all of your paint let the whole thing dry for a while. I let mine dry for about 30 minutes before I attempted to peel the stencil off. I wanted to reuse the stencil for a second flour sack to save me some time so I peeled it away really carefully.
You can reuse the stencils about 2-3 times before they start to not really work any more. To reapply the stencil I used a sheet of packing paper between the stencil (which now had paint on it) and my iron so I wouldn't hurt my iron - it worked perfectly!
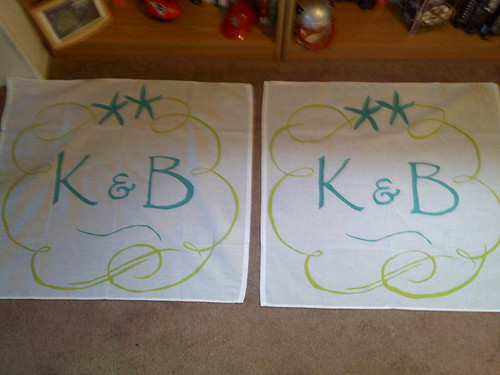
If it's a smaller less detailed stencil you can just cut a new one. For the little monogrammed banners I made for my sister-in-law I just cut a new stencil. You also might notice that those are smaller - I only used one flour sack that I cut in half and then I hemmed up the raw edges with my sewing machine.
These banners are going to be used as decoration for my cousin's wedding. They can be hung up on a bar, draped across a table - you could even get a dowel and some yarn and hang them from a sheppard's hook (the Dollar Tree usually has really cute ones in the summertime!!)
---
Lastly, be sure to check back frequently - I'm really excitedly working with a fantastic wedding blog,
Big Day for 10k, to host a giveaway for one of my hair pieces in the next few weeks!! I'll make a post as soon as it's all nailed down!! :)
Please follow me on this blog or '
Like' my shop on Facebook for product updates in my shop and other fun posts from my blog!