

Tuesday, December 25, 2012
Wednesday, December 19, 2012
Happy Holidays!!
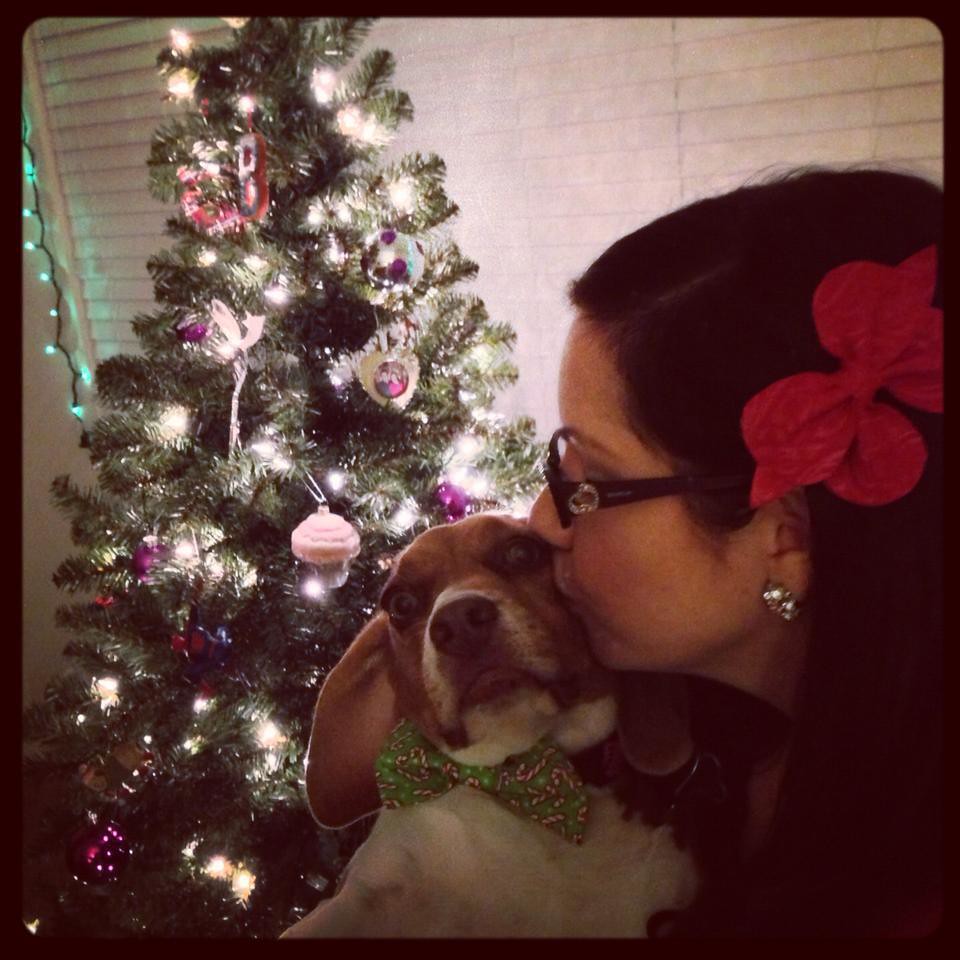
This will be my last post for the next few weeks, and we're going to go out with a cuteness overload. Some of the proud dog mommies send me the most ADORABLE photos of their pups modeling their holiday bowties.
Without further adieu, prepare to make all kinds of ridiculous noises of glee was you scroll...
First up we have our in-house model:


Without further adieu, prepare to make all kinds of ridiculous noises of glee was you scroll...
First up we have our in-house model:

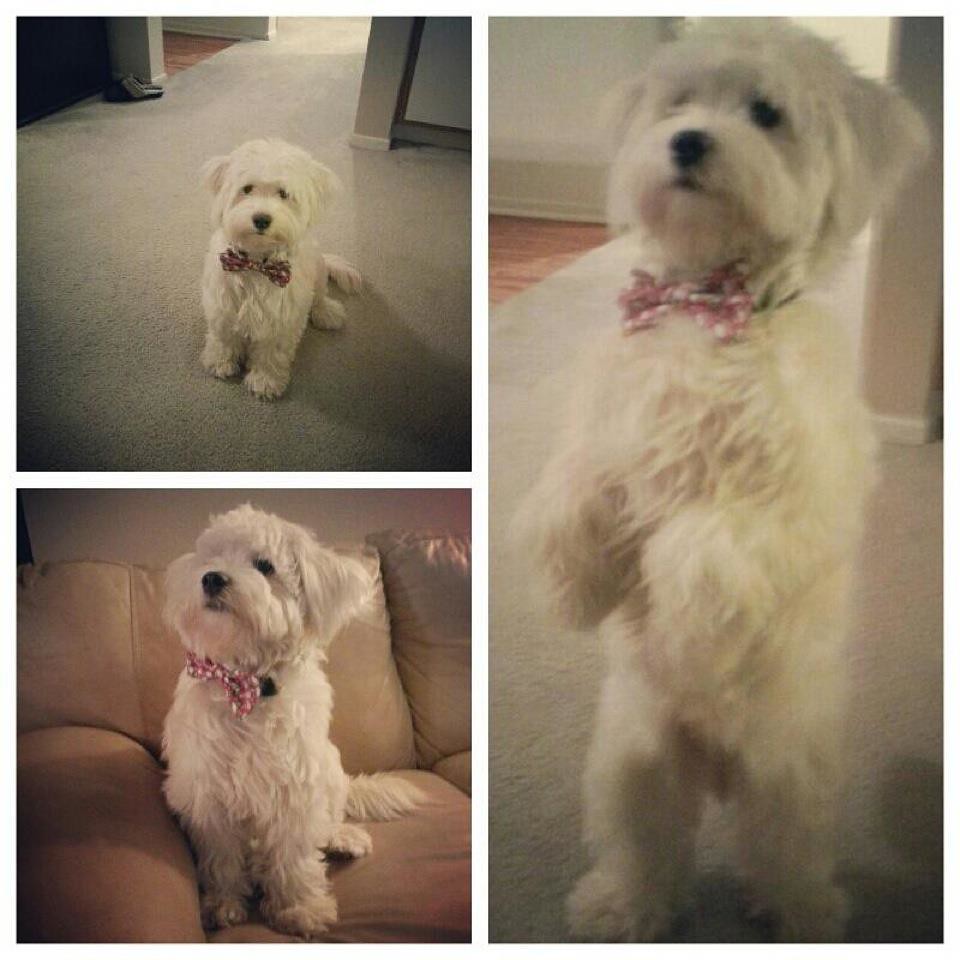
Next up we have Louie & Luce, two adorable ladies from Southern California:

Spiderman and his owner are each modeling items from my shop:
The red felt bow can be found here!!
Little Boo is beyond cute in this series of shots:
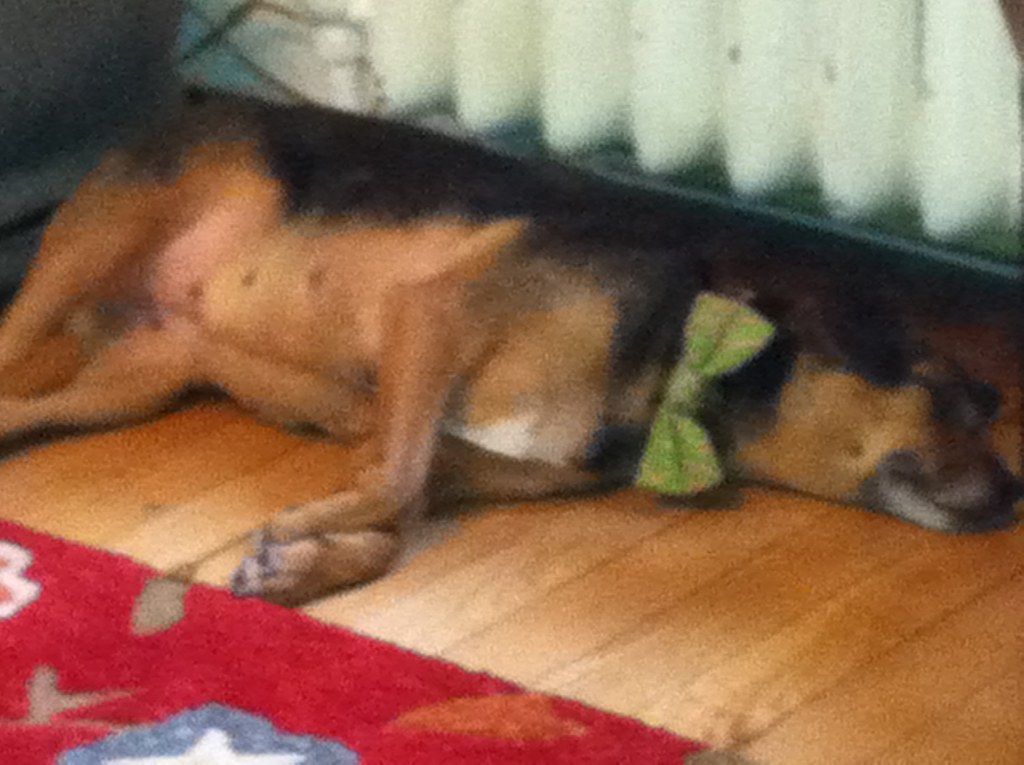
I love that Sadie prepares for the holiday rush with a good nap!!
Charlie is kickin' it in front of the Christmas tree and looking oh so adorable!!

I'll be posting more bowtie photos as they come in, because the cuteness must be shared!!
I hope you all have an incredible holiday season!!
Wednesday, December 12, 2012
Holiday Spirit:
Sorry if some of this is a repeat for some of you. I tried to move it to another date, but it somehow went live anyway. For those of you who saw it, I've added a few more items to the post!! Enjoy (again)!!
I thought I'd share a few more simple DIY/re-crafted Christmas projects that have been going on around here. We're usually not around our own house for the holidays so we don't tend to decorate all that much. While this year is no different, we have a few more things hung up for the season.
First, from last week, we've got the Santa belt pillows from my DIY tutorial last week snazzing up our couch:

We borrowed a fake Christmas tree, and suddenly needed a tree topper. I'd seen this really cute one at the Dollar Tree, but our tree is only 5-ish feet tall, so Mr. Reindeer was rather large at 12 1/4 inches tall, and he threw the symmetry of the tree off a bit (ya think?!). Also, I picked him up a bit late in the game (Thanksgiving weekend did a number on my local Dollar Tree), so the only reindeer left in the store were a bit decrepit. I found one that looked like it could be worked with and promptly rescued him.

After: Isn't he cute?!!

Next up, my sister-in-law had given me 4 placemats that had accidentally shrunk in the wash to craft with. I had them sitting around for a while until I figured out what I could make with them. I really liked the quilted pattern so I knew I could make SOMETHING fun out of them. Then one afternoon when I got home from work it hit me...
They started out looking like this:


I thought I'd share a few more simple DIY/re-crafted Christmas projects that have been going on around here. We're usually not around our own house for the holidays so we don't tend to decorate all that much. While this year is no different, we have a few more things hung up for the season.
First, from last week, we've got the Santa belt pillows from my DIY tutorial last week snazzing up our couch:

We borrowed a fake Christmas tree, and suddenly needed a tree topper. I'd seen this really cute one at the Dollar Tree, but our tree is only 5-ish feet tall, so Mr. Reindeer was rather large at 12 1/4 inches tall, and he threw the symmetry of the tree off a bit (ya think?!). Also, I picked him up a bit late in the game (Thanksgiving weekend did a number on my local Dollar Tree), so the only reindeer left in the store were a bit decrepit. I found one that looked like it could be worked with and promptly rescued him.
Before: He looks great here, mine was not this nice looking.... plus, SO TALL. My store also didn't have the Santa or Snowman.

After: Isn't he cute?!!
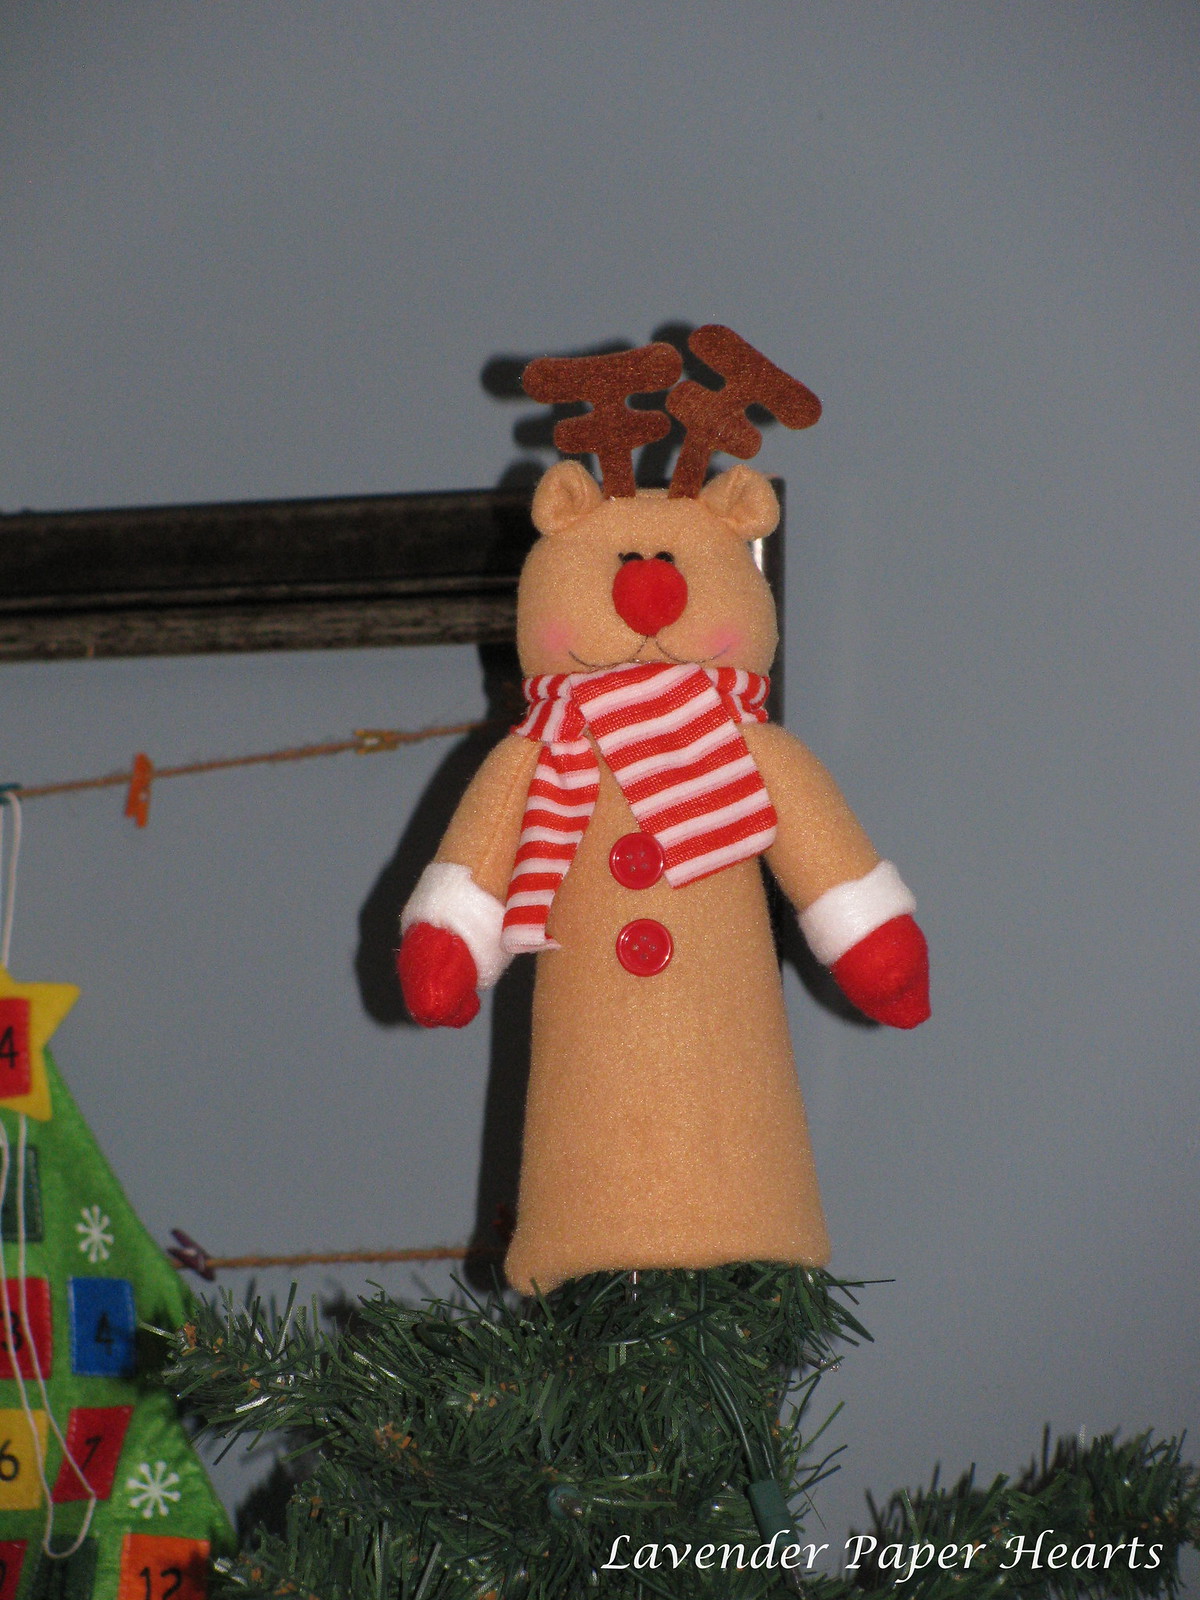
I got some scissors and my glue gun and got to work. I cut off about 4 - 5 inches from the bottom of Mr. Reindeer (it was just plastic, and then I tucked under the extra body felt) and then removed and re-positioned his buttons. But then I realized that his arms were now really disproportionately long to his new shorter body. He looked hilarious/ridiculous. The arms were tucked under the scarf so I very carefully cut them off and made them about an inch and a half shorter and easily glued them back into place. I also tacked down the scarf with glue to securely hide his, um, surgery. BOOM, he's a new man and he looks super cute on our little tree!!
They started out looking like this:

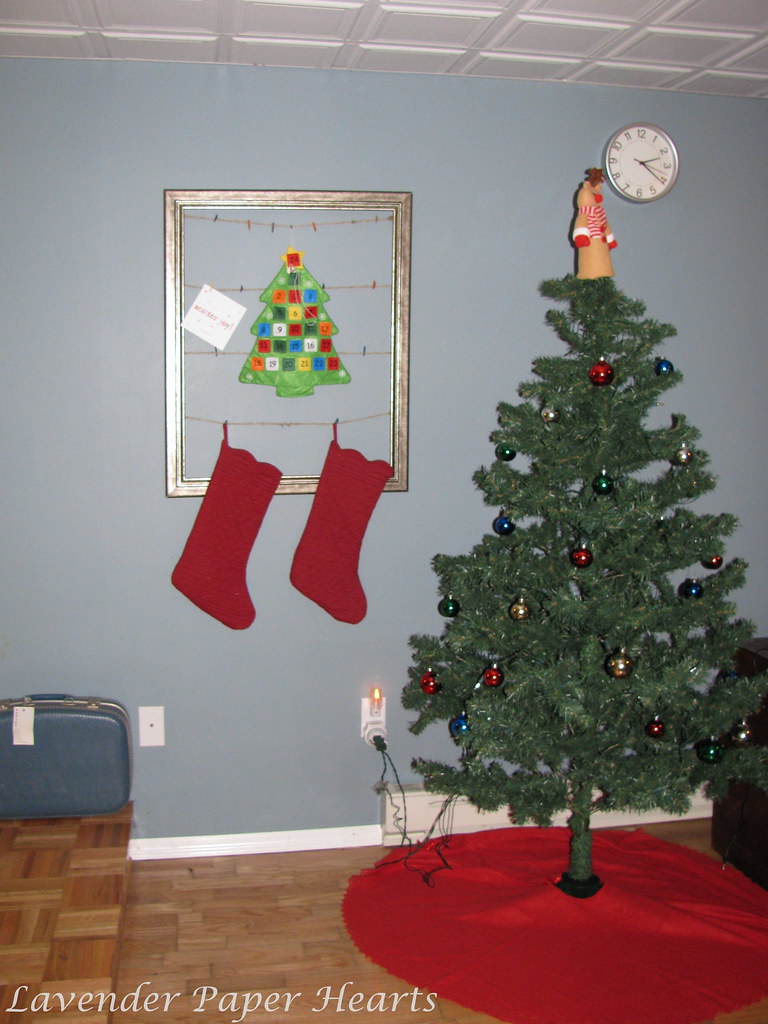
They ended up like this:

Now, if you look closely you can see that they're not identical. It doesn't really bother me, in fact, I think it gives them a little character... plus, you really have to look at them to notice. To make these I simply drew the stocking pattern free-handed on to the placemats, pinned them together and quickly sewed them. I cut off the extra fabric, grabbed a scrap and ran it through the machine to make two loops to hang them with, and boom - done. It honestly took less than 10 minutes. I especially love the quilted pattern and the little scalloped edge at the top.
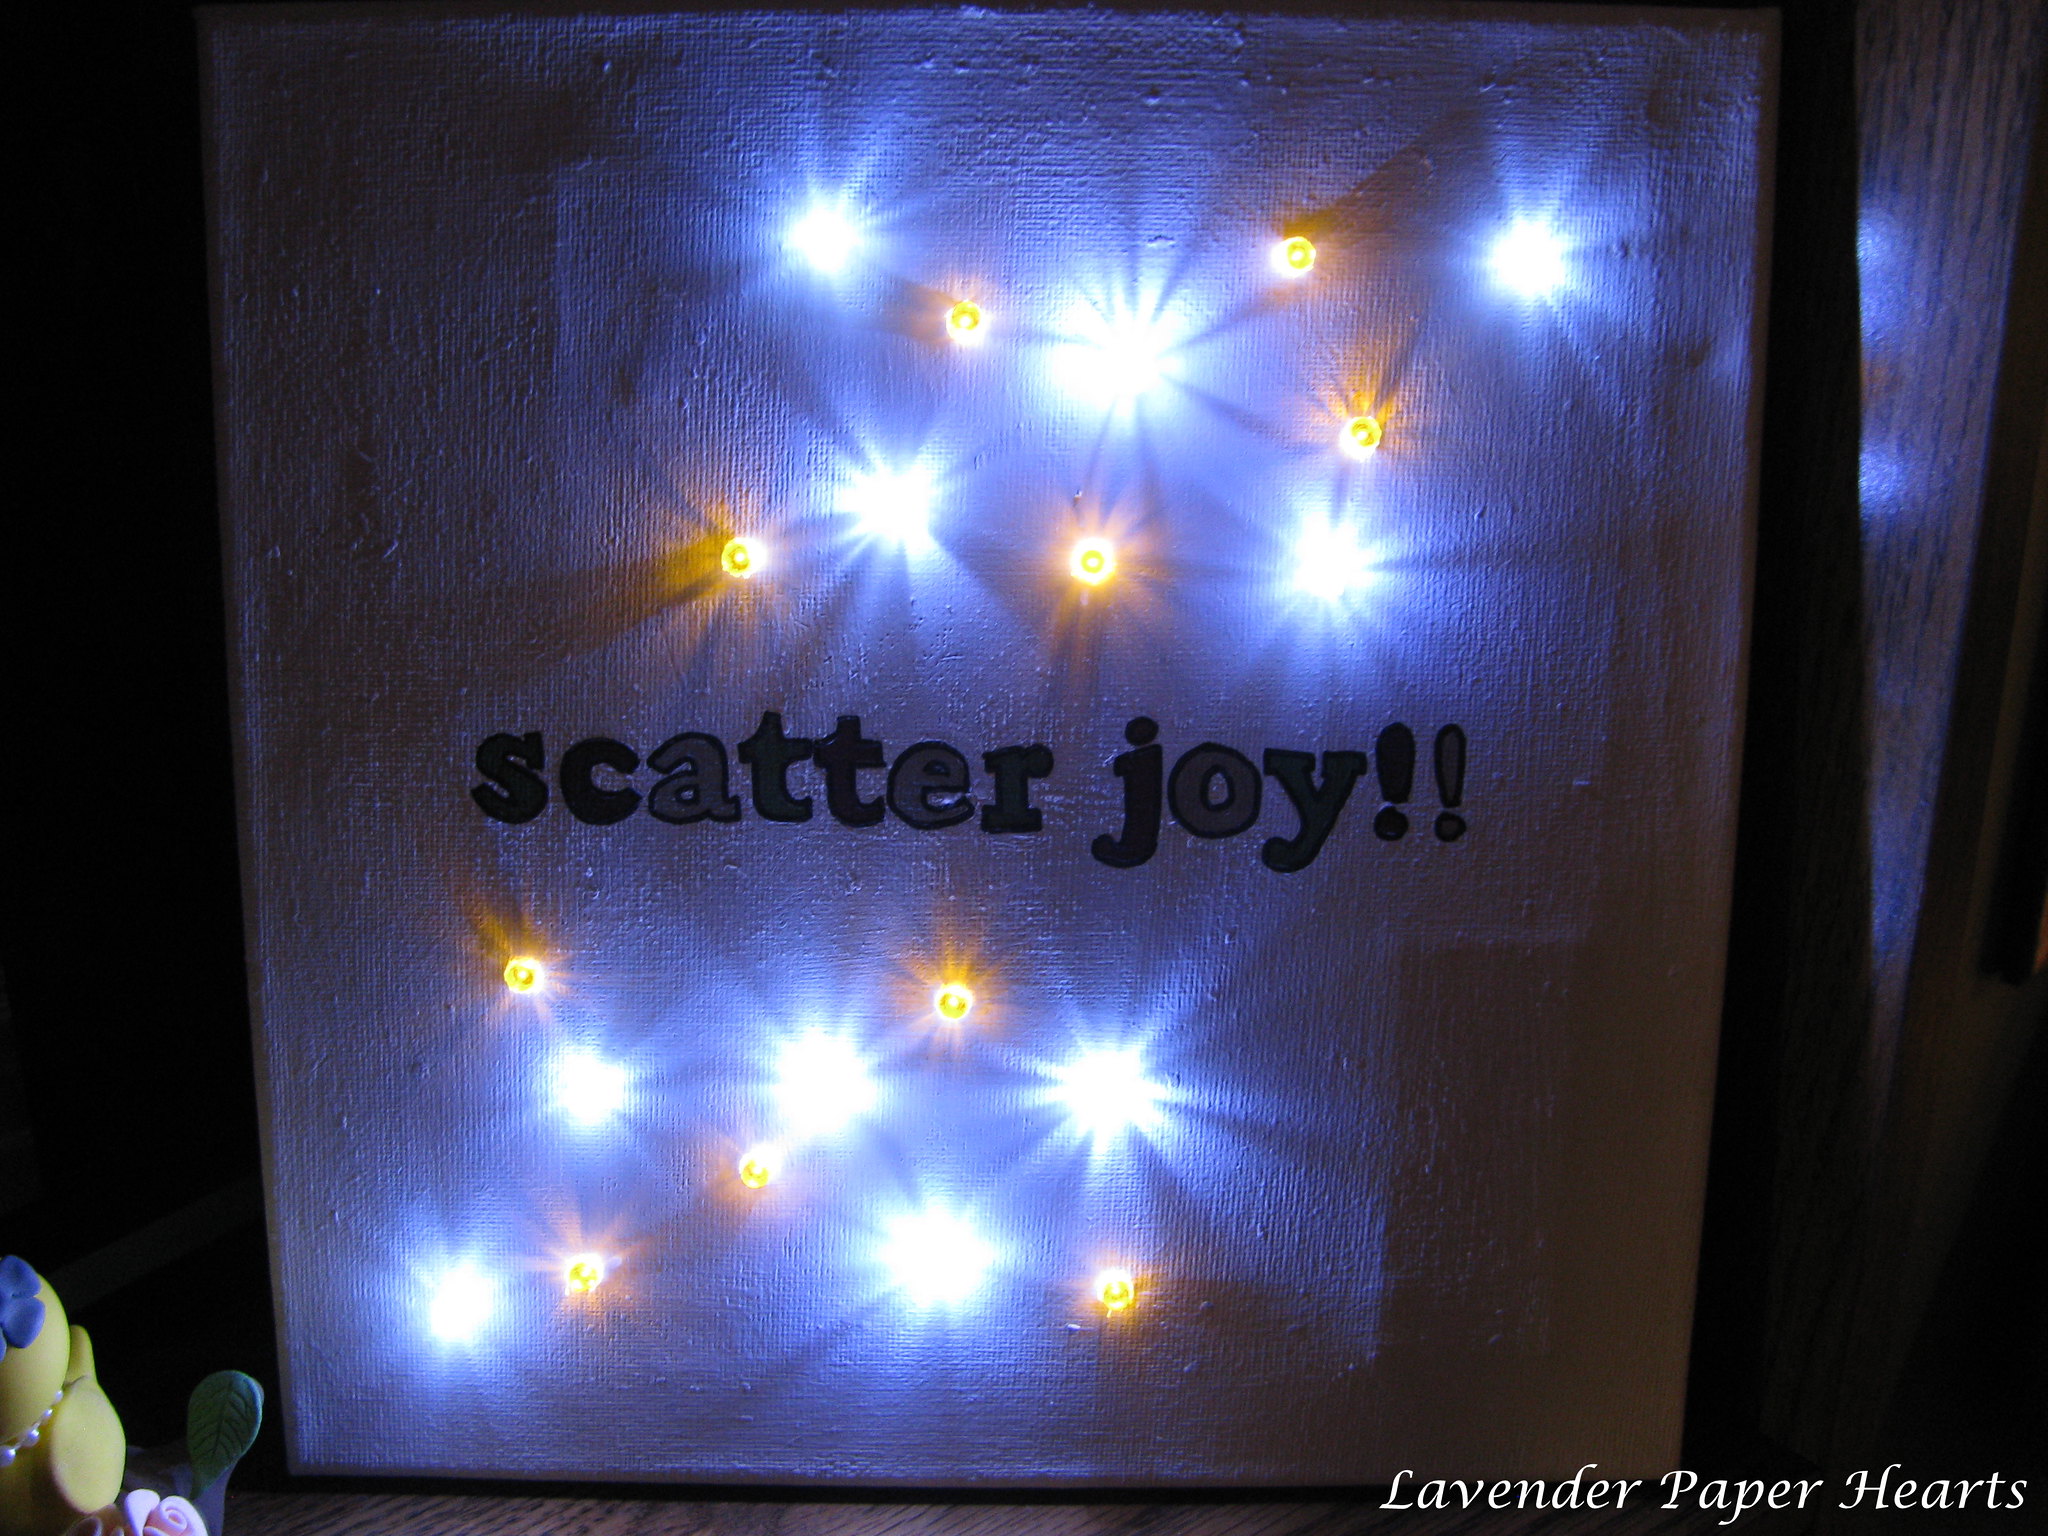
I was inspired to make the craft below after getting our first Christmas card of the season. Hubs and I thought the Emerson quote was so sweet and simple and, well, great, that I wanted to see if I could turn it into a bit of a bigger canvas somehow and with twinkle lights, because everyone loves twinkle lights.
Original:

I just finished this up after searching a few times at the Dollar Tree for lights. I bought a paint-by-number canvas at the Christmas Tree Shop and then lightly scrubbed off the paint by numbers part. I then covered the canvas in white paint, freezer paper stenciled on my phrase. The colors are red, green, and silver. Then I got my tool that looks like an ice pick, and after hot-melt gluing the battery box in place I used a pencil where I wanted my lights to go (they're strings of 10 lights), adjusted accordingly, and then gently poked through the canvas until the hole was just a little bit smaller than the light. I carefully pushed just the tip of the light of the led through the hole and then hot-glued them in place on the back. Boom. Done. :) I kind of super love it. These lights are my new favorite thing.
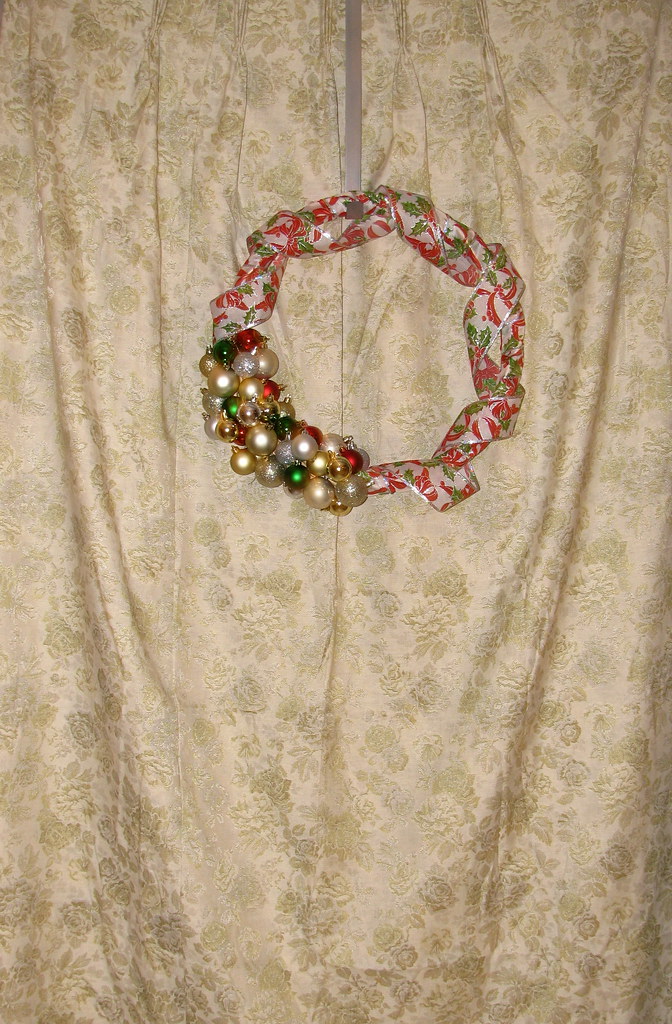
I made this wreath last Christmas. I found ALL of the supplies from the Dollar Tree (it ended up costing about $7 total). We hung it up on a door we have in our living space.
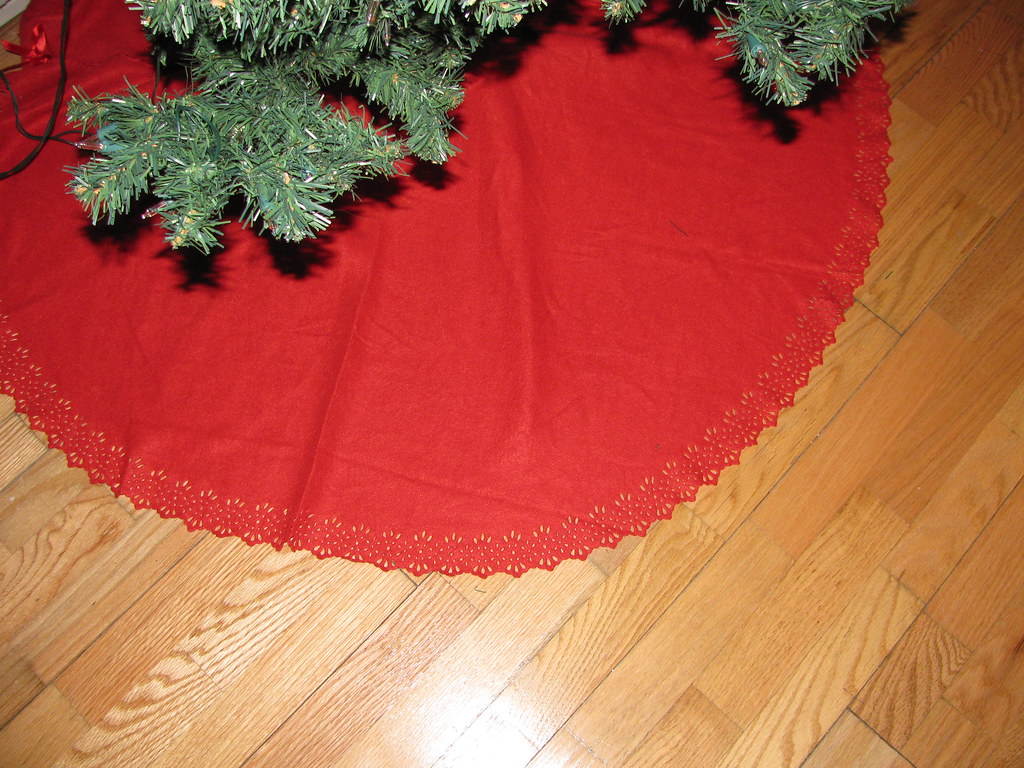
Lastly, and I did not make this, but I picked up a tree skirt from the Christmas Tree shop that would match the red in Mr. Reindeer's scarf. It was a good deal and I really loved the detailed edge!!
All together they look like this:
Or like this with the lights on (more impressive, in my opinion).

Wednesday, December 5, 2012
Custom Order: Holiday Pet Bowties
BOWTIES ARE NOW UP FOR SALE ON MY ETSY PAGE: HERE
I got a custom order for doggie bowties & bows last week from my sister. She's going to a Christmas party this weekend and wanted to give something special to the pets in her friend's lives. After gathering supplies I finished them up this morning, quickly snapped some photos, and mailed them off. I can't wait to see them in action on all of her friend's dogs!!
My sister sent me photos of the pups so that I could get a feel for their size and adjust the bows accordingly. The dogs ranged in size from big, medium, and small.

Because I knew she was giving them as gifts, I whipped up a simple but cute packaging for her too.

The doggie model checks out the goods...

These bowties and bows would look great on dogs OR cats!! Custom orders can be made by sending me a convo on Etsy or messaging me on my Facebook shop page.
BOWTIES ARE NOW UP FOR SALE ON MY ETSY PAGE: HERE
Wednesday, November 28, 2012
Holiday DIY Tutorial: Santa Pillows
Since Thanksgiving is officially over now, boo, it's time to be moving on to Christmas. I thought I'd share a super easy tutorial that you could whip up in no time. Like I said on Facebook last week, I had to run some errands after work and went a new way home. As luck would have it I stumbled across a Dollar Tree I'd never been to before. I was in no rush so I stopped in to check it out.


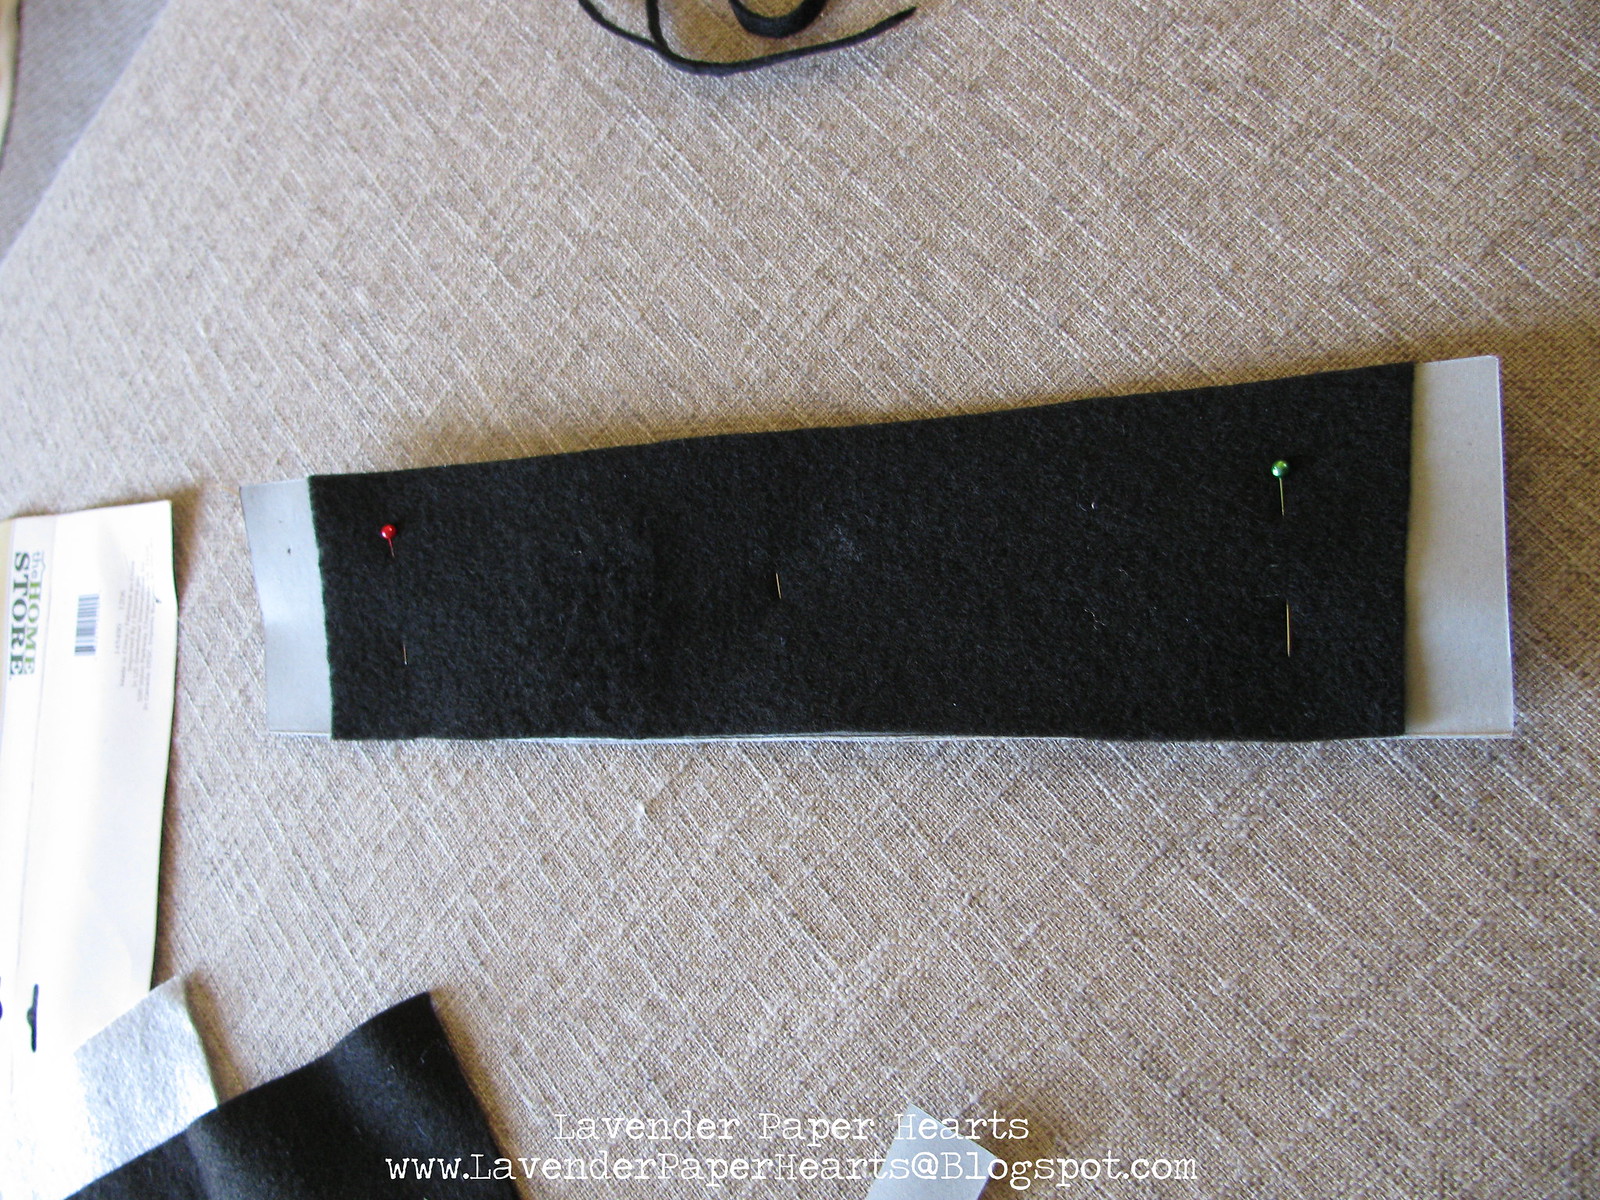
Now, pin the template to your black felt and you'll get the first 11 inches of your belt. The pillows I used were 16 inches wide, and I was using felt sheets which are something like 8 x 11 so I had to cut another piece and then glue the two pieces together to make one 16 inch belt. (If you're making two belts, repeat this step for belt #2.)


Super cute, right?!! Now go and make yourself some cute Santa pillows!! Next week I'll share some of the other holiday crafts I've been dabbling in to decorate our living space.
I knew that the Dollar Tree sold pillow cases because my husband is a bit rough on our couch pillows and I'd already bought a navy blue set to cover our current pillows. I'd been thinking of this craft for a while but couldn't find any pillow cases, let alone red ones, at my local store. I had other things on my mental DT must-search-for-list so I remembered to look for them at the VERY last minute. I mean, I'd already been standing in line and was about to be rung up when I grabbed my stuff and dashed off in the hopes of finding some. It was like a Christmas miracle!!


Supplies for 2 Santa Pillows:
- Red pillow cases - $2.00 *Save the cardboard topper
- Black felt (2 8x11 sheets) $0.29 each - I had it on hand
- Grey felt $0.29 each - I had it on hand
- Measuring tape - on hand
- Sharp scissors - on hand *This is important!!
- Crafting glue - on hand
- Sewing pins - on hand
- Fabric marking pen or pencil - on hand *Not pictured below... I forgot
- A scrap of cardboard big enough to fit into the pillow
Project total for me: $2

This tutorial (and its measurements) are geared towards these Dollar Tree pillows, but the tutorial is pretty straight forward and can easily be done with other pillows. Start by gathering your supplies. I had all the supplies on hand to make these with the exception of the red pillows. I like to make templates to make things easier on myself, especially when attempting to make two identical items. I also don't like to waste supplies so I looked around and decided that half of the cardboard topper that had been attached to the pillows would make a great width for the Santa belt. I cut the cardboard in half to make my belt template. Half of the cardboard measures 3 inches wide and about 16 inches long.

Now, pin the template to your black felt and you'll get the first 11 inches of your belt. The pillows I used were 16 inches wide, and I was using felt sheets which are something like 8 x 11 so I had to cut another piece and then glue the two pieces together to make one 16 inch belt. (If you're making two belts, repeat this step for belt #2.)
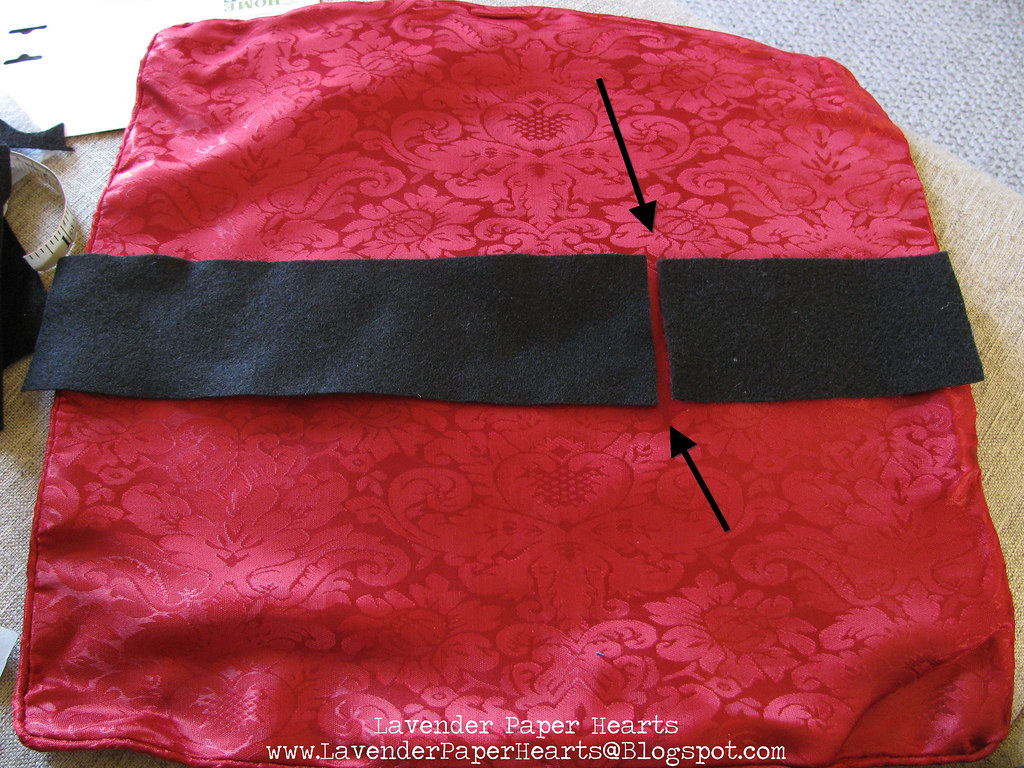
Here you might be say, but Kelly, then we'll see the seam and that just won't do, Santa's belt can't have a seam. What will the elves think?! I know, I know... so here's where you get sneaky! You're going to hide the seam under the felt "belt" part. If I've just blown your mind, take a minute to gather yourself and come back when you're ready.
Once you've gotten your belts cut out it's now onto the buckle. Grab that grey felt and the other half of the cardboard pillow packaging and continue. I eyeballed my buckle and it ended up being 4 3/4 inches by 3 1/2 inches tall. I then eye-balled again and cut out a piece of cardboard to help me trace the inside of the belt using the extra cardboard. Trim as necessary to get the size you want. As you can see below, I then used my fabric marker to trace out the middle and then cut it out with my scissors. Easy peasy.

Next is assembly. I forgot to take pictures of this part but it's also pretty straight forward. Using crafting glue, glue the thin edges of your black felt together... or, just glue them touching each other to your grey buckle felt piece. DO NOT OVERLAP THE BLACK FELT - it will create a bulky seam that you'll see under the buckle. Just do your best to glue the seam together, or glue them directly to the felt. Let it dry for about 15-20 minutes and then come back to it.

Hiding the seam under one of the buckle sides, make sure that you've lined it up so that you've got enough black felt on either side of the pillow to touch each side of the pillow, so 16 inches across. Look at the photo above with the red pillow and the belt if that's a bit unclear. Since a felt sheet is only 11 inches, you're going to need to sort of share the off-centered-ness and make sure that the felt buckle successfully hides the seam. Glue the buckle to the belt. Let this sit for 15 - 20 minutes to dry a bit. Once it's dry-ish, lay the belt on top of the pillow, mark the middle of the buckle (1 3/4 inches in) with your fabric marker and find the 8 inch mark on the pillow and line up the center of the buckle at the 8 inch mark. At this step, it's a good idea to cut off the extra black belt felt on either end. DON'T CUT OFF TOO MUCH - measure twice, cut once.
Okay, you're ready to glue the belt to the pillow... Here is where you'll need your cardboard scrap. You want it to be big enough so that it will fit inside the pillow and so you can glue the belt to the pillow and not have the two pillow sides accidentally glue themselves together. This would be no bueno. I used a USPS priority mail envelope that I had laying around and angled it inside the pillow. Next, you can either eyeball or measure to find the center of the pillow and glue your belt in place. Some people like their belts dead center, some people like them a little more towards the "top" part of the pillow. The choice is up to you. I decided on the center and glued away. I just ran the glue around the outer edge of my belt felt and used it sparingly (it will weep through the felt if you push too hard, but if this happens it should dry clear).
Give the pillows several hours to dry completely before attempting to stuff new pillows into the covers. Be gentle as you stuff the pillow, the felt belt isn't delicate, but it should be treated with a bit of care. Throw them on your couch and enjoy. Below are the pillows jazzing up our couch!!

Super cute, right?!! Now go and make yourself some cute Santa pillows!! Next week I'll share some of the other holiday crafts I've been dabbling in to decorate our living space.
Be sure to check out some of my other holiday crafts here.
What holiday decorations have you been whipping up??
Wednesday, November 21, 2012
Baby: Music Mobile!!
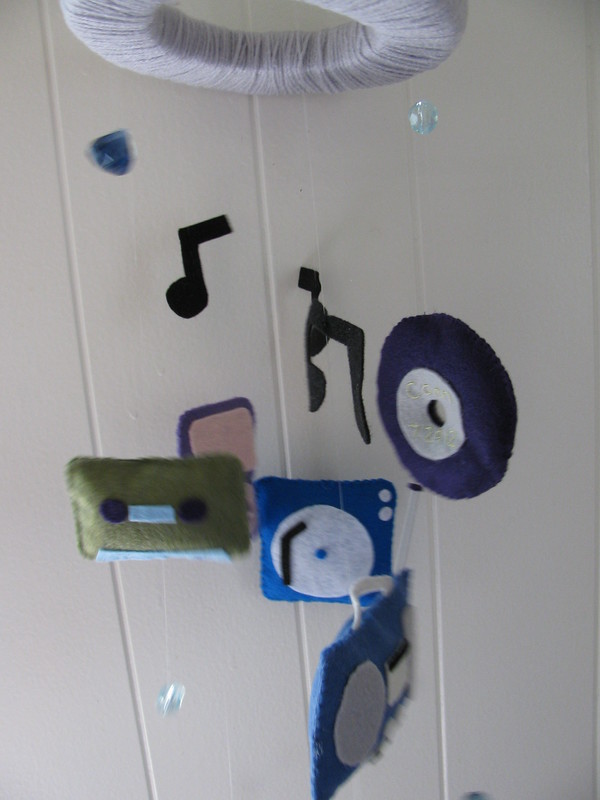
Hello there! I'm so excited to announce that I've officially added baby mobiles to my shop!! I was inspired to start making these for friends and family and I'm pumped to now make them for others as well. I've added a Baby Goods & Supplies section to my shop and am featuring a few styles I've already made.
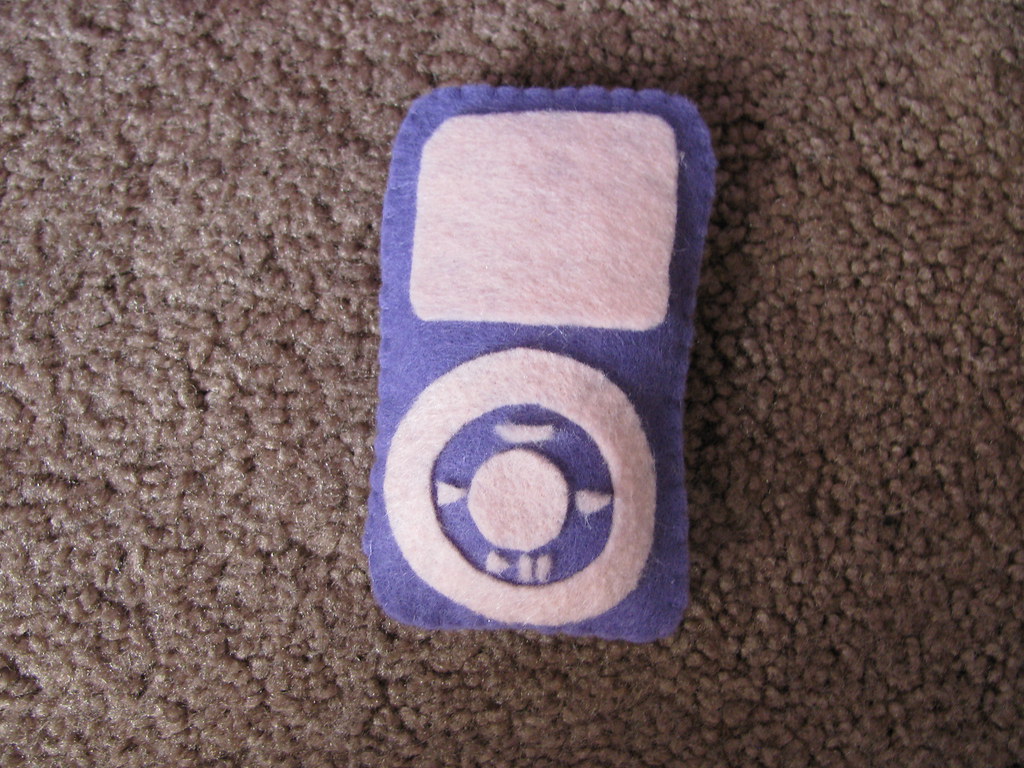
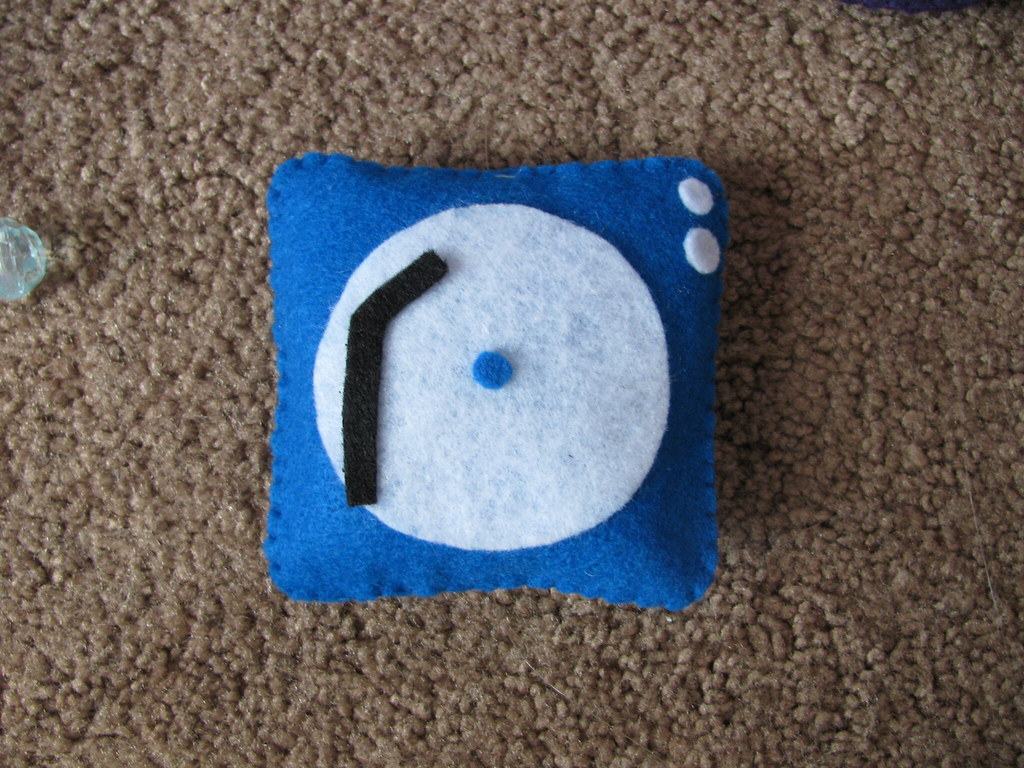
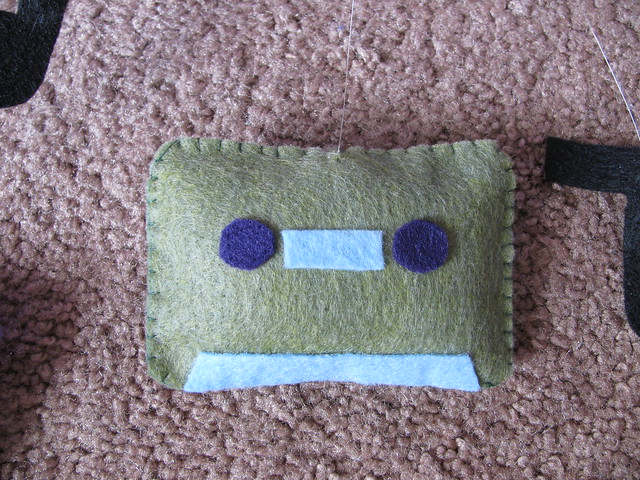
Baby C was born in late July and earlier in the summer mama gave me some basic ideas about what was she was thinking up for the baby room: an awesome music and travel theme (side note: totally love this!). She then talked loosely about some of the colors she was going to incorporate into a mural she was paining on the wall for this special little nugget. Yeah, Baby C's mom is an uber-talented artist - no pressure!! I took this info as inspiration, Googled around to get a bit more, and below is the music themed mobile I came up with. The mobile was completely made from scratch using felt for the base of the different music instruments.


I've already gotten a sweet photo of Baby C enjoying/memorized by the mobile!! Happy baby win!! Baby C is uber-precious and I'm so glad that mom and baby (and dad too) are doing really well!!
Check back next week for a DIY tutorial on Santa Pillows. You can check out a preview on my Facebook site: www.facebook.com/lavenderpaperhearts
Baby C was born in late July and earlier in the summer mama gave me some basic ideas about what was she was thinking up for the baby room: an awesome music and travel theme (side note: totally love this!). She then talked loosely about some of the colors she was going to incorporate into a mural she was paining on the wall for this special little nugget. Yeah, Baby C's mom is an uber-talented artist - no pressure!! I took this info as inspiration, Googled around to get a bit more, and below is the music themed mobile I came up with. The mobile was completely made from scratch using felt for the base of the different music instruments.
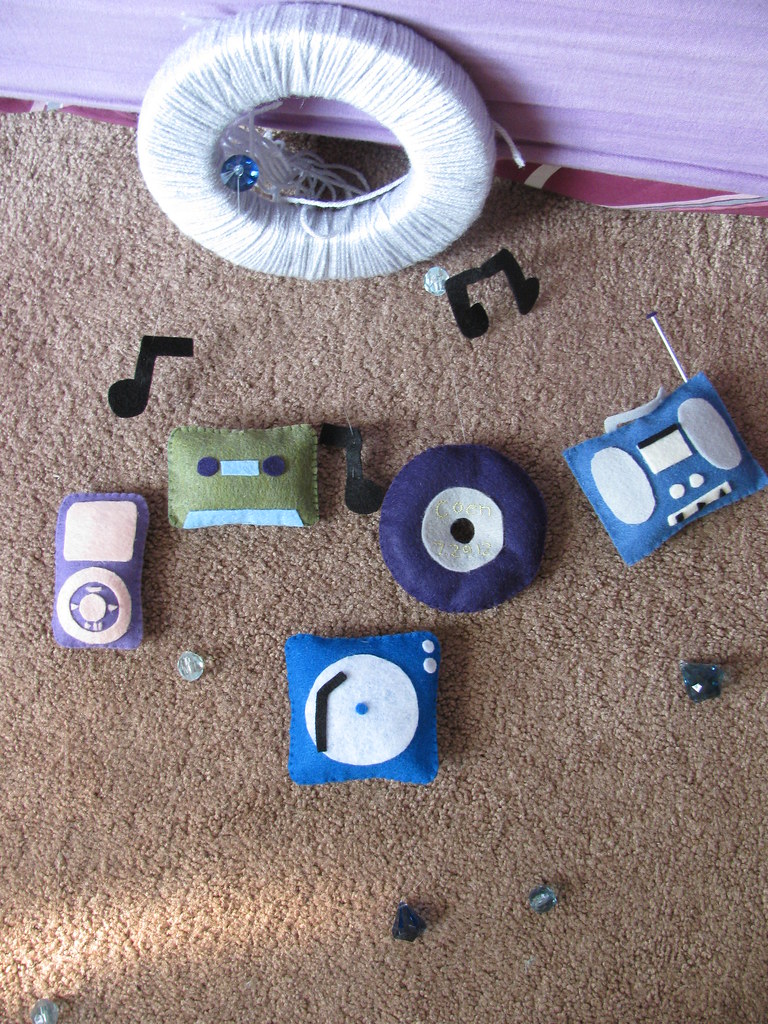
Here are some closeups:


Check back next week for a DIY tutorial on Santa Pillows. You can check out a preview on my Facebook site: www.facebook.com/lavenderpaperhearts
HAPPY TURKEY DAY TOMORROW!!
Wednesday, October 31, 2012
Happy Halloween x2
Just because I can... I had grand plans of making the puppy a Halloween costume (I was thinking Captain Underpants), but then I got too sick this weekend to do much of anything. We've joked about how puppy's harness looks like he's a member of the SWAT team, so now, for today at least, he's officially a member.

Happy Halloween!!

HAPPY HALLOWEEN!!
Happy Halloween!! I hope that my East Coast friends have safely survived Hurricane Sandy. We've had a few days off from school and it's been great because I've been SUPER sick and using the time to sleep and try to feel better. My sister has been stuck in NYC for a few days longer than she anticipated, but hopefully she'll get home sometime soon.
With Halloween today, it means that stores will officially start inundating us with Christmas/Holiday stuff tomorrow... It also means the start of shopping for the Christmas season (if you haven't started already, which, gasp, I have). I've started started making some lists of things I'm making for friends and family. I've even completed a few items on my list (whoa!). Fact: It's my first Christmas out of grad school in what feels like a VERY LONG time, so I actually have time to think about the holidays in advance, instead of just barely coming up for air some time around December 18th/19th just in time to travel and order things last minute. Phew!
With planning ahead in mind, and hopefully with running the risk of being one of those inundating types, I'm sharing some of my felt hair bows early this year so that people can order them early and in time for the holidays.
I was inspired to make these last fall when I saw something similar in a shop. I can make them in a ton of different colors, but I've highlighted the red embossed material here for holiday season. I wore one on Christmas day last year.
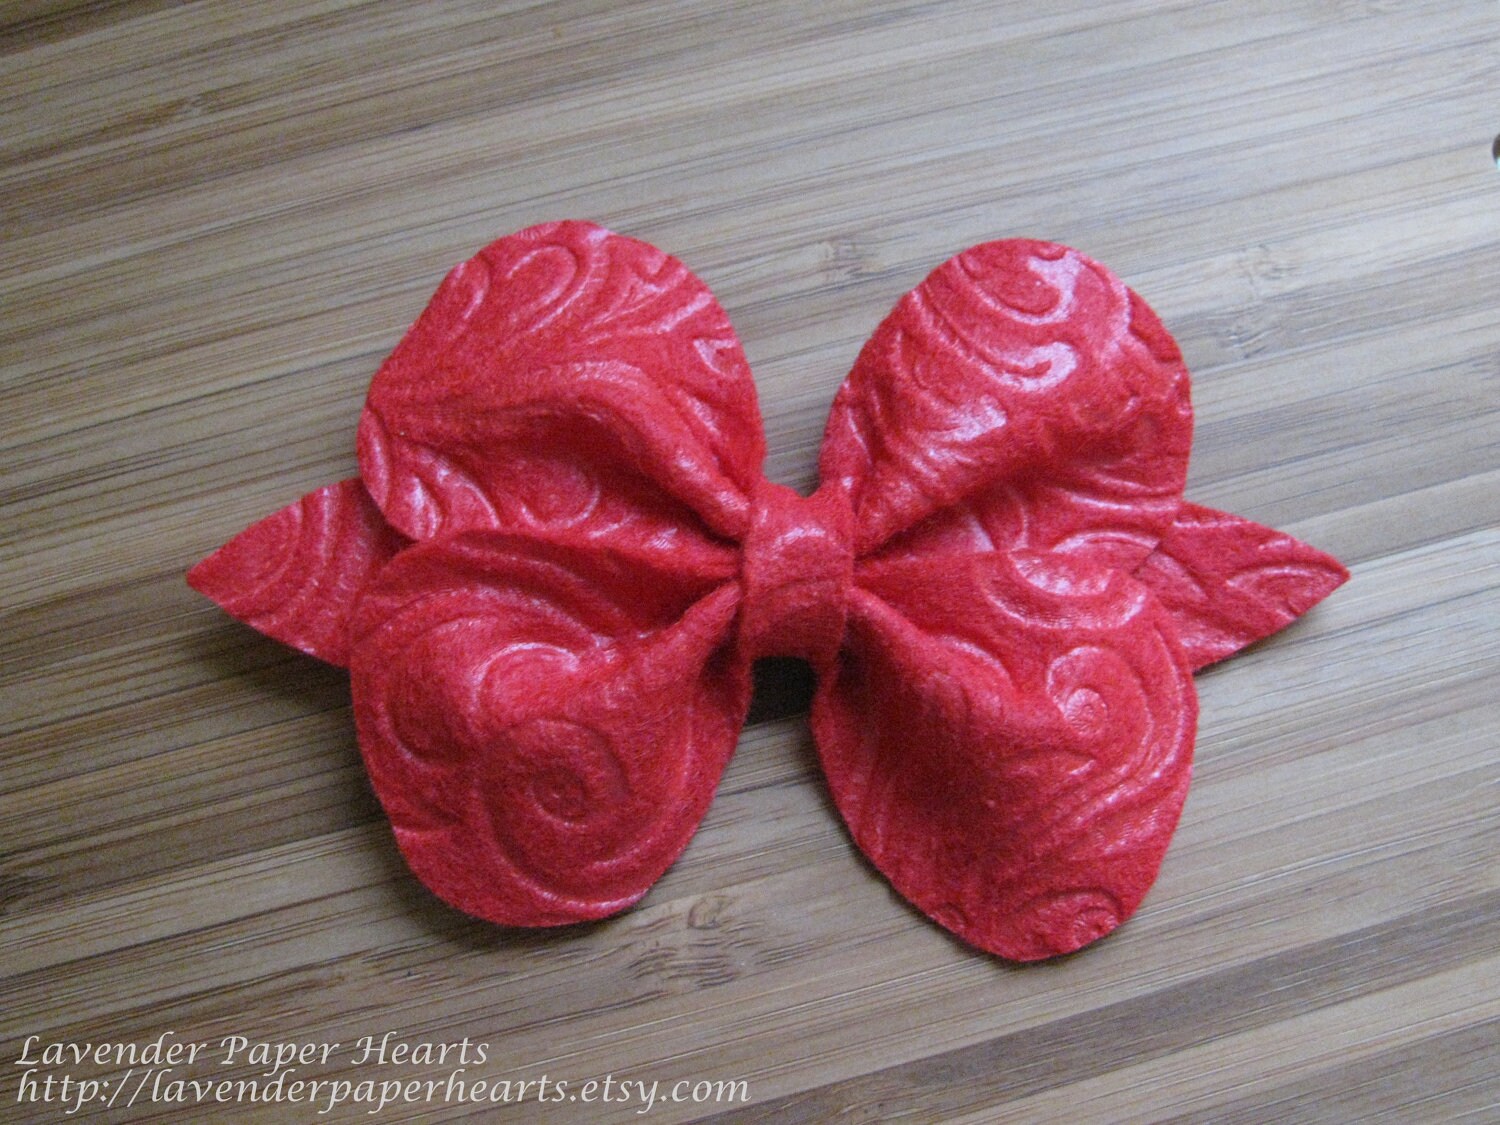
I make them in shapes that rage from adult size to little lady and mini size. The red embossed bow above is adult size which you can compare the size of the photo below.
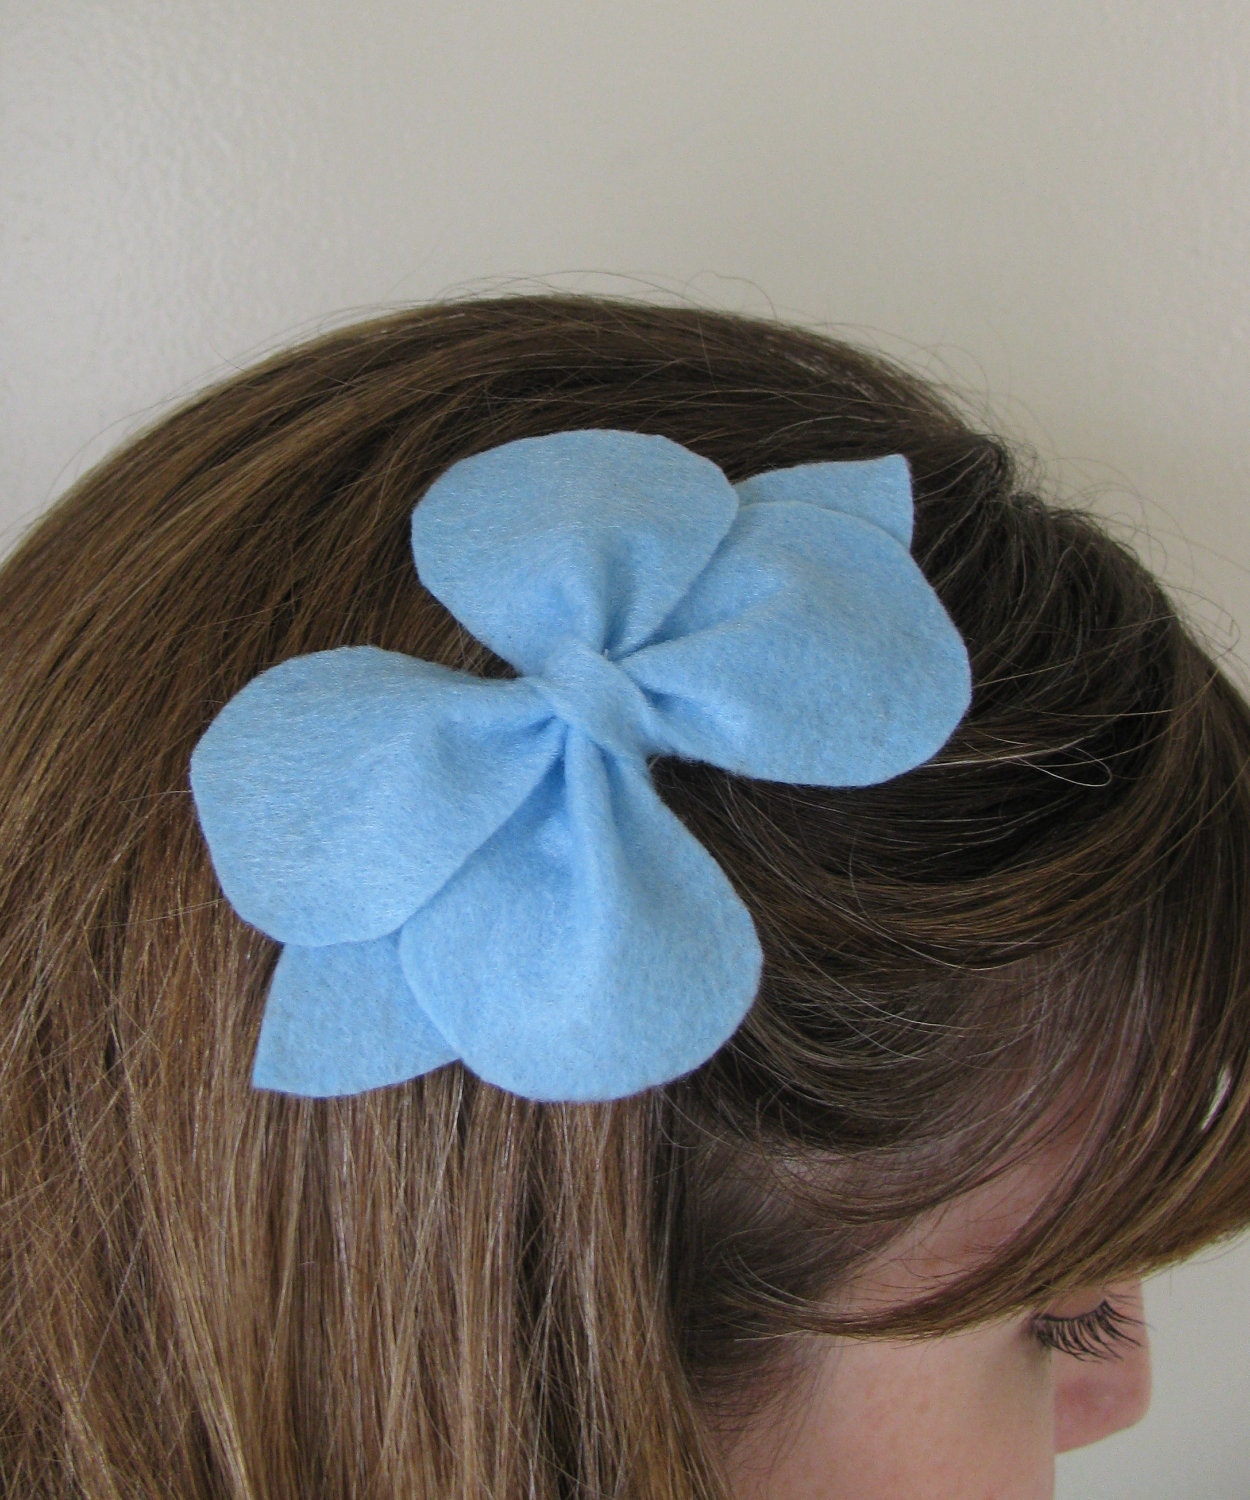
The bow measures 4 3/4 inches wide by 2 3/4 inches tall and has both a pin and alligator clip for versatility.
Stay tuned next week for another holiday inspired hair piece. I'm also planning to post some of my baby mobiles for sale sometime soon.
With Halloween today, it means that stores will officially start inundating us with Christmas/Holiday stuff tomorrow... It also means the start of shopping for the Christmas season (if you haven't started already, which, gasp, I have). I've started started making some lists of things I'm making for friends and family. I've even completed a few items on my list (whoa!). Fact: It's my first Christmas out of grad school in what feels like a VERY LONG time, so I actually have time to think about the holidays in advance, instead of just barely coming up for air some time around December 18th/19th just in time to travel and order things last minute. Phew!
With planning ahead in mind, and hopefully with running the risk of being one of those inundating types, I'm sharing some of my felt hair bows early this year so that people can order them early and in time for the holidays.
I was inspired to make these last fall when I saw something similar in a shop. I can make them in a ton of different colors, but I've highlighted the red embossed material here for holiday season. I wore one on Christmas day last year.
The bow measures 4 3/4 inches wide by 2 3/4 inches tall and has both a pin and alligator clip for versatility.
Stay tuned next week for another holiday inspired hair piece. I'm also planning to post some of my baby mobiles for sale sometime soon.
Friday, October 19, 2012
DIY Coat Makeover #2
Here is my second DIY coat makeover installment. On Wednesday I showed you how to jazz up a coat with some fancy-nerd-love felt elbow patches. Today's project is even easier than the patches (is that even possible, yes!) and it too makes quite the statement. If you missed my first coat snaz-up project from earlier in the week click HERE to check it out.
Coat Snaz Up/Makeover #2: BUTTONS
So a few winters ago I got a long black wool pea coat from Old Navy that I got on super sale. I picked black, because while it might be a bit boring, I knew it needed to last me a while. Plus, let's face it, black is classic. After wearing it for 8 months or so, basically right before the winter coat wearing season ended in Ohio, I decided it needed to be spiced up a bit and I searched on Etsy for new buttons for my coat. Etsy has SO MANY amazing options and deals on buttons. You really can find almost anything your heart desires so use your imagination and spice things up. Right now there are 400,000 button options available. See? I wasn't lying. SO MANY OPTIONS.
Some things to keep in mind!
1. Measure the buttons on your coat now to get an idea of the replacement button size you'll need to look for. You can usually wiggle a bit on getting buttons a wee bit smaller, but I don't recommend getting buttons that are much bigger than what your coat currently has (they might not fit in the button holes!)
2. When you remove the buttons attached to your coat put a pin in place where the button was so that when you attach your new buttons you don't have issues with the button holes and buttons not matching.
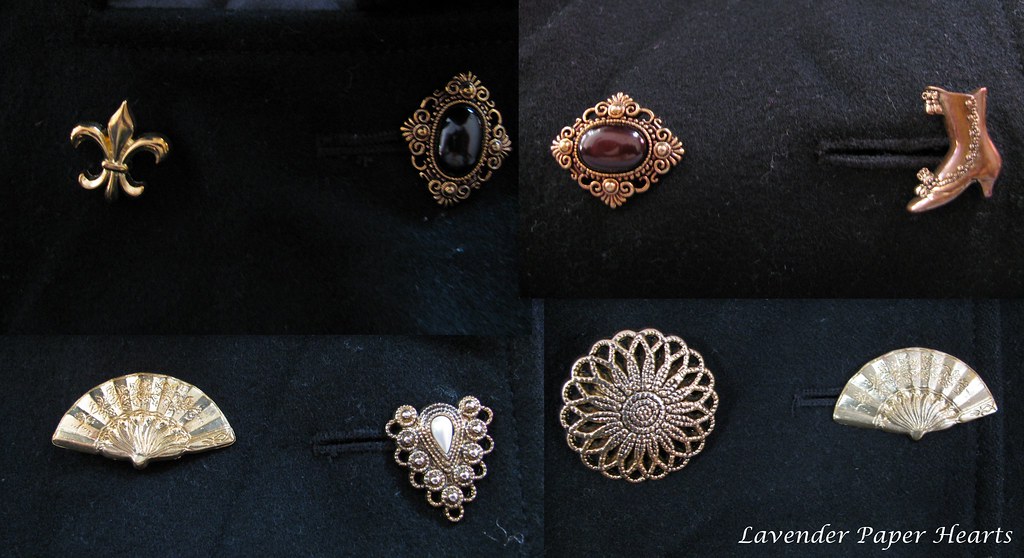
Here are a few quick random sets of buttons that caught my eye in a search I just did:


Coat Snaz Up/Makeover #2: BUTTONS
So a few winters ago I got a long black wool pea coat from Old Navy that I got on super sale. I picked black, because while it might be a bit boring, I knew it needed to last me a while. Plus, let's face it, black is classic. After wearing it for 8 months or so, basically right before the winter coat wearing season ended in Ohio, I decided it needed to be spiced up a bit and I searched on Etsy for new buttons for my coat. Etsy has SO MANY amazing options and deals on buttons. You really can find almost anything your heart desires so use your imagination and spice things up. Right now there are 400,000 button options available. See? I wasn't lying. SO MANY OPTIONS.
Some things to keep in mind!
1. Measure the buttons on your coat now to get an idea of the replacement button size you'll need to look for. You can usually wiggle a bit on getting buttons a wee bit smaller, but I don't recommend getting buttons that are much bigger than what your coat currently has (they might not fit in the button holes!)
2. When you remove the buttons attached to your coat put a pin in place where the button was so that when you attach your new buttons you don't have issues with the button holes and buttons not matching.
Here are a few quick random sets of buttons that caught my eye in a search I just did:


3.  4.
4. 
 4.
4. 
*All images are from Etsy sellers see numbers below for links!!
2. Bohemian Findings (You can see from the penny in the photo that these would obviously be too small.)
3. Add Vintage
4. World Garden
You can find vintage buttons, mix and matching lots, plastic, wooden, hand painted, mass produced buttons. All kinds of wonderful buttons!!
Here's what I ended up doing with my coat. It had 8 button holes to play with so I really mixed it up quite a bit.
Here's the coat (which looks kind of totally shapeless here, but is actually quite flattering on):
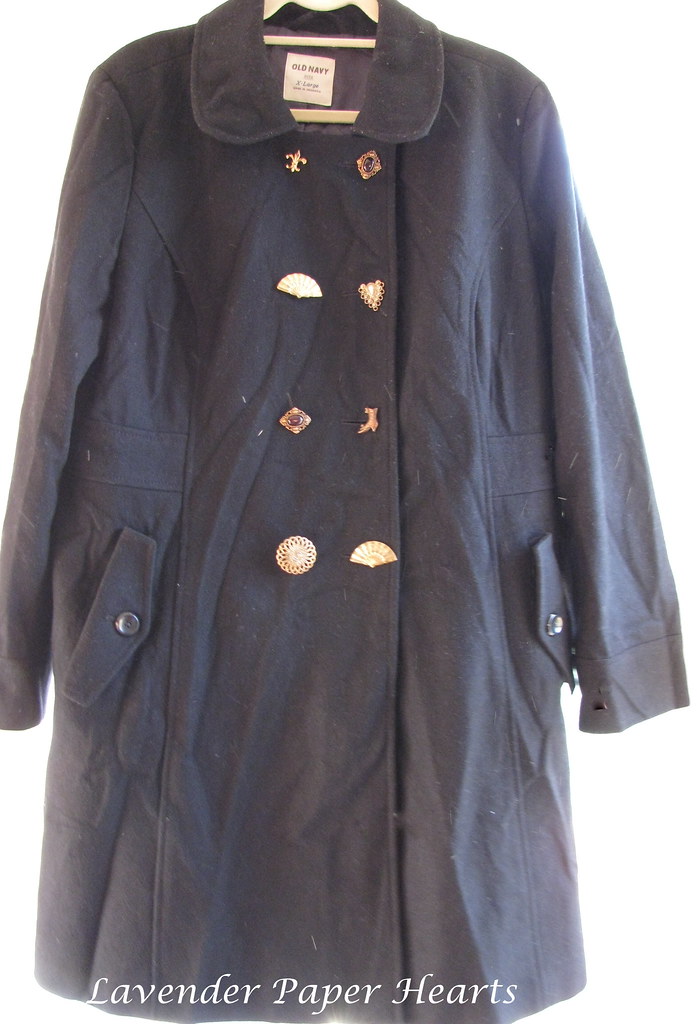
Now, if this is too funky for you, that's totally fine. Even just changing up the button color (the original buttons on this coat were black) really adds a nice change up to the coat. I've still held on to the original coat buttons just in case I ever want to put them back on the coat.
*Again, look past the wrinkles... This coat was in the same vacuum saver storage bag!
Here is a handy dandy tutorial I found on how to sew on a shank button. For those of you reading this post in a blog reader, for some reason the video didn't work in mine. I had to go to the actual blog link at LPH to see it:
Wednesday, October 17, 2012
DIY: Winter Coat Snaz Up
Sorry for the hiatus. Things have been rather busy around here and I had a few posts that I'd initially written but they needed to be pushed back a bit. Thanks for being patient. I've got 3 or 4 Lavender Paper Hearts projects that are halfway finished so I hope to, well, finish them up and then post them sometime soon. I've got two posts for you this week though for simple DIY winter coat snaz up/makeover projects.
So it's alllllmost winter coat time here in New England and as soon as the heat wave ends in Southern California maybe (after Christmas?) it'll be faux-winter coat time there too. I've got a few tips today to help jazz (or snaz) up a winter coat for a new season.
My first pea coat I wore for (shh, don't tell anyone) 11 years. How do I know it's this old? I remember I bought in my senior year of high school from Old Navy. I never intended to keep wearing the same coat for so long, but it was (and still is) in excellent shape. It was a classic pea coat and it got me through California "winters" and winters in New England and my first few in Ohio. It was really well made and I didn't really wear it all that much in California so it got it's first real work done in Massachusetts and then Ohio.
I've been a graduate student for the last 7 years of my life which means I don't always have a ton to spend on coats, but sometimes all you need to do is make a few subtle changes to spice things up. Luckily, Old Navy still has REALLY excellent deals on classic wool coats and while they're not lined as nicely as they used to be (let's be real, what is?), they still tend to be a really good deal for awesome coats.
"We Don't Need No Stinkin' Patches"... But, wait, We DO!!
Coat Snaz Up Idea #1:
This first spice up idea comes from idealized visions of nerdy professors combined with an awesome pin of heart shaped elbow patches I found a while back on Pinterest. The pin was originally from Country Living Magazine online for a Valentine/s Day Craft they called, "Wear your heart on your sleeve." I love that the new vision of the patch is a fun and sweet heart. I thought this would make a really great re-do (or really add on I guess) to the coat I got for Christmas last year from my MIL.
Think of the vision like this:


The nice thing about this project is that it can be removed at any time and restore your coat back to its original state.
Be sure to check back on Friday for another post. I've got another easy idea for a coat makeover.

So it's alllllmost winter coat time here in New England and as soon as the heat wave ends in Southern California maybe (after Christmas?) it'll be faux-winter coat time there too. I've got a few tips today to help jazz (or snaz) up a winter coat for a new season.
My first pea coat I wore for (shh, don't tell anyone) 11 years. How do I know it's this old? I remember I bought in my senior year of high school from Old Navy. I never intended to keep wearing the same coat for so long, but it was (and still is) in excellent shape. It was a classic pea coat and it got me through California "winters" and winters in New England and my first few in Ohio. It was really well made and I didn't really wear it all that much in California so it got it's first real work done in Massachusetts and then Ohio.
I've been a graduate student for the last 7 years of my life which means I don't always have a ton to spend on coats, but sometimes all you need to do is make a few subtle changes to spice things up. Luckily, Old Navy still has REALLY excellent deals on classic wool coats and while they're not lined as nicely as they used to be (let's be real, what is?), they still tend to be a really good deal for awesome coats.
"We Don't Need No Stinkin' Patches"... But, wait, We DO!!
Coat Snaz Up Idea #1:
This first spice up idea comes from idealized visions of nerdy professors combined with an awesome pin of heart shaped elbow patches I found a while back on Pinterest. The pin was originally from Country Living Magazine online for a Valentine/s Day Craft they called, "Wear your heart on your sleeve." I love that the new vision of the patch is a fun and sweet heart. I thought this would make a really great re-do (or really add on I guess) to the coat I got for Christmas last year from my MIL.
Think of the vision like this:


Applied to this coat:
I started with this sweet Apt 9 coat from Kohls:
FYI: I never have this ridiculous expression on my face when I wear this coat. Nor do I do that weird arm thing.
*Warning - some of these photos were taken in my basement apartment so they're a bit dark.
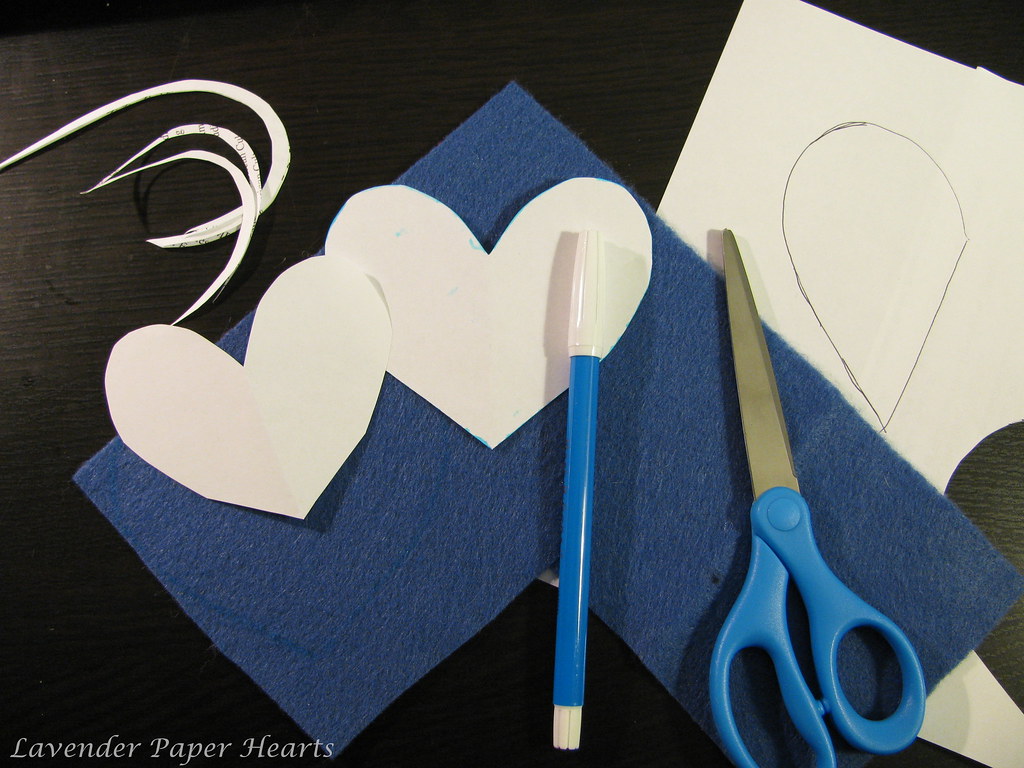
Step 1: Here are the basic supplies you'll need... gather them up and get ready to start!
1. Paper to make your paper stencil
2. A fabric pen
3. Sharp Scissors
4. Felt (30 cents a sheet at Joann's)
5. Thread (not pictured, I didn't have it yet)
6. Needle (also not pictured)
7. A rules (...yeah, not pictured either)
Step 2. Once you've figured out what size heart you want for your elbow patches you'll want to trace the template onto your felt. You can see from the previous photo that it took me a few tries to find the right size. Cut out your hearts with some sharp scissors.

Step 3: Next you want to figure out where you want your patches to be on the coat. This is a little bit harder then it might seem. I used a piece of scotch tape to sort of mark where my elbow was on the coat. I did this on each side.
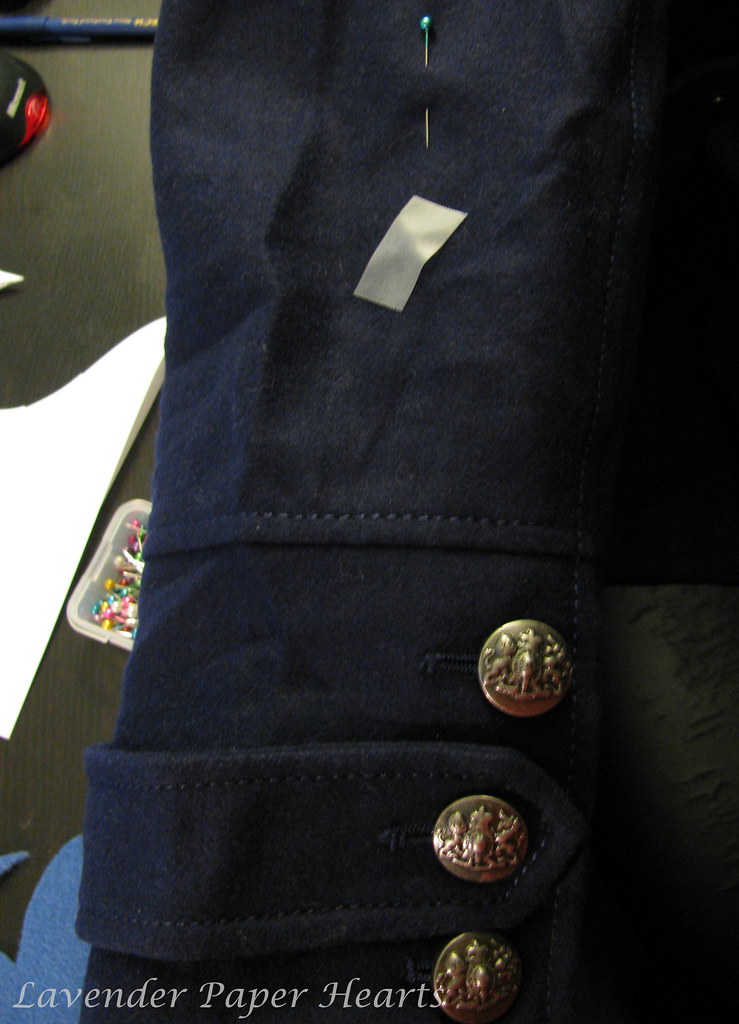
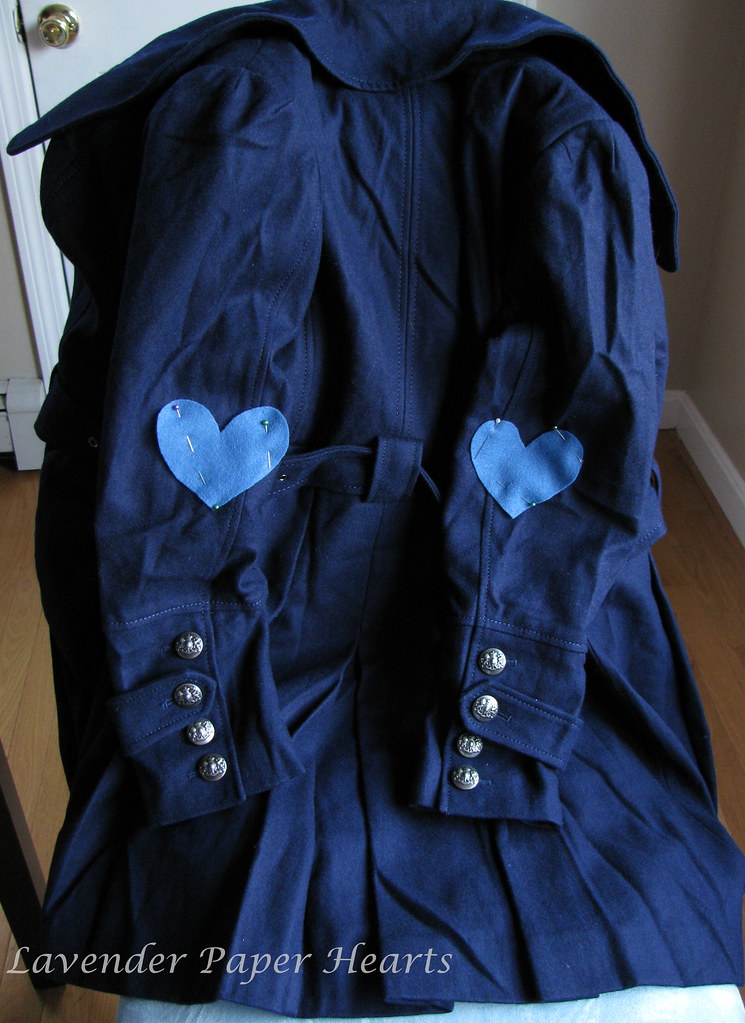
Step 4: I then pinned on the felt hearts onto the coat and stood in the mirror to see if they looked like they were in the right place. I also double checked with my husband and he recommended that I move them up a bit more... turns out they were close, but they weren't exaaccctttly in the right place. A few slight tweaks and I was golden. A ruler is helpful for this to make sure that both sides are evenly lined up.
*Hey, hey, hey - Don't judge my wrinkly coat. It was packed away in an air tight vacuum space bag while we moved.
Step 5: Using what's called a button hole stitch you want to sew the patches in place. I've added a tutorial below that shows you how to do this. It's a great stitch and it adds a cute homespun vibe to the patches. I did this at night in the basement so the photos were rather underwhelming. You can get enough of an idea from the tutorial as to how to go about sewing on the felt.
Your finished product should look like this:
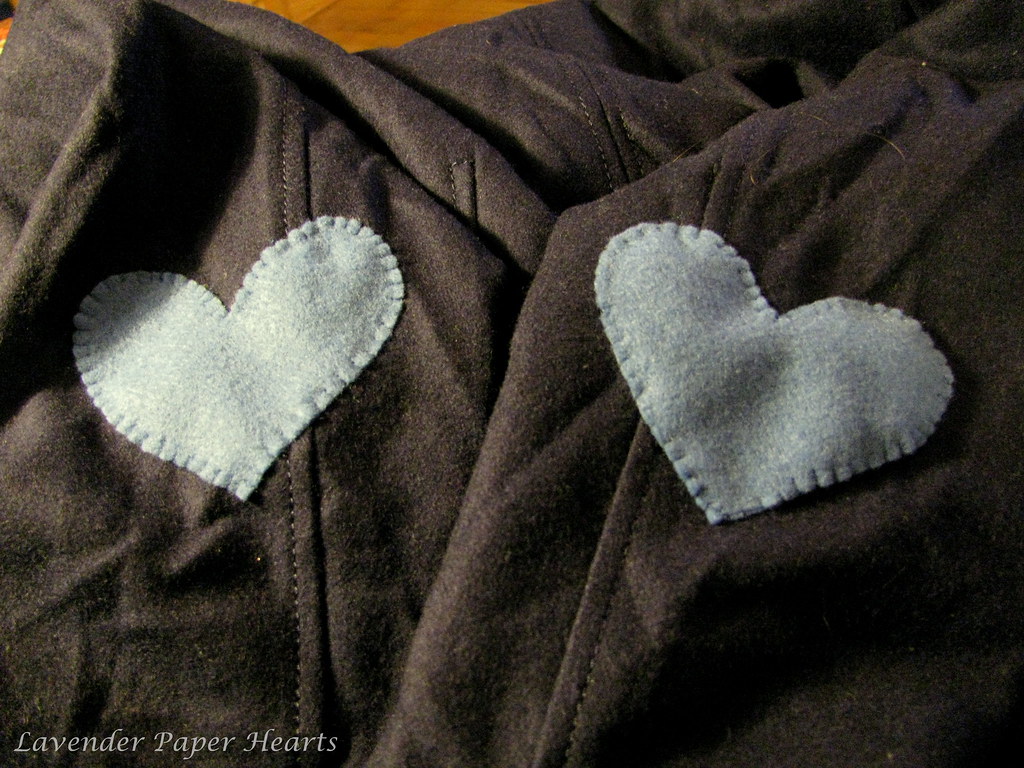

*The dust in the air is making my coat look dirty - it's wrinkly, but NOT dirty!!
Here's the button hole stitch tutorial:
The nice thing about this project is that it can be removed at any time and restore your coat back to its original state.
Be sure to check back on Friday for another post. I've got another easy idea for a coat makeover.
Lastly...

*I'm pretty sure Bailey is wondering what the hell is going on in this photo...
Subscribe to:
Posts (Atom)