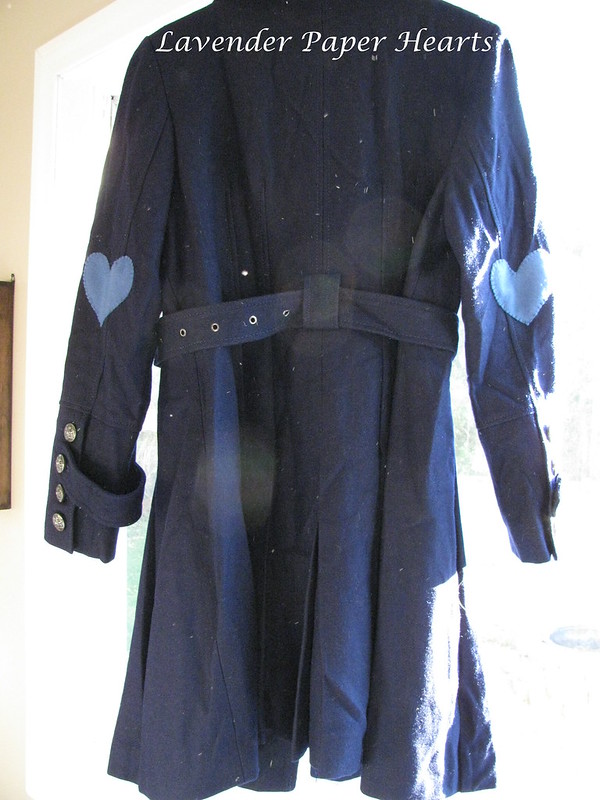
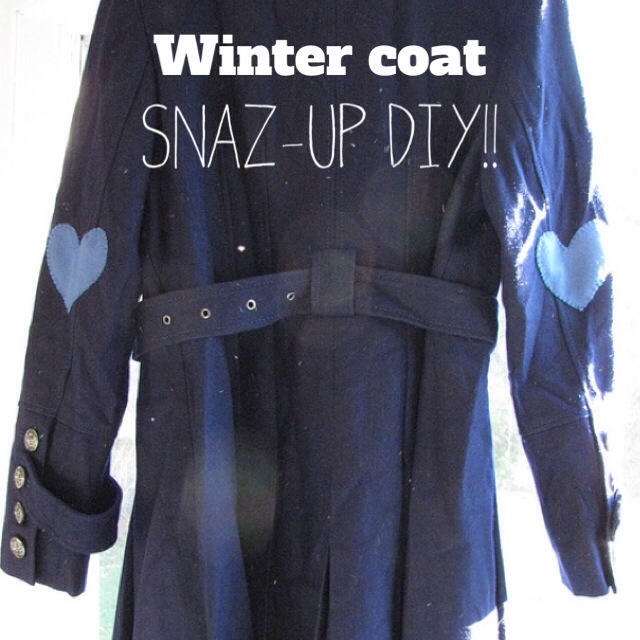
It's officially getting COLD here in New England. I thought I'd share a DIY from last year. Adding something like little heart elbow patches to a coat can change up it's look in a big way. To see my DIY tutorial on how to do this, click HERE!
This coat makeover series was done in two parts. To see how I revamped a plain black winter coat with some fancy buttons click HERE. This DIY is what we call: "DUH, stupid easy!" but it also has a great impact and helps makeover a coat.
Showing posts with label coat makeover. Show all posts
Wednesday, November 27, 2013
Wednesday, February 13, 2013
Holiday Coat Makeover
Sorry for the lack of posting the last few weeks. We moved 2 weeks after getting back from holidays in California and things have been a bit bananas ever since then.
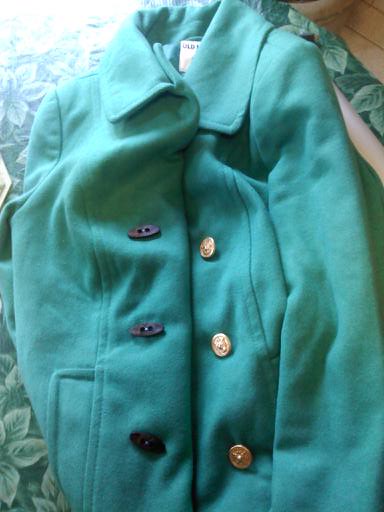
I thought I'd share a quick post to show a coat makeover I did for my sister over the holidays. My sister had stockpiled a bunch of sewing & mending projects for when I arrived and she kept me busy!! I'd found this coat on Old Navy on super-mega-discount sometime in early December and being a good older sister I sent the info over to my sister Nikki. I just so happens to be in her favorite color, and that girl is always in the market for new coats, so I knew she'd be an easy sell. (Plus, I'm pretty sure I found it when it'd been marked down to $27, free shipping, and 4% cash back from Ebates - for a WOOL COAT. I told you it was a good deal!!) The only thing I wasn't thrilled about were the coat's GOLD buttons. Seeing them in person they were actually much better looking, but still, after the DIY coat makeover post we knew we could find something much more fun! We dragged my husband into a few Joann's Fabric stores all over Santa Monica before we found buttons we liked. Then we had to call around to another store near my mom's house (where we were staying) so that we could find a few more to make sure we replaced ALL the gold buttons on the coat and not just the buttons on the front. There were two buttons on the back, and of course the first store only had 6 buttons.
Here is a photo of the coat. You'll notice that the coat's original buttons are on the right side of the photo, and the oval shaped buttons we chose (they looked like wood) are on the left side. Nikki also wanted the thread on the buttons to pop a bit, so she picked a bright lighter blue colored thread! It added a really nice subtle touch to the coat.
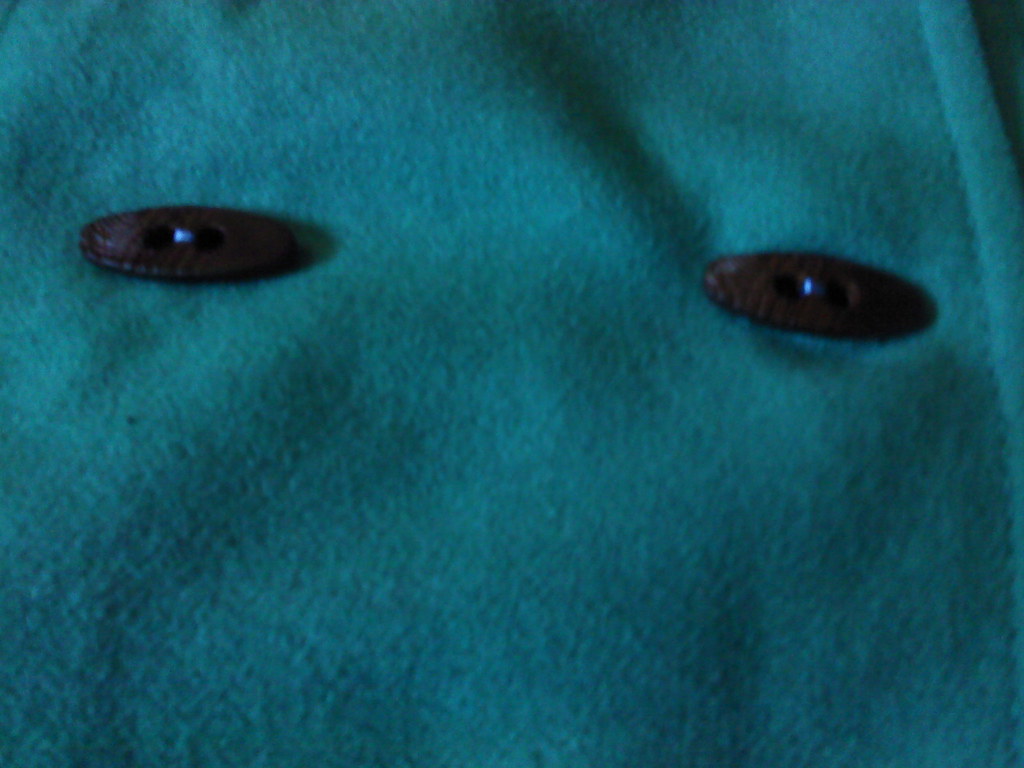
Here you can see the thread a bit better (but it's still blurry - cell phone picture):
Ta-da!! See, it's so easy, and it really changes the look of a coat from it's original look and then you can easily change it up from season to season!!
I'm hoping to get my craft room set up sometime this coming week and when I get some free time I'm going to work on a few new hair piece ideas to add to the shop. Stay tuned!!
I thought I'd share a quick post to show a coat makeover I did for my sister over the holidays. My sister had stockpiled a bunch of sewing & mending projects for when I arrived and she kept me busy!! I'd found this coat on Old Navy on super-mega-discount sometime in early December and being a good older sister I sent the info over to my sister Nikki. I just so happens to be in her favorite color, and that girl is always in the market for new coats, so I knew she'd be an easy sell. (Plus, I'm pretty sure I found it when it'd been marked down to $27, free shipping, and 4% cash back from Ebates - for a WOOL COAT. I told you it was a good deal!!) The only thing I wasn't thrilled about were the coat's GOLD buttons. Seeing them in person they were actually much better looking, but still, after the DIY coat makeover post we knew we could find something much more fun! We dragged my husband into a few Joann's Fabric stores all over Santa Monica before we found buttons we liked. Then we had to call around to another store near my mom's house (where we were staying) so that we could find a few more to make sure we replaced ALL the gold buttons on the coat and not just the buttons on the front. There were two buttons on the back, and of course the first store only had 6 buttons.
Here is a photo of the coat. You'll notice that the coat's original buttons are on the right side of the photo, and the oval shaped buttons we chose (they looked like wood) are on the left side. Nikki also wanted the thread on the buttons to pop a bit, so she picked a bright lighter blue colored thread! It added a really nice subtle touch to the coat.
Here you can see the thread a bit better (but it's still blurry - cell phone picture):
Here's the finished coat:
Ta-da!! See, it's so easy, and it really changes the look of a coat from it's original look and then you can easily change it up from season to season!!
I'm hoping to get my craft room set up sometime this coming week and when I get some free time I'm going to work on a few new hair piece ideas to add to the shop. Stay tuned!!
Friday, October 19, 2012
DIY Coat Makeover #2
Here is my second DIY coat makeover installment. On Wednesday I showed you how to jazz up a coat with some fancy-nerd-love felt elbow patches. Today's project is even easier than the patches (is that even possible, yes!) and it too makes quite the statement. If you missed my first coat snaz-up project from earlier in the week click HERE to check it out.
Coat Snaz Up/Makeover #2: BUTTONS
So a few winters ago I got a long black wool pea coat from Old Navy that I got on super sale. I picked black, because while it might be a bit boring, I knew it needed to last me a while. Plus, let's face it, black is classic. After wearing it for 8 months or so, basically right before the winter coat wearing season ended in Ohio, I decided it needed to be spiced up a bit and I searched on Etsy for new buttons for my coat. Etsy has SO MANY amazing options and deals on buttons. You really can find almost anything your heart desires so use your imagination and spice things up. Right now there are 400,000 button options available. See? I wasn't lying. SO MANY OPTIONS.
Some things to keep in mind!
1. Measure the buttons on your coat now to get an idea of the replacement button size you'll need to look for. You can usually wiggle a bit on getting buttons a wee bit smaller, but I don't recommend getting buttons that are much bigger than what your coat currently has (they might not fit in the button holes!)
2. When you remove the buttons attached to your coat put a pin in place where the button was so that when you attach your new buttons you don't have issues with the button holes and buttons not matching.
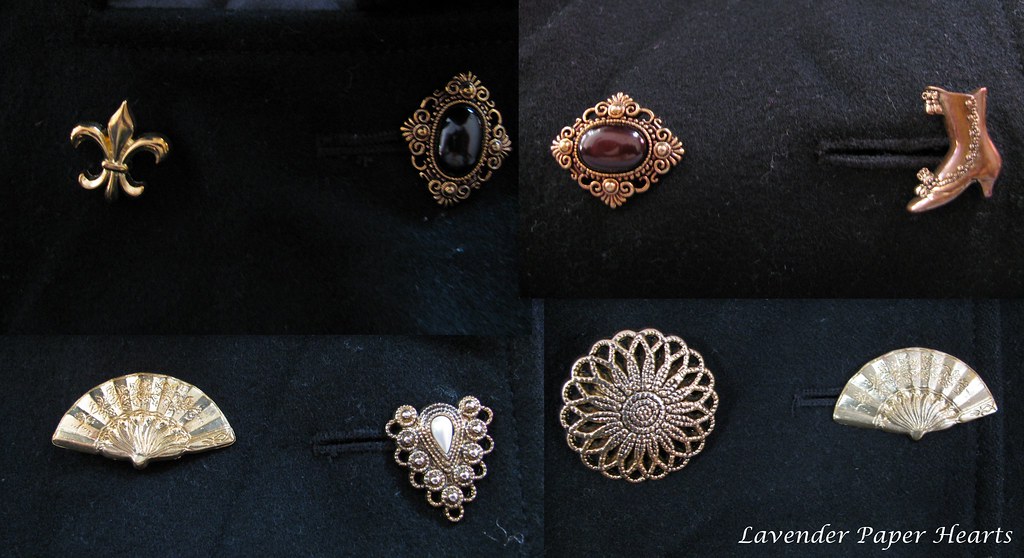
Here are a few quick random sets of buttons that caught my eye in a search I just did:
Coat Snaz Up/Makeover #2: BUTTONS
So a few winters ago I got a long black wool pea coat from Old Navy that I got on super sale. I picked black, because while it might be a bit boring, I knew it needed to last me a while. Plus, let's face it, black is classic. After wearing it for 8 months or so, basically right before the winter coat wearing season ended in Ohio, I decided it needed to be spiced up a bit and I searched on Etsy for new buttons for my coat. Etsy has SO MANY amazing options and deals on buttons. You really can find almost anything your heart desires so use your imagination and spice things up. Right now there are 400,000 button options available. See? I wasn't lying. SO MANY OPTIONS.
Some things to keep in mind!
1. Measure the buttons on your coat now to get an idea of the replacement button size you'll need to look for. You can usually wiggle a bit on getting buttons a wee bit smaller, but I don't recommend getting buttons that are much bigger than what your coat currently has (they might not fit in the button holes!)
2. When you remove the buttons attached to your coat put a pin in place where the button was so that when you attach your new buttons you don't have issues with the button holes and buttons not matching.
Here are a few quick random sets of buttons that caught my eye in a search I just did:
*All images are from Etsy sellers see numbers below for links!!
2. Bohemian Findings (You can see from the penny in the photo that these would obviously be too small.)
3. Add Vintage
4. World Garden
You can find vintage buttons, mix and matching lots, plastic, wooden, hand painted, mass produced buttons. All kinds of wonderful buttons!!
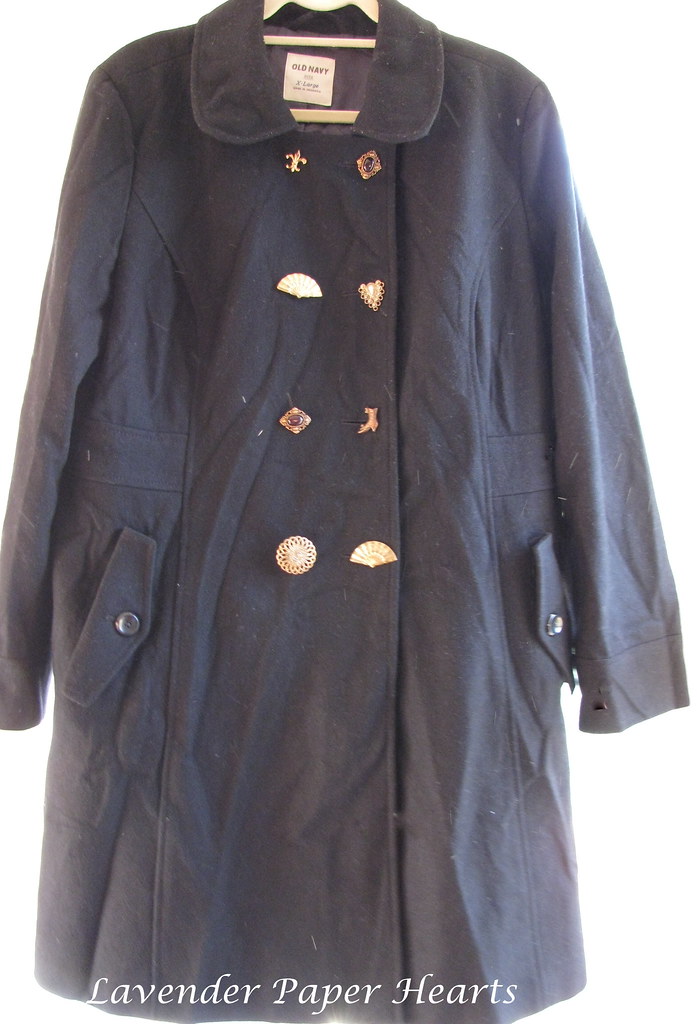
Here's what I ended up doing with my coat. It had 8 button holes to play with so I really mixed it up quite a bit.
Here's the coat (which looks kind of totally shapeless here, but is actually quite flattering on):
Now, if this is too funky for you, that's totally fine. Even just changing up the button color (the original buttons on this coat were black) really adds a nice change up to the coat. I've still held on to the original coat buttons just in case I ever want to put them back on the coat.
*Again, look past the wrinkles... This coat was in the same vacuum saver storage bag!
Here is a handy dandy tutorial I found on how to sew on a shank button. For those of you reading this post in a blog reader, for some reason the video didn't work in mine. I had to go to the actual blog link at LPH to see it:
Wednesday, October 17, 2012
DIY: Winter Coat Snaz Up
Sorry for the hiatus. Things have been rather busy around here and I had a few posts that I'd initially written but they needed to be pushed back a bit. Thanks for being patient. I've got 3 or 4 Lavender Paper Hearts projects that are halfway finished so I hope to, well, finish them up and then post them sometime soon. I've got two posts for you this week though for simple DIY winter coat snaz up/makeover projects.
So it's alllllmost winter coat time here in New England and as soon as the heat wave ends in Southern California maybe (after Christmas?) it'll be faux-winter coat time there too. I've got a few tips today to help jazz (or snaz) up a winter coat for a new season.
My first pea coat I wore for (shh, don't tell anyone) 11 years. How do I know it's this old? I remember I bought in my senior year of high school from Old Navy. I never intended to keep wearing the same coat for so long, but it was (and still is) in excellent shape. It was a classic pea coat and it got me through California "winters" and winters in New England and my first few in Ohio. It was really well made and I didn't really wear it all that much in California so it got it's first real work done in Massachusetts and then Ohio.
I've been a graduate student for the last 7 years of my life which means I don't always have a ton to spend on coats, but sometimes all you need to do is make a few subtle changes to spice things up. Luckily, Old Navy still has REALLY excellent deals on classic wool coats and while they're not lined as nicely as they used to be (let's be real, what is?), they still tend to be a really good deal for awesome coats.
"We Don't Need No Stinkin' Patches"... But, wait, We DO!!
Coat Snaz Up Idea #1:
This first spice up idea comes from idealized visions of nerdy professors combined with an awesome pin of heart shaped elbow patches I found a while back on Pinterest. The pin was originally from Country Living Magazine online for a Valentine/s Day Craft they called, "Wear your heart on your sleeve." I love that the new vision of the patch is a fun and sweet heart. I thought this would make a really great re-do (or really add on I guess) to the coat I got for Christmas last year from my MIL.
Think of the vision like this:
The nice thing about this project is that it can be removed at any time and restore your coat back to its original state.
Be sure to check back on Friday for another post. I've got another easy idea for a coat makeover.
So it's alllllmost winter coat time here in New England and as soon as the heat wave ends in Southern California maybe (after Christmas?) it'll be faux-winter coat time there too. I've got a few tips today to help jazz (or snaz) up a winter coat for a new season.
My first pea coat I wore for (shh, don't tell anyone) 11 years. How do I know it's this old? I remember I bought in my senior year of high school from Old Navy. I never intended to keep wearing the same coat for so long, but it was (and still is) in excellent shape. It was a classic pea coat and it got me through California "winters" and winters in New England and my first few in Ohio. It was really well made and I didn't really wear it all that much in California so it got it's first real work done in Massachusetts and then Ohio.
I've been a graduate student for the last 7 years of my life which means I don't always have a ton to spend on coats, but sometimes all you need to do is make a few subtle changes to spice things up. Luckily, Old Navy still has REALLY excellent deals on classic wool coats and while they're not lined as nicely as they used to be (let's be real, what is?), they still tend to be a really good deal for awesome coats.
"We Don't Need No Stinkin' Patches"... But, wait, We DO!!
Coat Snaz Up Idea #1:
This first spice up idea comes from idealized visions of nerdy professors combined with an awesome pin of heart shaped elbow patches I found a while back on Pinterest. The pin was originally from Country Living Magazine online for a Valentine/s Day Craft they called, "Wear your heart on your sleeve." I love that the new vision of the patch is a fun and sweet heart. I thought this would make a really great re-do (or really add on I guess) to the coat I got for Christmas last year from my MIL.
Think of the vision like this:
Applied to this coat:
I started with this sweet Apt 9 coat from Kohls:
FYI: I never have this ridiculous expression on my face when I wear this coat. Nor do I do that weird arm thing.
*Warning - some of these photos were taken in my basement apartment so they're a bit dark.
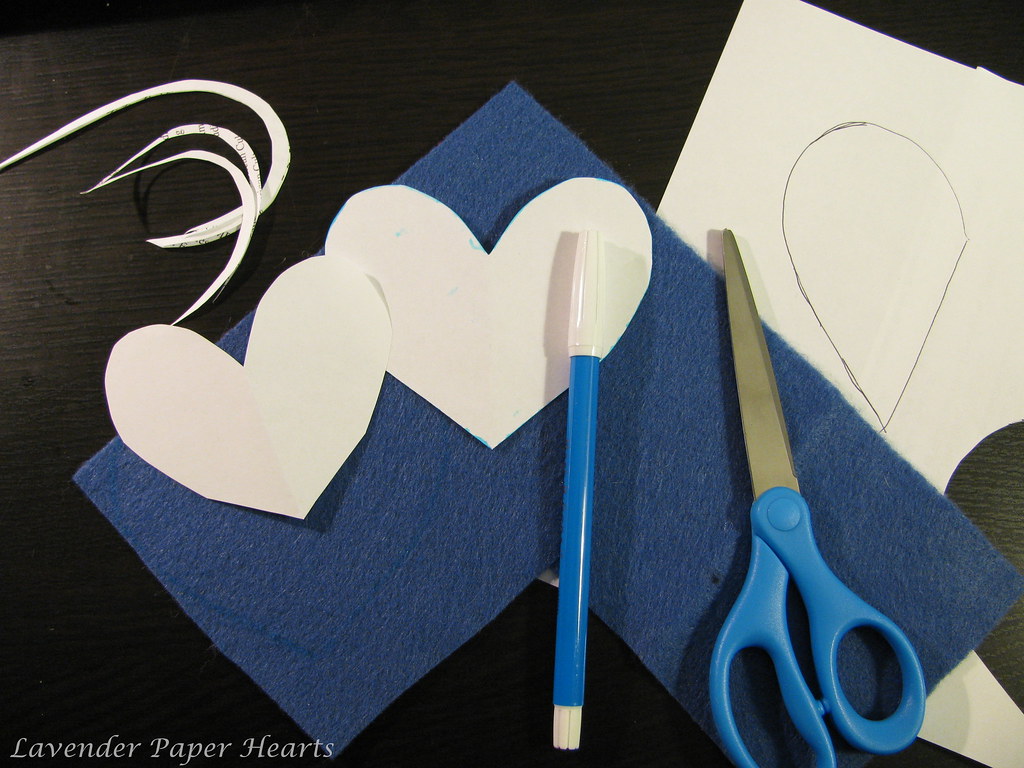
Step 1: Here are the basic supplies you'll need... gather them up and get ready to start!
1. Paper to make your paper stencil
2. A fabric pen
3. Sharp Scissors
4. Felt (30 cents a sheet at Joann's)
5. Thread (not pictured, I didn't have it yet)
6. Needle (also not pictured)
7. A rules (...yeah, not pictured either)
Step 2. Once you've figured out what size heart you want for your elbow patches you'll want to trace the template onto your felt. You can see from the previous photo that it took me a few tries to find the right size. Cut out your hearts with some sharp scissors.
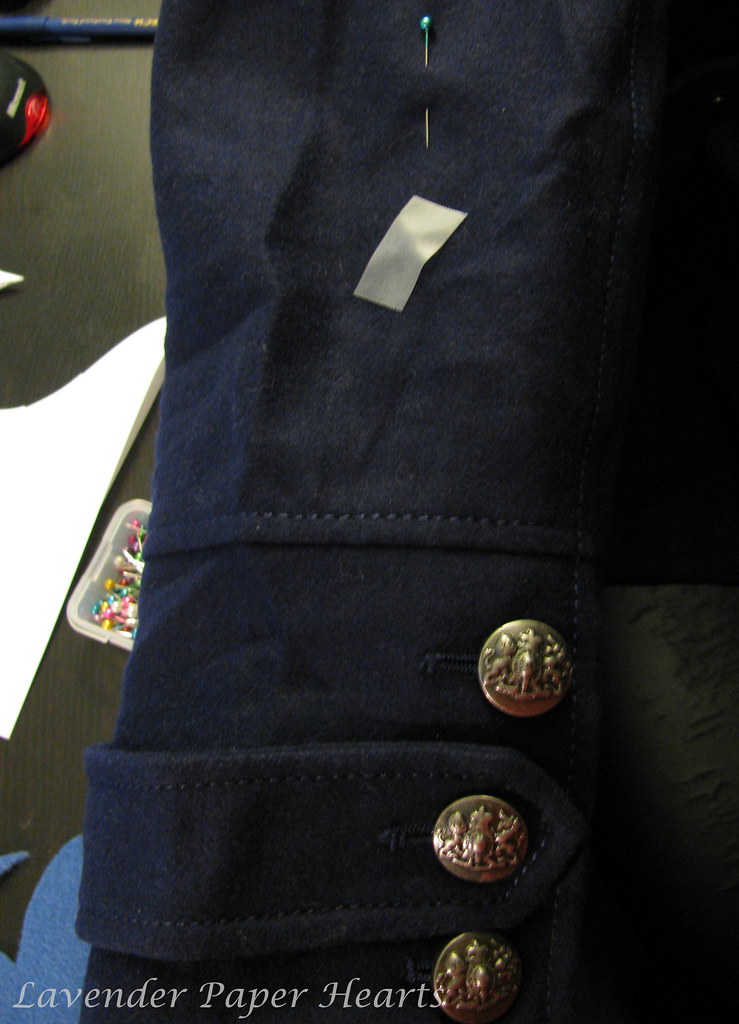
Step 3: Next you want to figure out where you want your patches to be on the coat. This is a little bit harder then it might seem. I used a piece of scotch tape to sort of mark where my elbow was on the coat. I did this on each side.
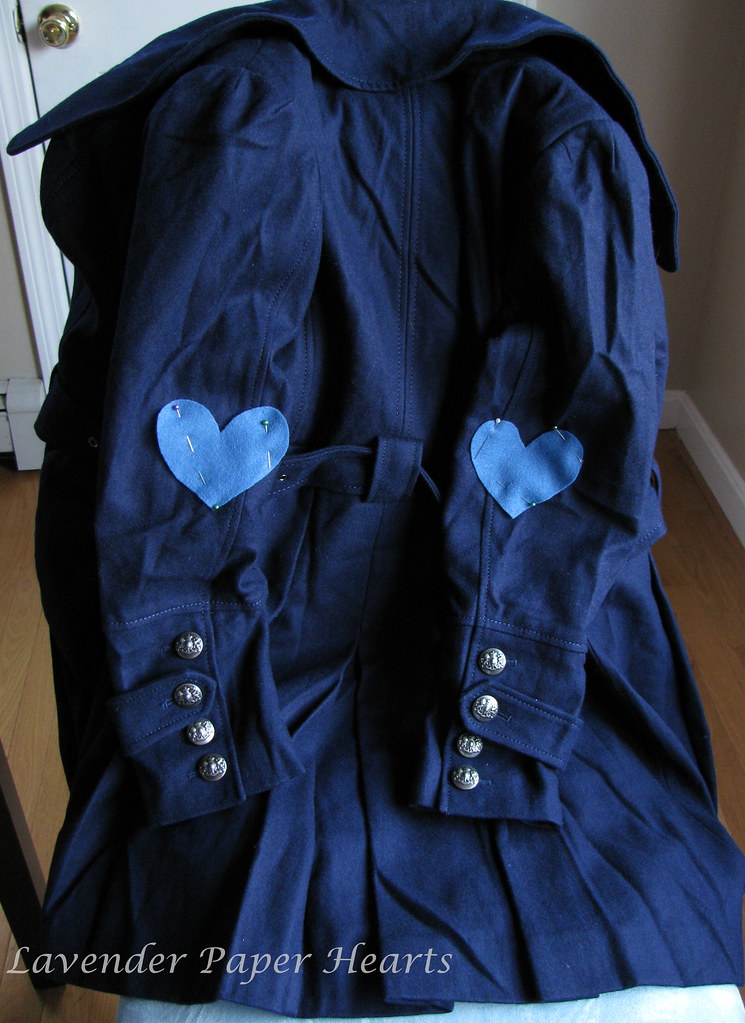
Step 4: I then pinned on the felt hearts onto the coat and stood in the mirror to see if they looked like they were in the right place. I also double checked with my husband and he recommended that I move them up a bit more... turns out they were close, but they weren't exaaccctttly in the right place. A few slight tweaks and I was golden. A ruler is helpful for this to make sure that both sides are evenly lined up.
*Hey, hey, hey - Don't judge my wrinkly coat. It was packed away in an air tight vacuum space bag while we moved.
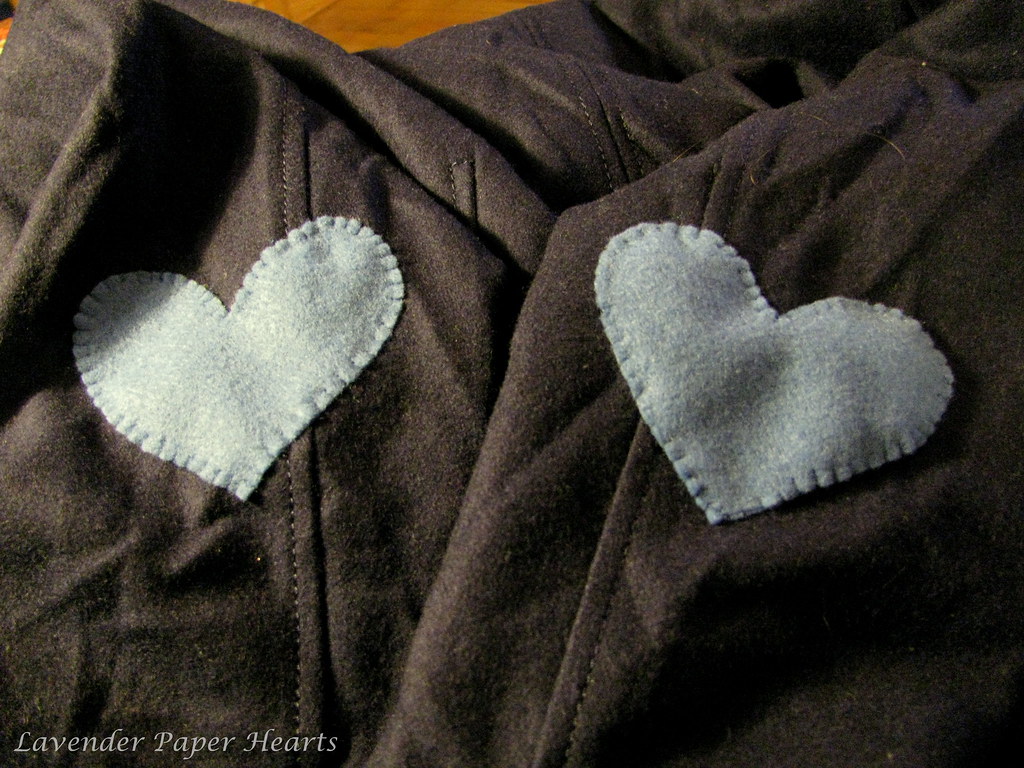
Step 5: Using what's called a button hole stitch you want to sew the patches in place. I've added a tutorial below that shows you how to do this. It's a great stitch and it adds a cute homespun vibe to the patches. I did this at night in the basement so the photos were rather underwhelming. You can get enough of an idea from the tutorial as to how to go about sewing on the felt.
Your finished product should look like this:
*The dust in the air is making my coat look dirty - it's wrinkly, but NOT dirty!!
Here's the button hole stitch tutorial:
The nice thing about this project is that it can be removed at any time and restore your coat back to its original state.
Be sure to check back on Friday for another post. I've got another easy idea for a coat makeover.
Lastly...
*I'm pretty sure Bailey is wondering what the hell is going on in this photo...
Subscribe to:
Posts (Atom)