Showing posts with label diy tutorial. Show all posts

Tuesday, August 20, 2013

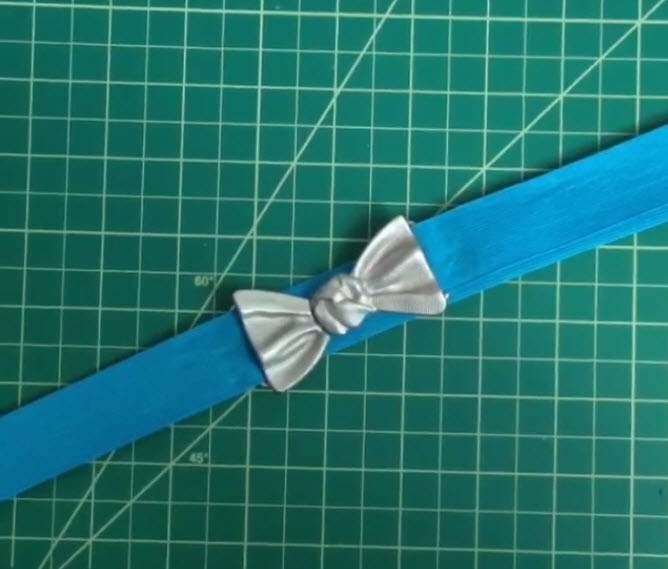
DIY Elastic Belt

I don't know about you, but sometimes I find it hard to track down the right belt for certain outfits.  I don't know if that's because the belts I'm envisioning just don't exist or I'm incredibly picky, but I got it in my head that I wanted to try and make my own and the bonus was that it was actually wayyy cheaper than buying one!!  I decided to make a belt with elastic material. I like the gentle stretch of the material and it's easy to work with.  

This process ended up being pretty easy and after a trial and error run (during which I discovered that the clear plastic snaps that seemed like a good idea, were actually defective.) I thought I'd share this super easy tutorial with you!! 

I made this belt from some colorful elastic, like I mentioned earlier, but I also made it snap on (and off) so that it could be swapped out for a different colored elastic depending on how I was feeling and or how it would compliment an outfit. Multiple belts in one!! And even with the purchase of two different colors of elastic, it was still cheaper than buying a belt. 


Supplies: 
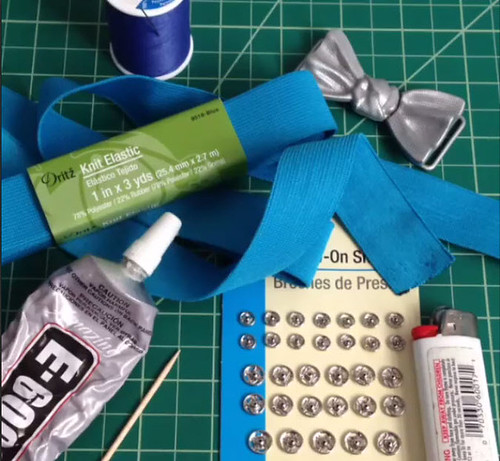
Fashion Belt Buckle Notion - The one I used comes in gold, but I painted it silver
Toothpick
Thread
Needle
Lighter

You can find all of these items at Jo-Ann's fabrics. Don't forget to use a coupon. If you have an smart phone, download the app and you'll never be without one! 

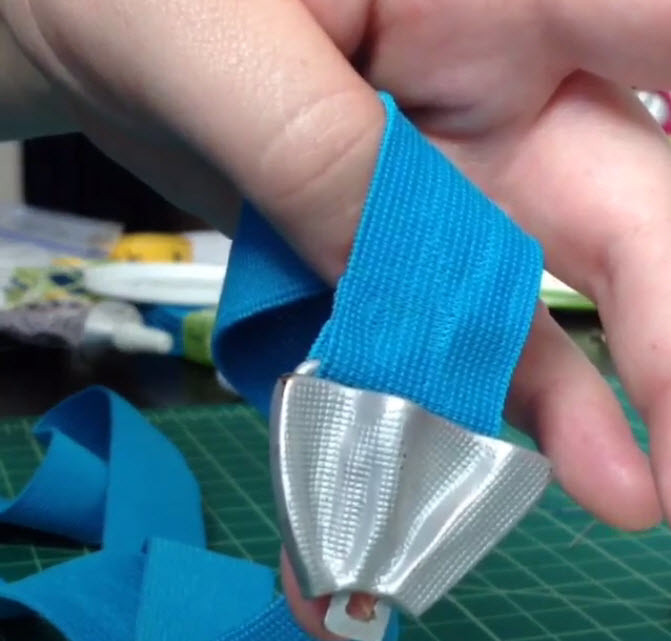
First, measure out the length you want by wrapping the knit elastic around your waist. You'll want it to be just a little bit smaller than your waste so that the belt has a little give when it's hooked together (this will help it stay on). Also be sure to then add 2 inches back on so that you have a space to add on the sew-on snaps.


You'll need to use your lighter here to lightly seal the edges. Quickly swipe the edge of the elastic through the flame and it should do the trick. 

Next you're going to glue on the pointy side of the snaps. I recommend E-6000 glue because it's strong and sturdy!


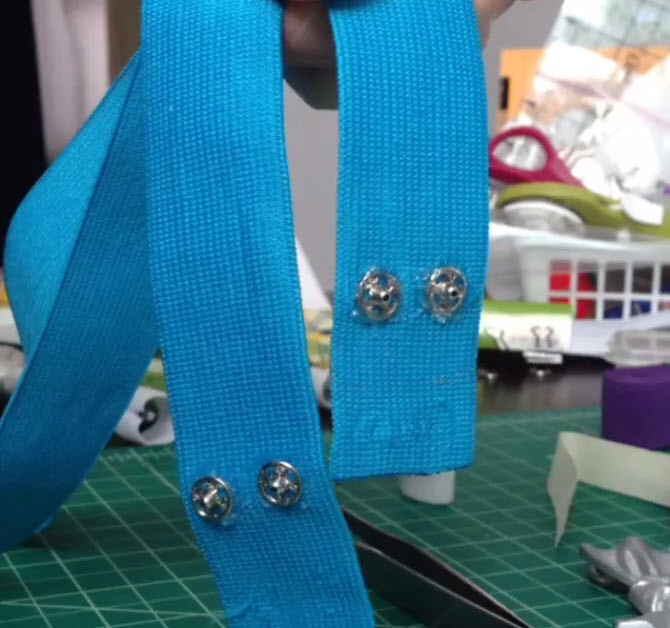
I've chosen to glue the snaps on one side, and then sew them on the inside edge so that you won't see the stitch marks when you're wearing the belt. You can see in the photo below that the belt from the front doesn't have any visible marks - the magic is in gluing!!


I eye-balled and ended up putting my glue 1 1/8th inches from the end of the elastic. I used a toothpick to plop down two blobs of glue and then used tweezers to set the nipple side of the snaps (with nipple up) into the glue.


You'll do this with all 4 snaps, making sure they're well-seated into the glue. Let the glue dry for at least a few hours before starting the other side.


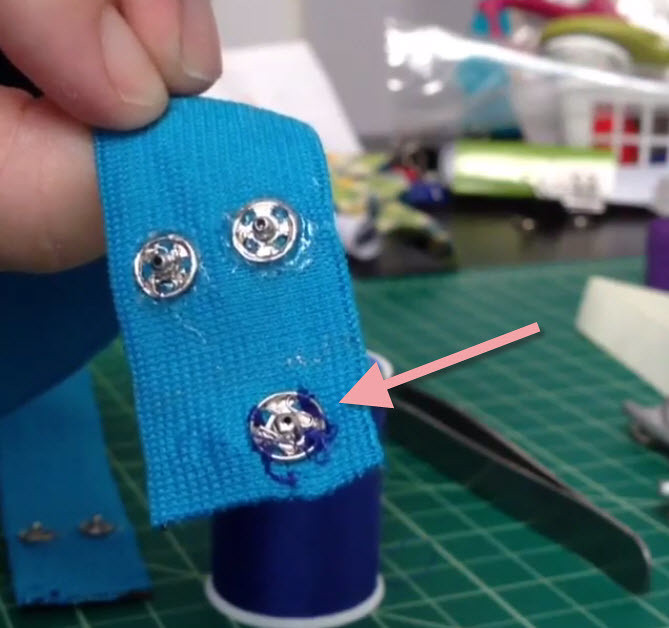
Next you're going to hand sew on the other side of the snap. I folded the elastic in half and used the nipples to sort of mark the elastic to show me where I needed to sew on the secondary snap.  Also, be sure to experiment a bit to make sure the snap is the correct side. I accidentally sewed my first one on backwards (which you can see in the photo below)!!


Once you've sewed on all 4 snaps you're basically done. You'll need to just snap your belt notion in place (with the sewed side on the inside) and magic - you're done!


Here's a quick step by step video I made for Instagram. It's fast, only 13 seconds, but it's always a fun challenge to see if it's possible to convey everything in 15 seconds max, and when not having the ability to delete anything or re-record.

Wednesday, July 10, 2013

Recipe: Cold Brew Coffee

It's summertime and officially cold brew coffee time for me!! I love to have coffee in the morning but once the heat starts in I can't deal with having hot coffee. Who wants to sweat first thing in the morning?!! Plus, if I was to buy an iced coffee most mornings that would add up pretty quickly. I stumbled across the cold brew concept a few summers ago. Making this coffee is a bit different than most might be used to. It involves steeping coffee overnight (or a minimum of 8 hours).  You can read more about it here and here.  I also just found a recipe for a blood orange ice coffee here that sounds amazing.

Cold brew coffee makes for a still really lovey tasting and less acidic coffee. Since you store it in the fridge when it's finished, you've got cold coffee at the ready for as long as your pitcher lasts you.  Don't worry, it's really easy to make big batches at a time. In the interest of saving space in our refrigerator I use a 2 liter pitcher which lasts me about a week and a half. (I tend to one small glass in the am only.)


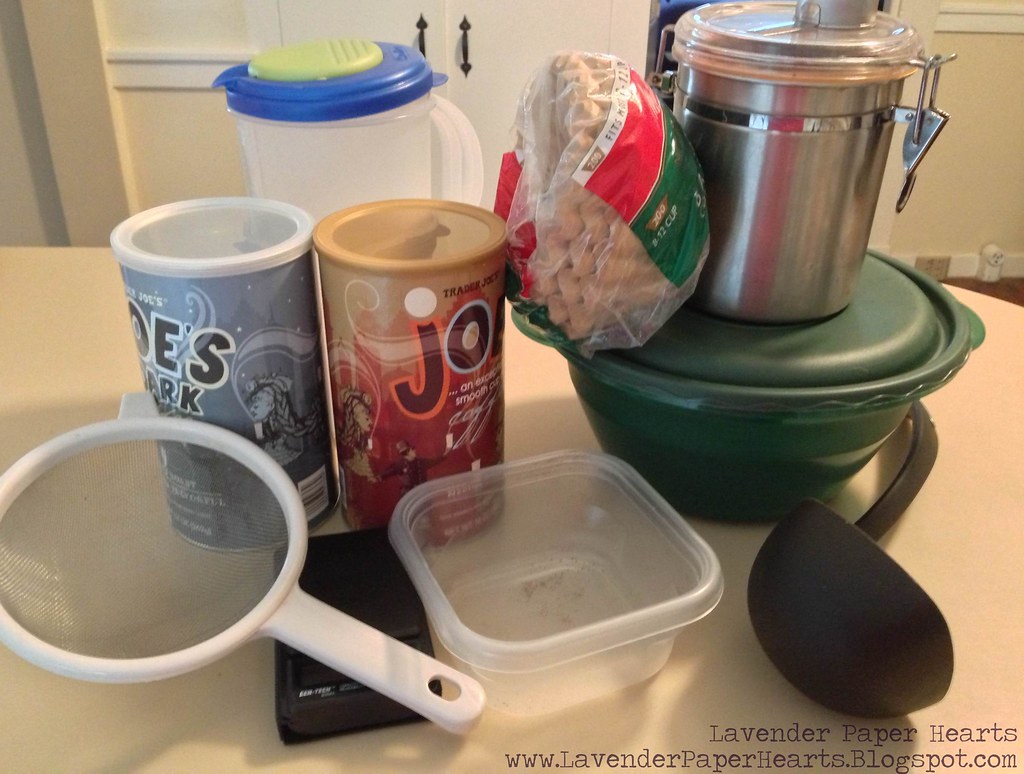
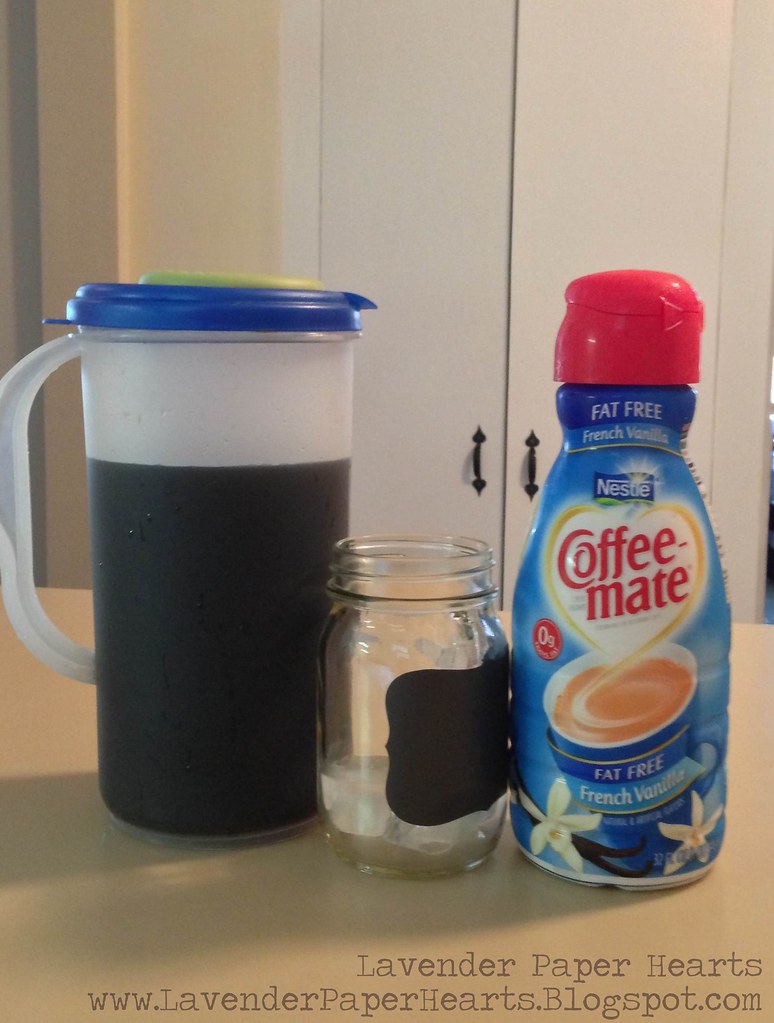
Above are the items you'll need for this recipe. Remember that you make the coffee in two stages so you won't need all of these items all at once.

Glorious Cold Brew Coffee

Ingredients:
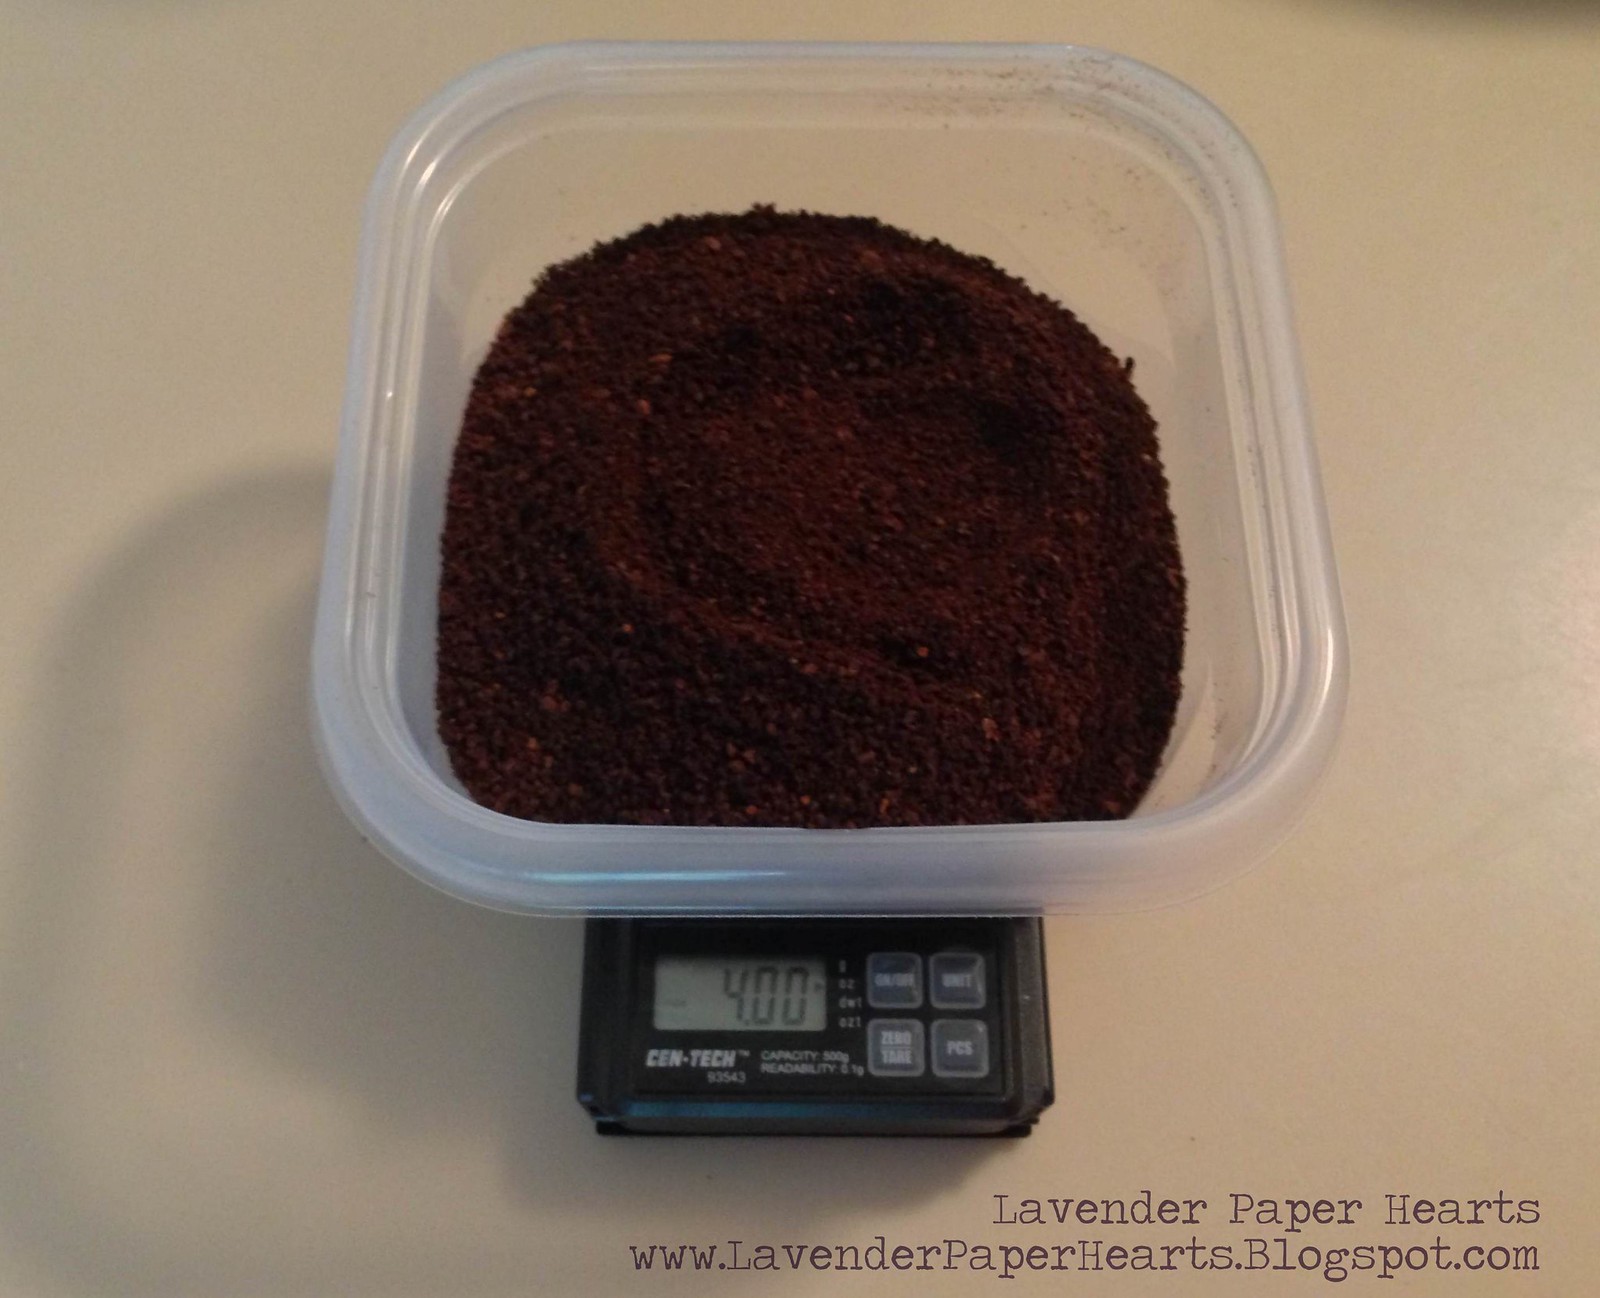
  • 4 oz (about 1 1/4 cup + 1 Tbs) good quality coffee - I use a blend of medium and dark coffee
  • 8 cups of water - room temperature

Tools:
  • If you're using a scale to measure your coffee you'll that and a container (*mine wasn't actually dirty, I'd already poured some coffee into it before taking the photo)
  • Strainer
  • Cheese cloth or large coffee filters
  • Ladle 
  • Pitcher

Iced coffee ingredients - optional:
  • ice, milk, cream, water, sugar, etc. 

Directions: 

Measure out your coffee. The type of coffee you choose is up to you. You just must choose a well ground coffee. Or make sure it's really well ground if you do it yourself. The original recipe I tried from Pioneer Woman used Cuban espresso and it was SUPER STRONG. It's a coffee I use regularly when making Cuban coffee but it was just too much for me. I made it a few times before figuring out that it made me feel bad (sometimes I'm slow).  Don't get me wrong, I love strong coffee, but that was just TOO STRONG for me. I use coffee beans that I get from Trader Joe's and then I grind myself. I make my own blend of the TJ's medium and dark roast coffees. I've used coffees like Dunkin' Donuts (in an attempt to appease my husband's tastes) and ended up using more coffee because it wasn't strong enough.  I've also used Starbuck's medium and dark roasts independent of one another and they were also really good.  You can use pre-ground coffee if that's what works for you! 


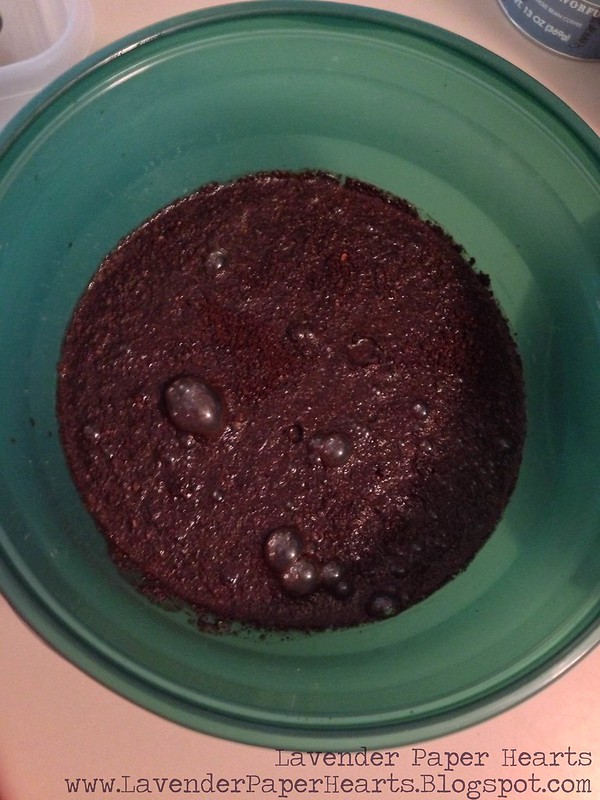
Pour your coffee into a large bowl and then pour your water over the coffee. Give it a stir and then cover it. (True fact: I don't always bother to stir it if I swirl the water in!)  Leave it in a spot in your kitchen where it won't get bumped and forget it for 8 - 24 hours. The nicest thing about this recipe is that you can't really mess it up.


The longer you seep your coffee the stronger it gets, so soak time is up to you (but it needs at least 8 hours). Another trick is if you decide you've made your coffee too strong (which happens) you just need to add more water to the coffee concentrate. It won't ruin it, it'll just cut down the strength a bit. (Be sure to add a little at a time.)  

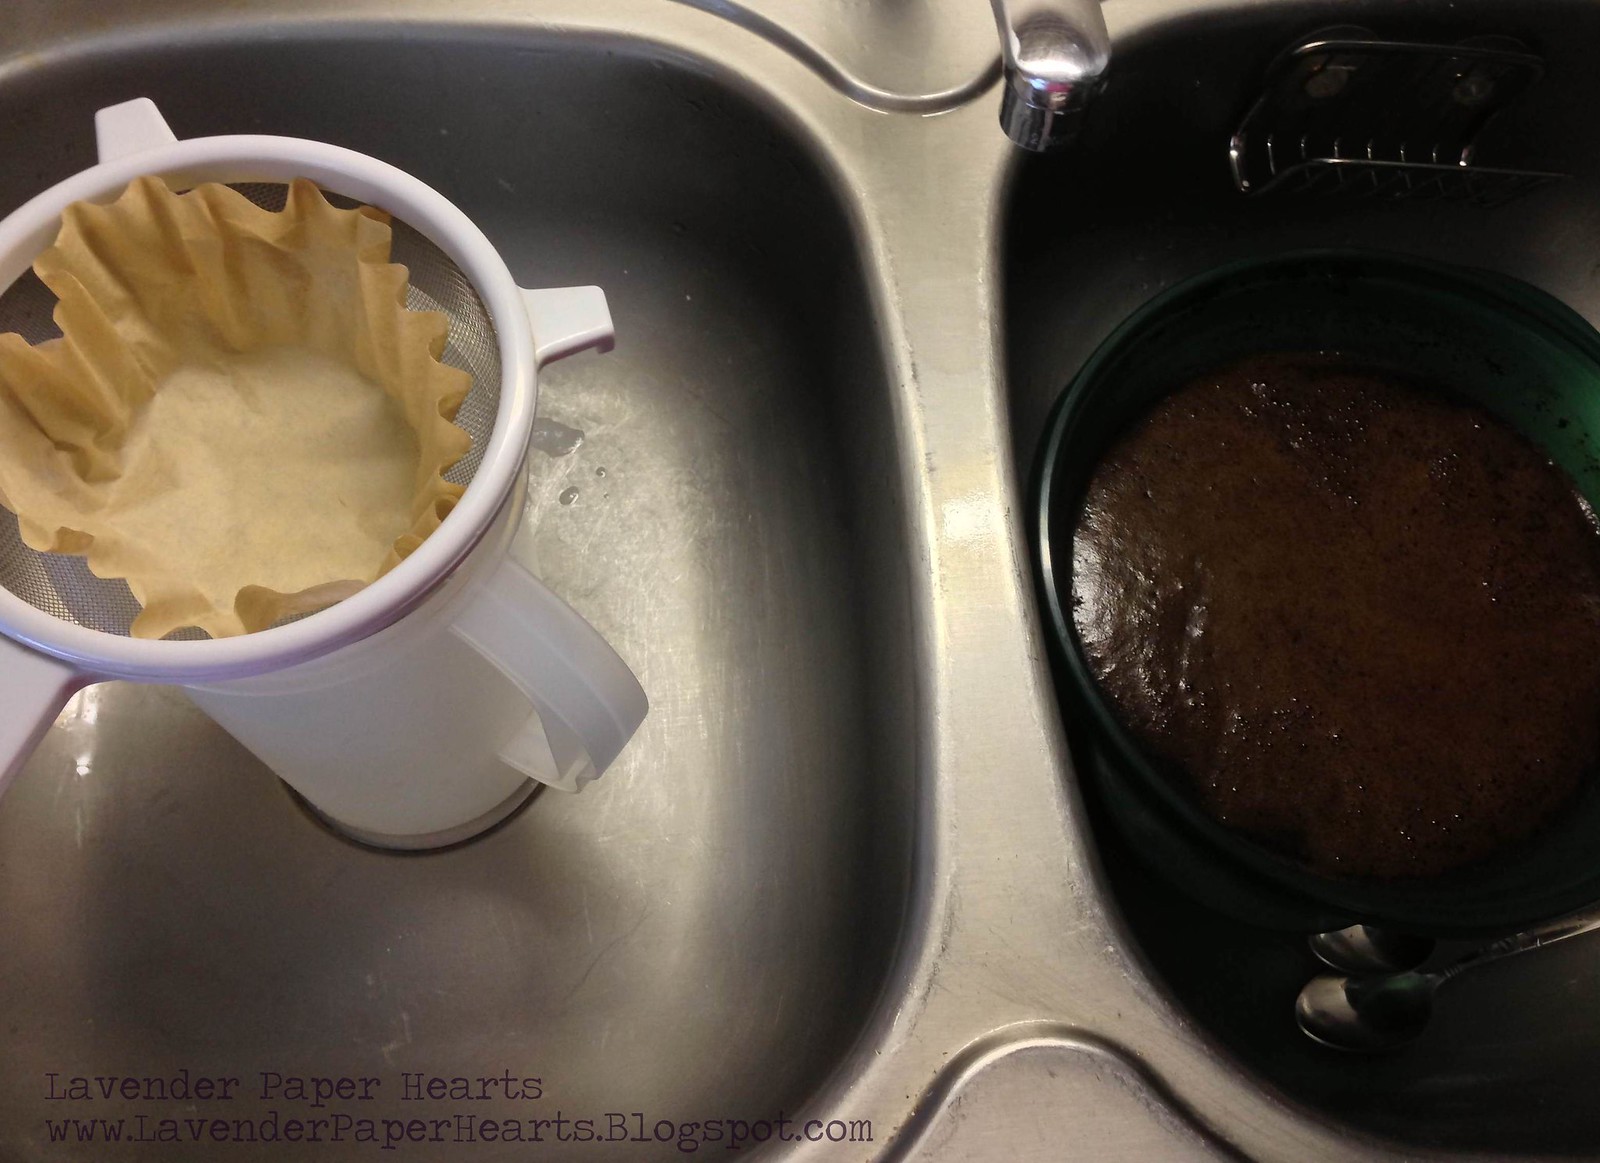
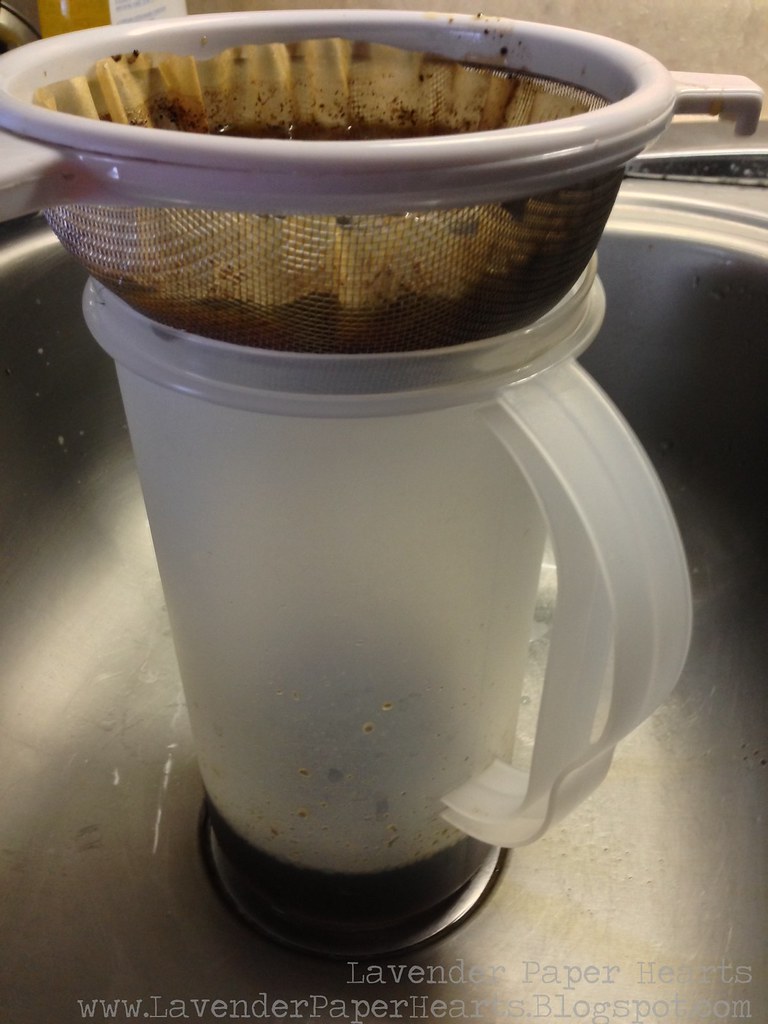
Once you're done letting your coffee steep, get out a strainer and either cheese cloth or large coffee filters that will fit in the strainer.  I like to do this step in the sink because I'm a klutz and I have knocked my drip coffee over before, so I don't take any chances and I just do it in the sink. You'll notice I also put the coffee bowl in the sink so that if any drips when I'm ladling it into the filter set-up I don't have to worry about making a mess. 


Mmmm! Sometimes I have to change out the filter if there are too many grounds in there - which can happen. If you don't want to bother changing the filter and you just have to wait a bit longer to strain the coffee. Walk away and do something else, it will, eventually, drop into your pitcher. It just might take a little more time.  I'd say this process takes about 15 - 20 minutes depending on how much I walk away to let it strain thoroughly. 


Once you're all done, you've now got liquid gold!! Put the pitcher in the fridge and you can either enjoy it right away, or wait until it's nice and cold and go from there. 


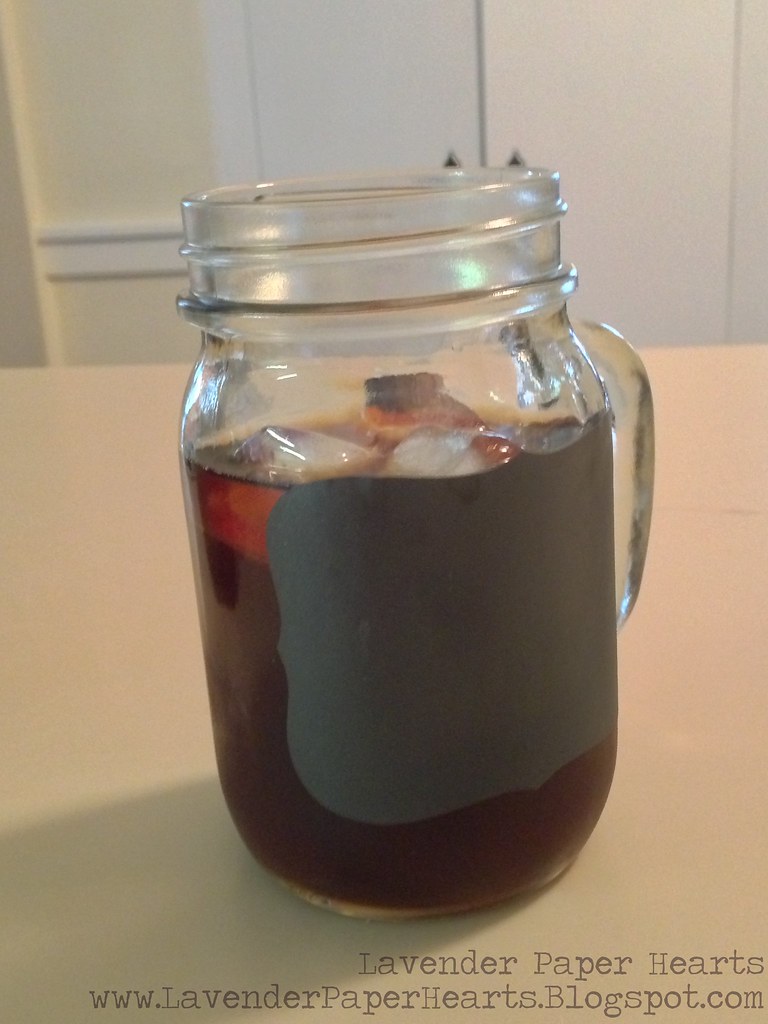
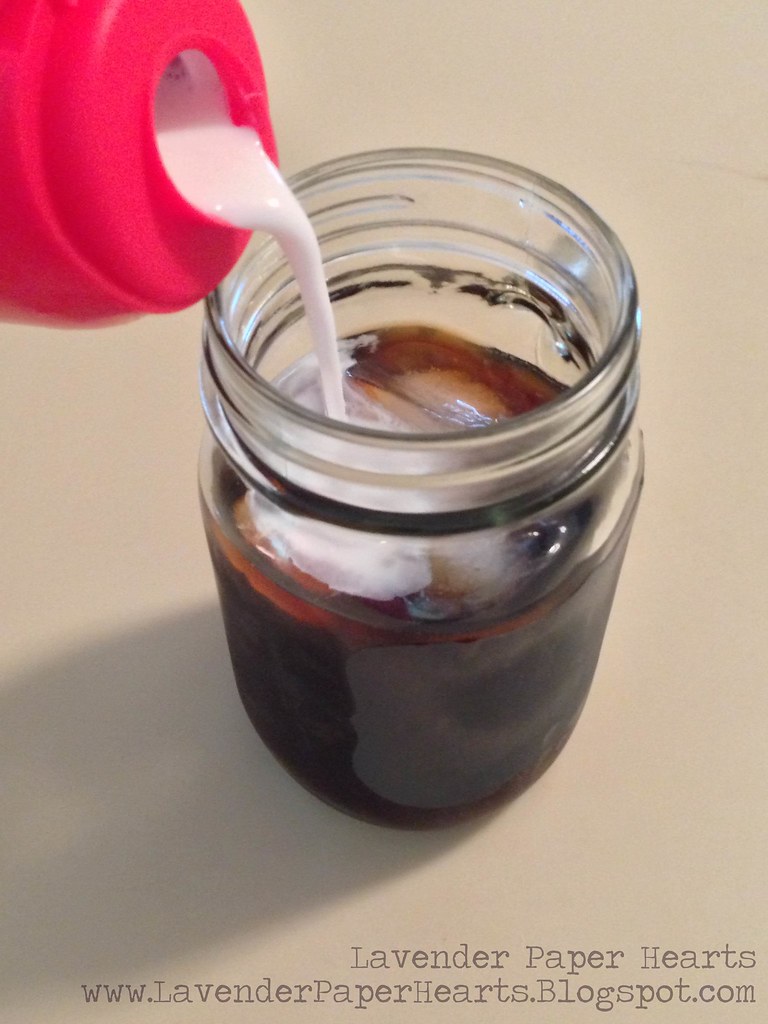
When I make hot coffee, I tend to drink it black, but there's something about iced coffee that makes me crave something a little sweet. I use 3 big ice cubes, and a splash of French Vanilla Coffee Mate. Perfection!! 

(07.01.2014 - ADDITION) I've started trying to stay away from extra soy and unpronounceable chemicals in my diet so I've been making my own creamer. Here's what I do: In a jar I mix together 3/4 cup almond milk with 3/4 cup coconut milk, and a few healthy dashes of vanilla extract. Put on the lid, shake, shake, shake, and you've got delish creamer to go with your coffee!!  (Some brands in the refrigerator section of the store sell this combo in one carton making for instant creamer - even easier!)

 + 


When I made this batch (using only 8 cups of water) it was a bit strong so I added 1 cup of water to my pitcher.  It should be just perfect!! 

Enjoy some cold brew coffee next time you get a hankering for coffee!! There's nothing more lovely in the morning than a cup of iced coffee.  I prefer to take it out to enjoy on the porch along with a good book. It's usually still a bit cool and with my iced coffee and book it's like a glorious little escape a little before I start my day. 

Wednesday, January 16, 2013

DIY Dog Treats

After a glorious amount of precious pups in holiday pet bowties, I thought I'd share my homemade dog treat recipe that I've been whipping up for the in-house model since we moved to the East Coast.  I decided to whip up a big batch for my friends animal babies this Christmas, too.


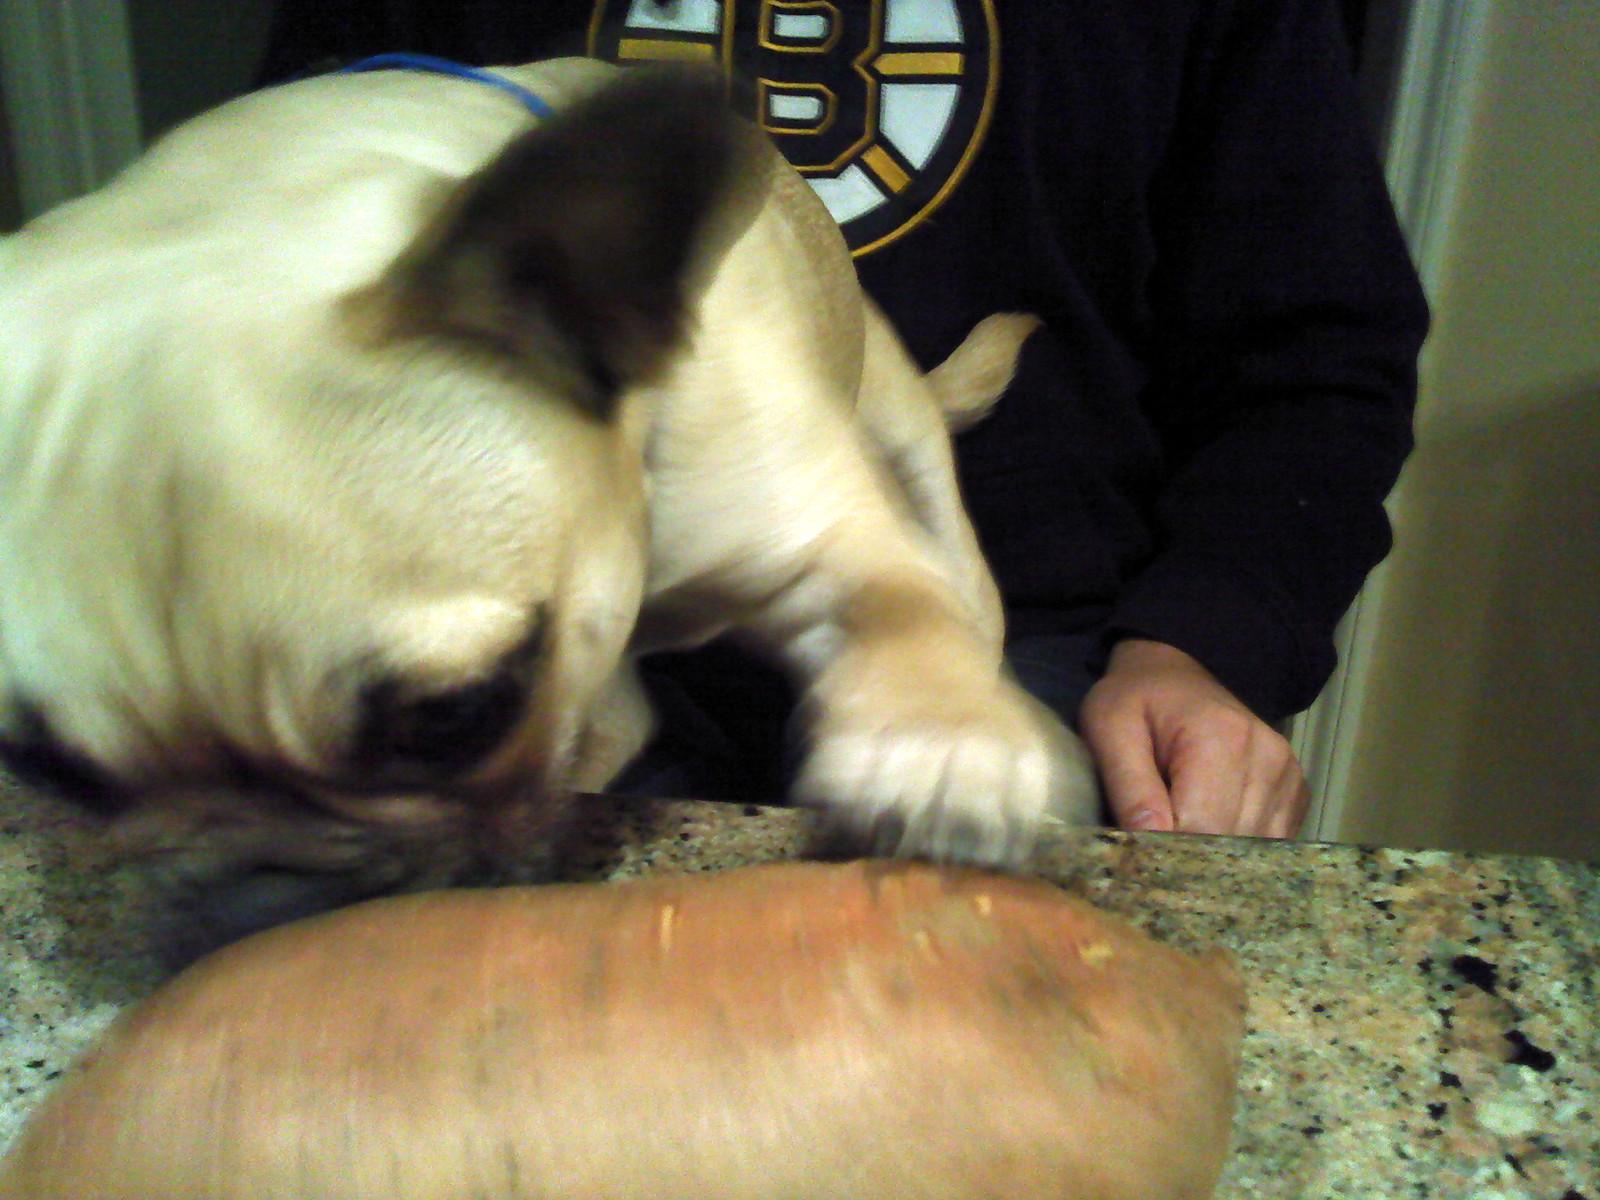
I had a bit of free time one day and felt like making Bailey some treats from scratch. After searching around online for various homemade recipes, some which had ingredients I didn't understand for a dog (like vanilla, really?) I came up with this one. I've been making treats now for Bailey every few weeks for the last few months, and now whenever Bailey smells sweet potato cooking, he comes running and sits under my feet while I work.  He would eat the whole sweet potato raw if we'd let him.

The recipe is versatile enough that you can use pumpkin or squash too. I had extra canned pumpkin around the holiday time and I used it in the treats and they were met with just as much enthusiasm as the sweet potato!! Also, this recipe really lends itself to halving or doubling. You can make as many or as few treats as you'd like.

Puppy Love Dog Treats

First things first. This recipe requires only 4 ingredients:

  • 1 cup wheat flour
  • 1/2 old fashioned oats (not quick oats)
  • 3/4 cup cooked sweet potato 
  • Some water - the amount you'll need depends on the size of your sweet potato
See, Bailey really loves sweet potatoes!! 

You need to start by cooking your sweet potato. I cook mine in the microwave. I wash the sweet potato and then pierce it many times with a fork, put it on a small plate, and pop it in the microwave. Depending on the size of the sweet potato, and how spiffy your microwave is, the cooking time will vary. I usually have to cook mine between 5-10 minutes to get it to be nice and soft.


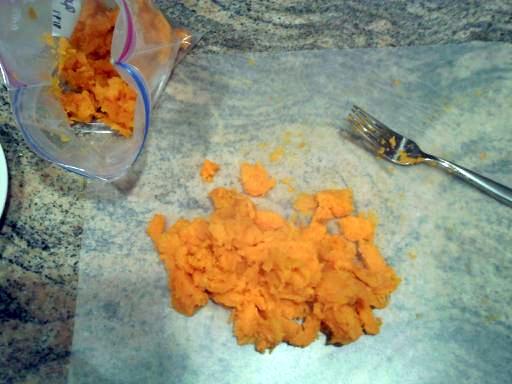
Let the sweet potato cool for a few minutes before digging into it - it's hot!! Scoop out all of the sweet potato (don't use the skin) and throw it in a freezer bag. You'll have more than you need so I always freeze the extra to use next time. Once it's in your bag, you want to add enough water until the mixture closely resembles soft baby food. I usually end up adding at least 1/2 cup if not more, but again this depends on the size of your sweet potato. If you're using canned pumpkin, no need to add water, it's already the right consistency. This step is important to make sure that your treats don't turn out too hard after baking (though they'll probably still be gobbled up).

Next, you want to add all of your ingredients to a medium sized bowl or if you've got one a Kitchenaid bowl.  Mix with whatever you're using (hand mixer, kitchenaid, your own arm) until well combined. Don't over mix though - wheat flour tends to be less forgiving with over mixing and can make the dough really tough. The end product should look like less sticky cookie dough. If your dough is too dry, you can add a teaspoon or two or three of water until the dough looks less dry.


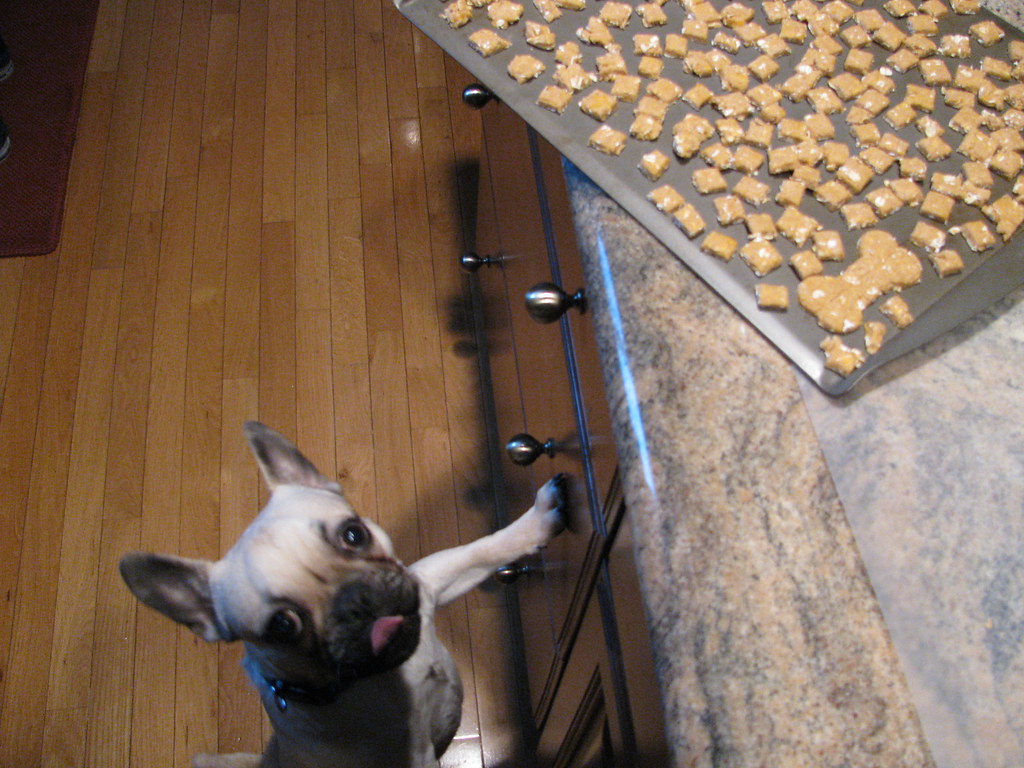
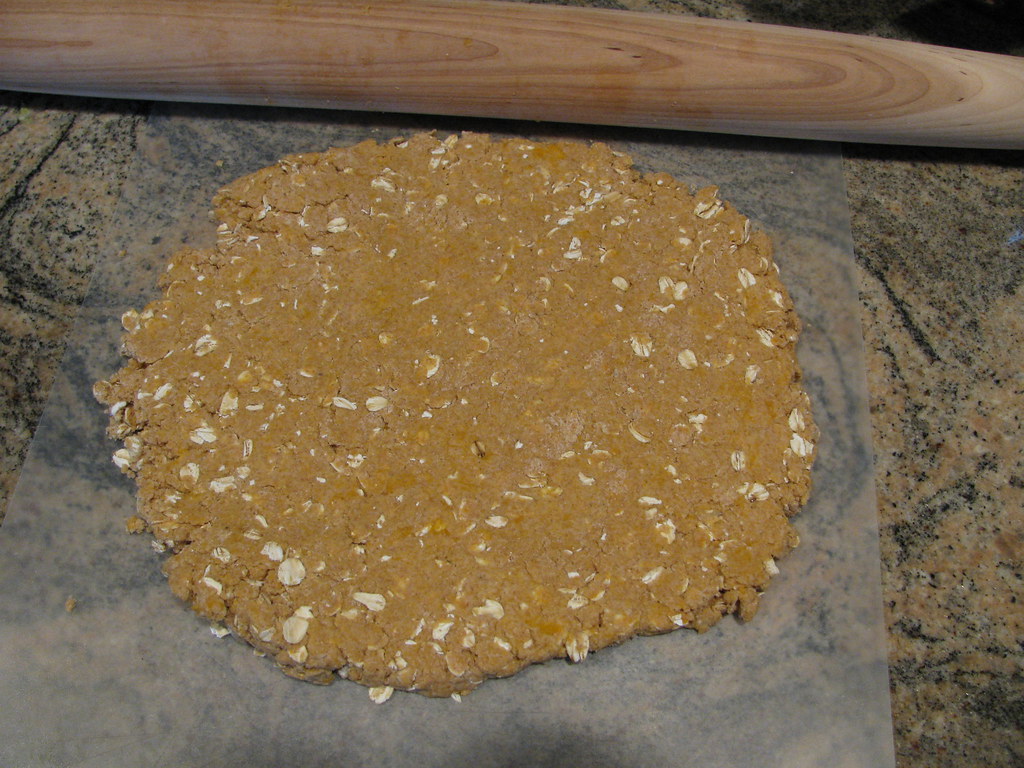
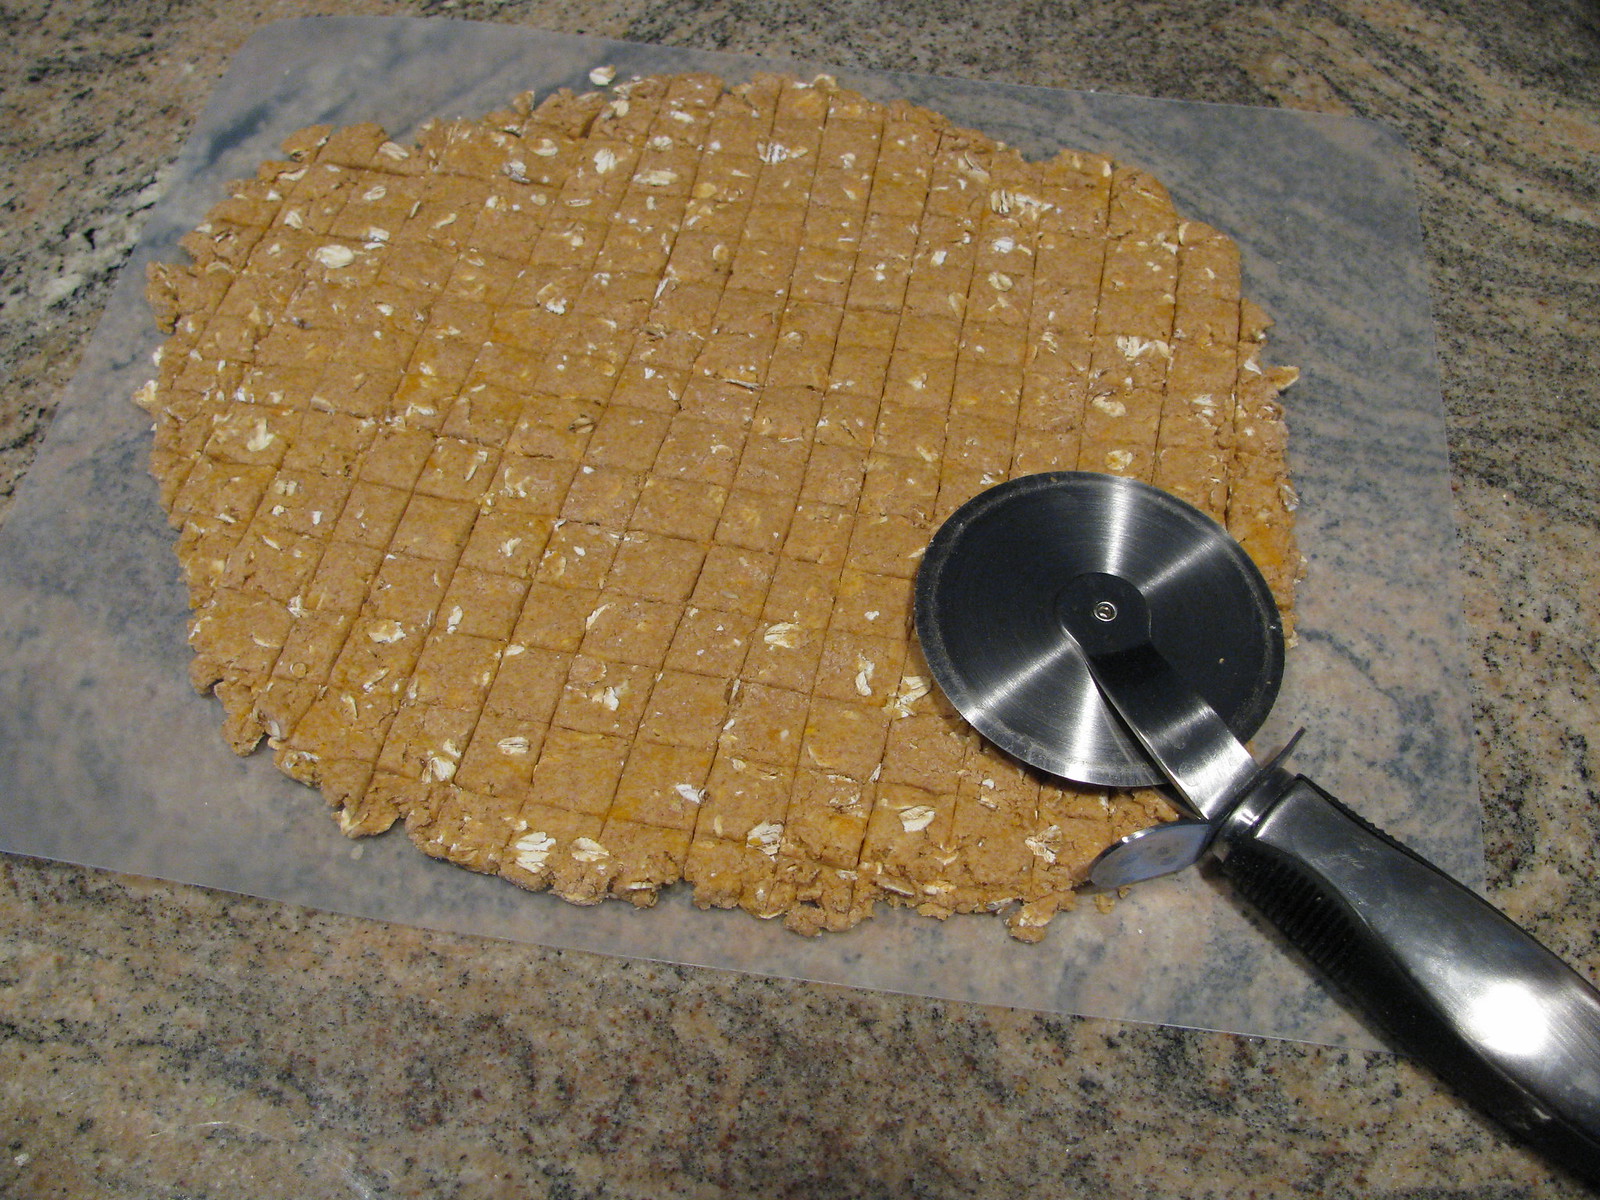
Pre-heat your oven to 350 degrees. Roll the dough out on your counter until it's about 1/4 of an inch thick. It won't look like very much dough, but for most dogs you'll need little treats so it will make more than you think it will. Using a long knife or a pizza cutter, cut up the treats.


The size you decide to make your treats depends on you. When Bailey was a little little puppy I made mine about 1cm by 1cm. Now that he's a bit bigger I've started to make my treats bigger. If you've got a big dog, you can also use a dog bone cookie cutter!


Once you've scored up your dough, carefully transfer your treats to a parchment or silpat lined sheet (skip the pan liner if you don't have any). Using a spatula might help here. This part for some reason usually takes me the longest. Don't worry too much about over crowding your cookie sheet. Depending on the size I go with, I usually use 2 sheets.

Cook your treats for 20 minutes. If you've got 2 sheets, rotate their oven position half way through. Once you've hit the 20 minute mark turn off your oven and leave them in there for 20 more minutes - leave the oven door shut!! Once they've sat in the oven for 20 minutes with the oven off, remove the treats and set them somewhere to cool. Don't let your cute dog tempt you into giving them a treat straight from the oven. The treats can be super hot!! Also, do not box up your treats until they've completely cooled of you risk them getting soggy (and possibly moldy down the road).

These treats last 3-4 weeks in a tupperware or a sealable plastic bag. There's no need to refrigerate them.

Enjoy!!

I should add that I'd be happy to make batches of these to sell if doing them yourself seems like too much trouble.  Just contact me at my Etsy shop Lavender Paper Hearts and I'd be happy to whip some up for you!!

This post is Treat-Crazed-Bailey approved:


Friday, July 27, 2012

DIY: Dye Your Crinoline!

Hey guys - Did you check out this tutorial on Monday over at Bridesmaids and Weddings yet??!!  If not, I've got you covered below.  However, if you're in the midst of wedding planning you should definitely add Bridesmaids and Weddings to your blog reader as they site is a great source for inspiration, and resources for things like vendors!! I thought I'd post the tutorial here today, just so it's in my blog too.


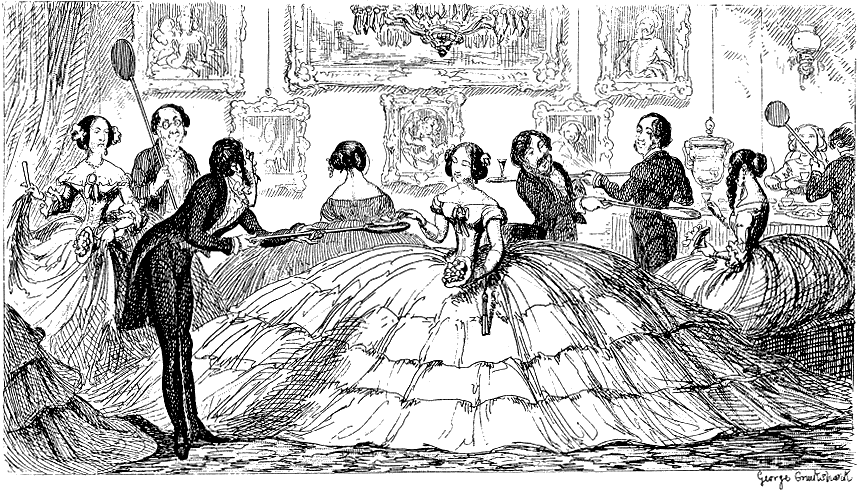
This is a tutorial for dying a crinoline or petticoat.  Now, not all wedding dresses require you to wear a crinoline, but for some dresses they really help to give the overall skirts portion of your dress definition and extra puff...plus, they're kind of fun.  Think late 1800s ladies fashion, or the gimongo ball gown skirts from My Big Fat Gypsy Wedding... Okay, well mine wasn't that puffy, but if you can work that look, go for it!!

Photo courtesy of Wikipedia


Since we're talking about My Big Fat Gypsy Wedding, while their over the top wedding dresses are admittedly not my style, I would JUMP at the chance to try one of those bad boys on. I just think it would be fun, even if I couldn't really walk and or do much of anything other than stand all day.  The ladies who wear the huge dresses on that show certainly evoke the old saying "beauty is pain," as some of the dresses weigh up to 200+ lbs and the weight of the dresses sometimes scar their hips!!

Okay, back to the tutorial...

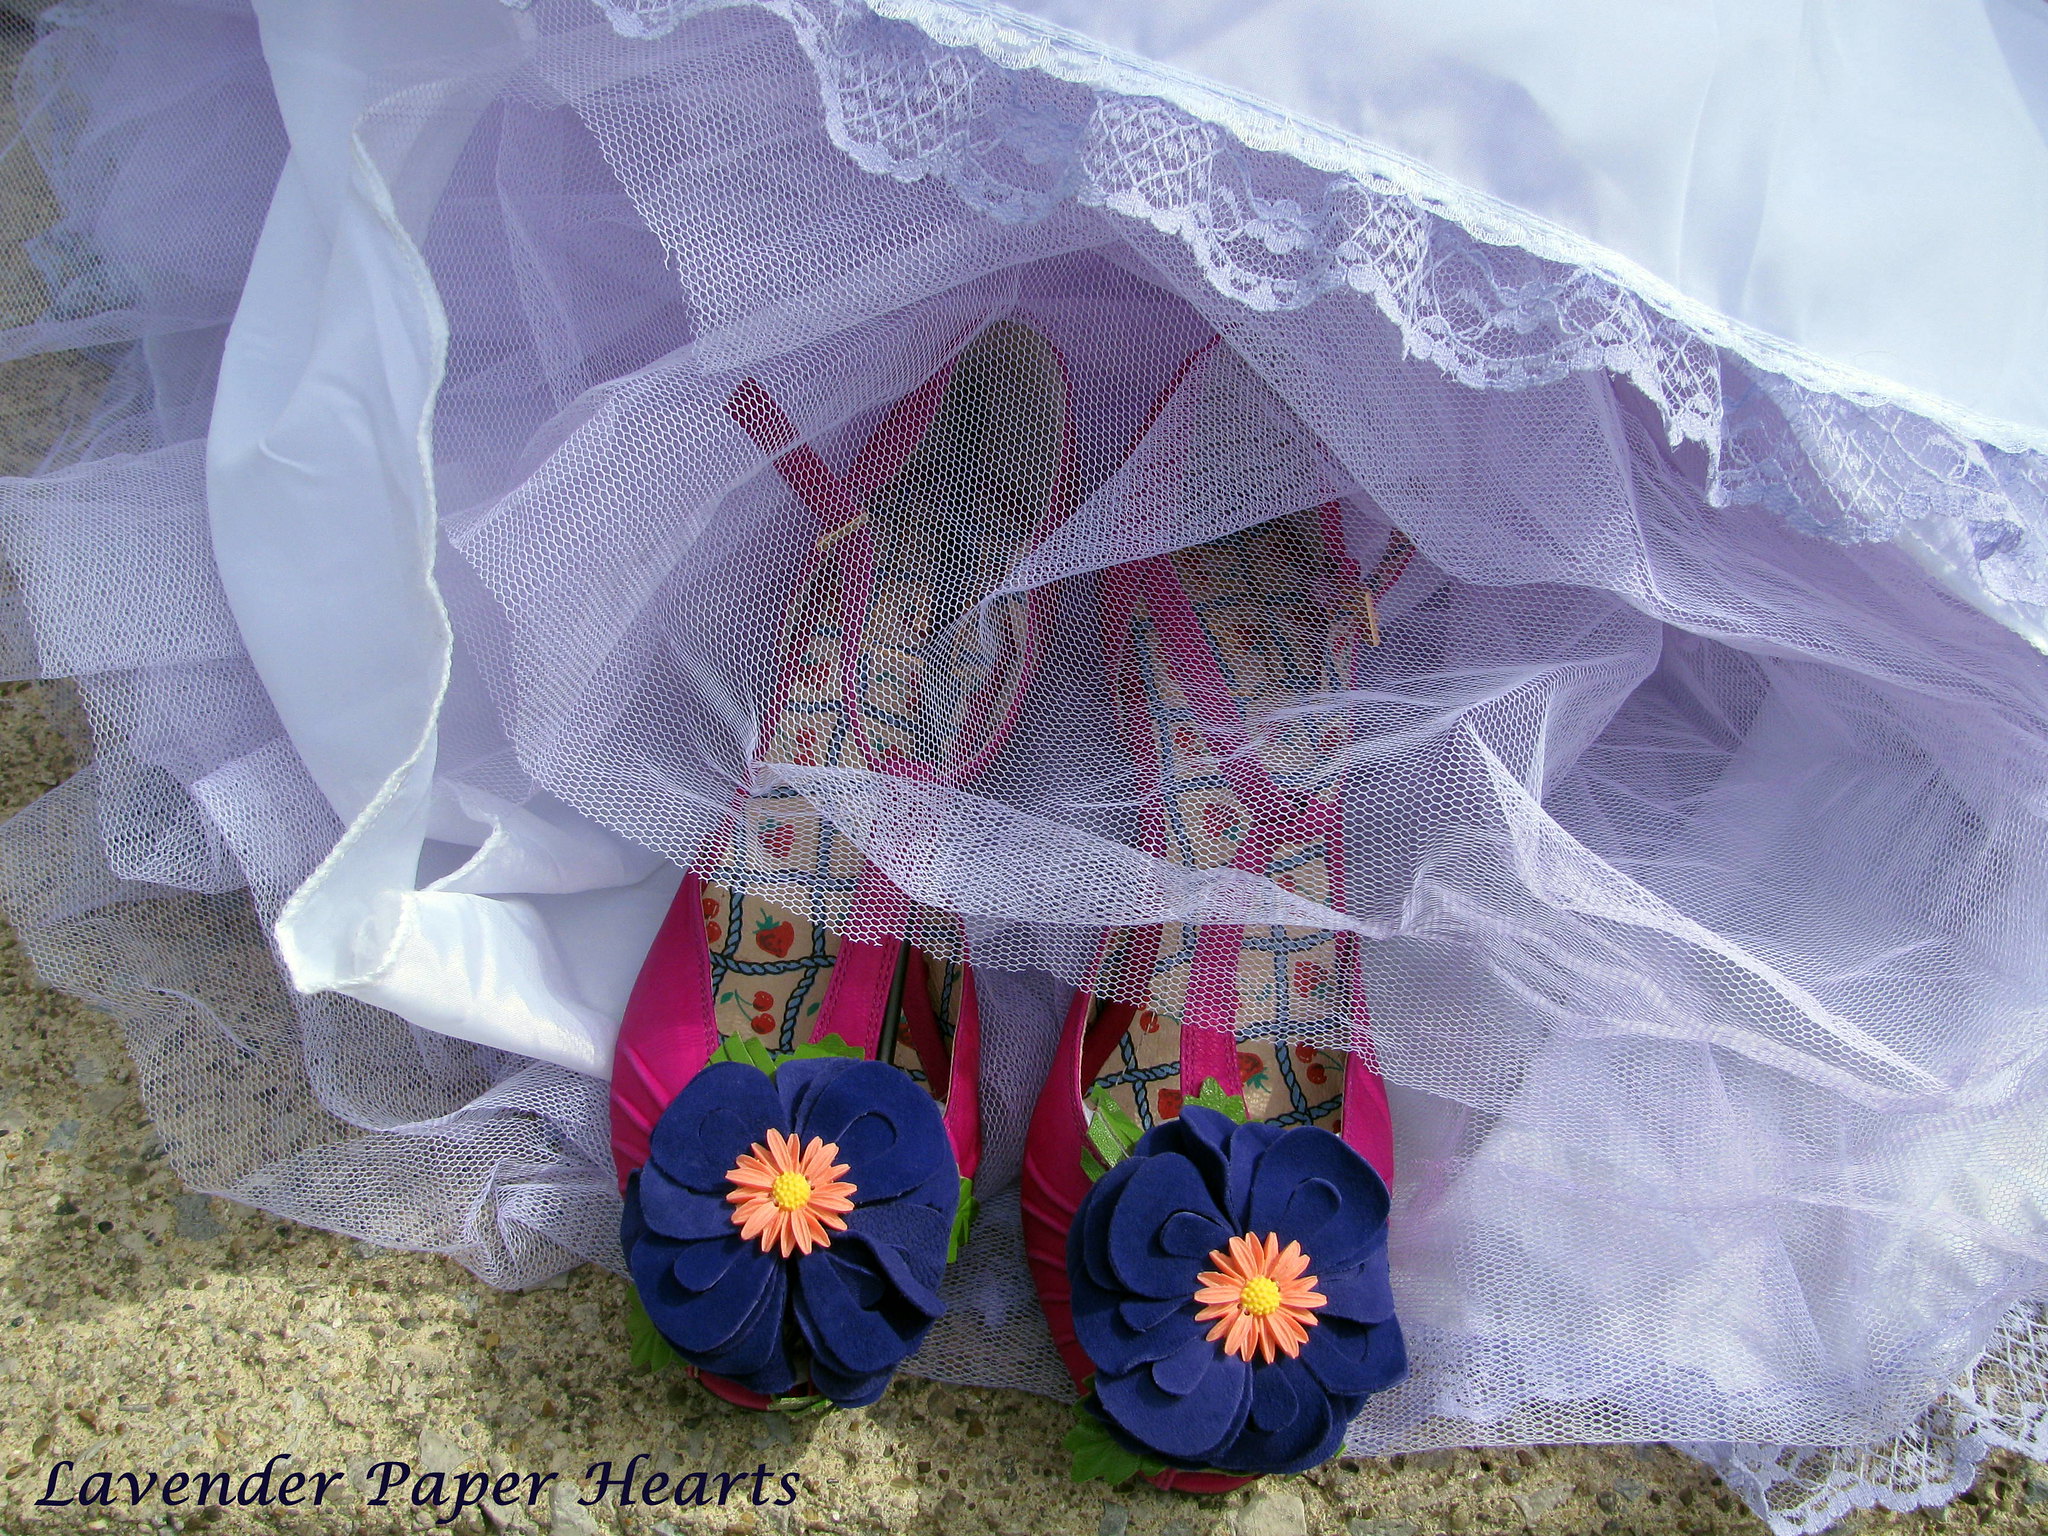
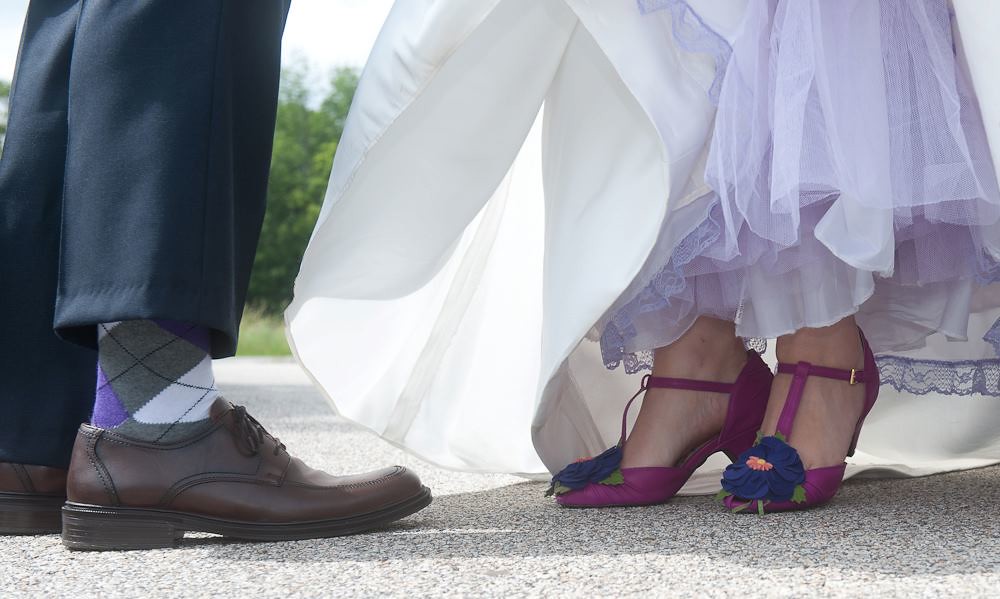
Basics of coloring your crinoline:  There are two basic ways of going about dying your crinoline. Version one is to dye the whole ENTIRE skirt.  This includes the crinoline's outer skirts as well as the tulle underneath.  Admittedly, dying the whole thing is the easier way of going about coloring a crinoline. If you want to dye the whole thing, skirts and all, merely follow the directions on the package of dye, starch and steam the heck out of the tulle section of the skirt, and you’re done.  Off Beat Bride has a great DIY tutorial on how to do this: HERE.  I found that dying the whole thing tends to give the crinoline a much darker color overall which wasn't what I was going for.  Since my wedding shoes were so bright (see awesome photo below), I wanted my crinoline to be more subtle in color.  Thus we have version two of dying a crinoline...  This version is a little bit more work, but I like that it's more subtle - go figure!


My shoes are by Miss L. Fire. They're amazing shoes, and FANTASTIC BRAND from over in the U.K.!! They were really soft leather and were a dream to wear all day!  *They also have incredible customer service.

Supplies: 
  • Crinoline – I bought mine from Angels Bridal on Ebay - $20 with shipping.
  • 1 Box RIT Dye, powder - $3.  You can use an additional box, or liquid if you want a darker color. I was going for a subtle pop of color.  Here is a really useful guide to mixing their colors. 
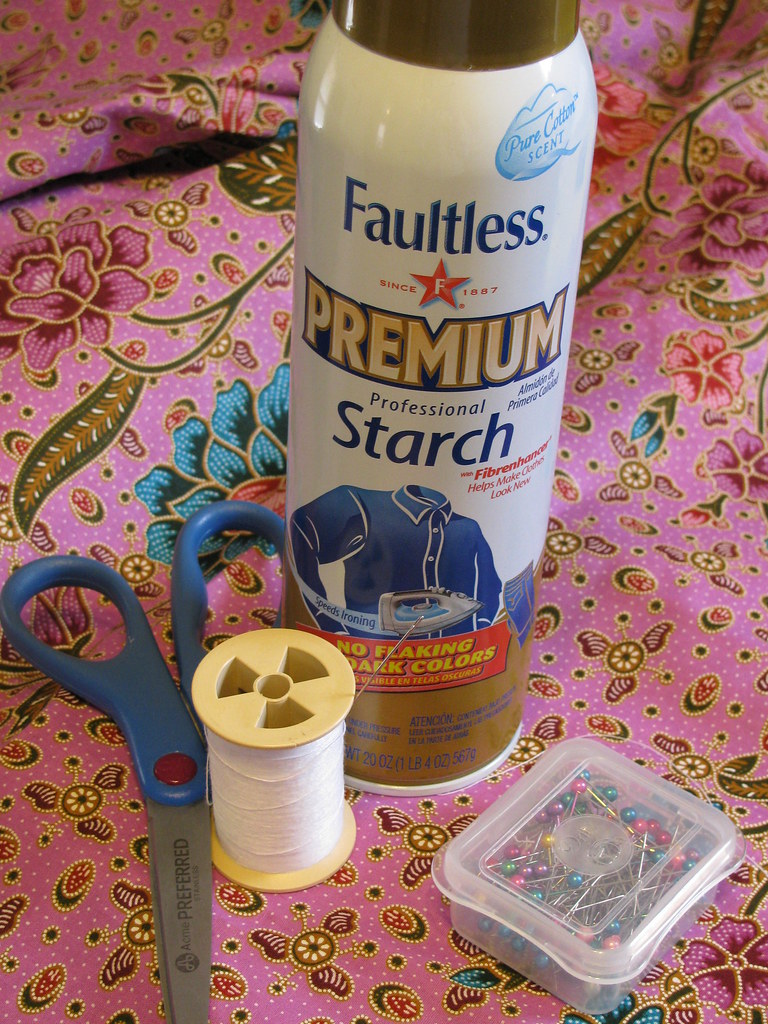
  • Clothing Starch - $3.  I read online that liquid can be more effective, but I used Faultless Premium Professional Starch and had no problems.
  • Scissors
  • Needle and Thread
  • Sewing Pins
  • Iron, with steamer function
  • Lace - $1 at Hobby Lobby (optional)


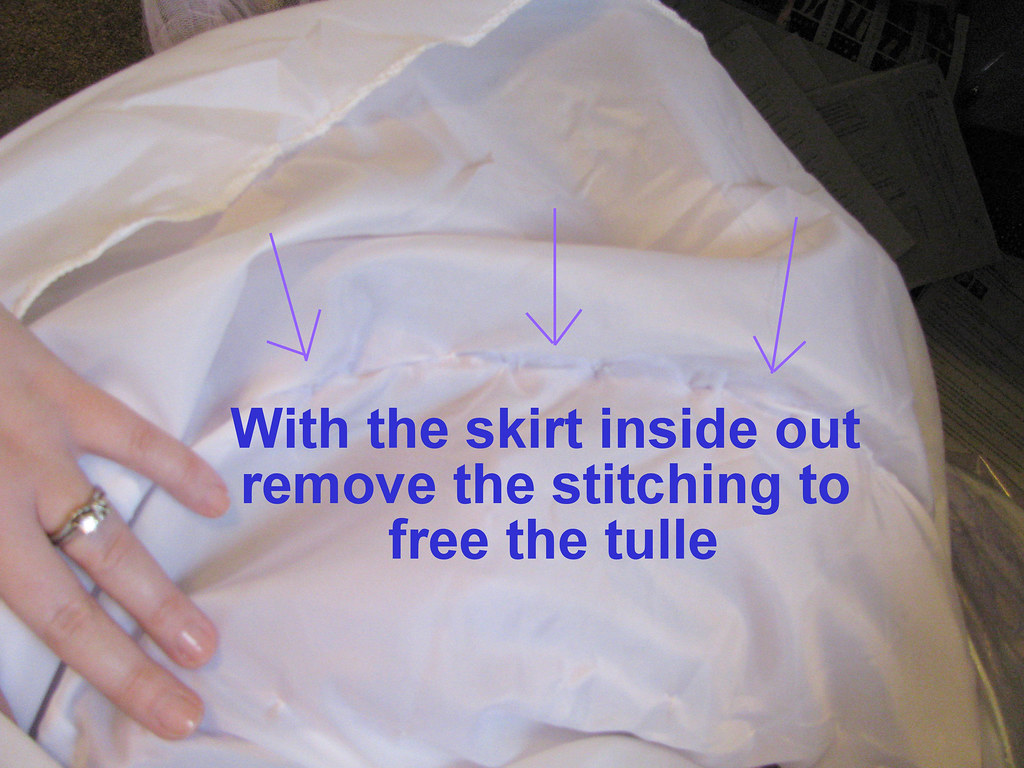
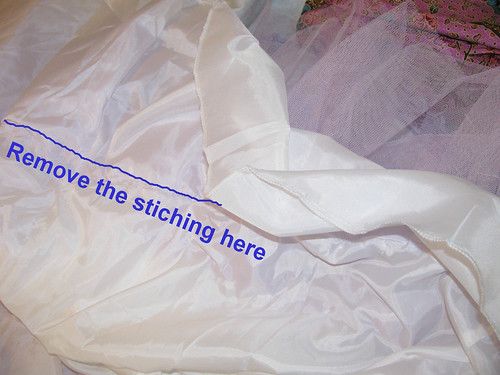
Step 1: Use a pair of scissors and turn the skirt inside out.  On the inside of the innermost skirt (this should now be on the outside) carefully snip away the seam that attaches the tulle or netting to the inner skirt.  To save yourself time when reattaching the netting, be really careful not to snip the thread that makes the gathering in the skirt.  You may have more than one layer of tulle/netting to your skirt.  Be sure to remove all layers.


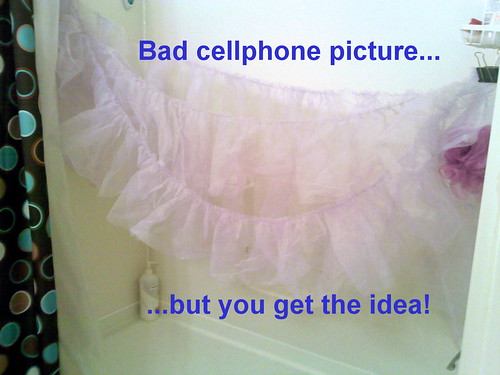
Step 2: Set the skirts aside - you’re going to be dying just the tulle/netting at this point.  You’ll need to thoroughly rinse the tulle before starting the dying process. This helps to remove the starch that is already in the skirt, it will help the tulle to take the color, and is an important step that should not be skipped.  Next, follow the directions on your RIT dye box.  I used a big rubbermaid container to dye my skirt. I didn't want to take any chances and accidentially dye my bath tub or my washing machine (I'm a renter).  Once you’re done dying the tulle, and have rinsed it until it the water runs clear, hang your tulle up to dry.  I rinsed out my tulle in the bathtub so I rigged a hanging fancy set up in my bathroom.... Clearly, it's very fancy. 


Step 3: When the tulle is completely dry, start to spray spray spray that sucker with starch.  This step will take a while so be patient. Once the tulle is completely dry (again) steam the tulle, being careful not to touch the tulle with the hot iron.  These steps help to give the tulle back the shape you washed out before dying.  Your completed crinoline won’t look terrible if you skip this step, but it will be significantly less puffy.  Repeat the starching, drying, and steaming process several times. *I probably did this 4 – 5 times.  The more you do, the puffier your skirt will be - which is a good thing!  On the day of my wedding one of my bridesmaids steamed and fluffed the skirt up one last time since it had to travel from Ohio to Massachusetts in a bag. (Thanks Melinda!!)

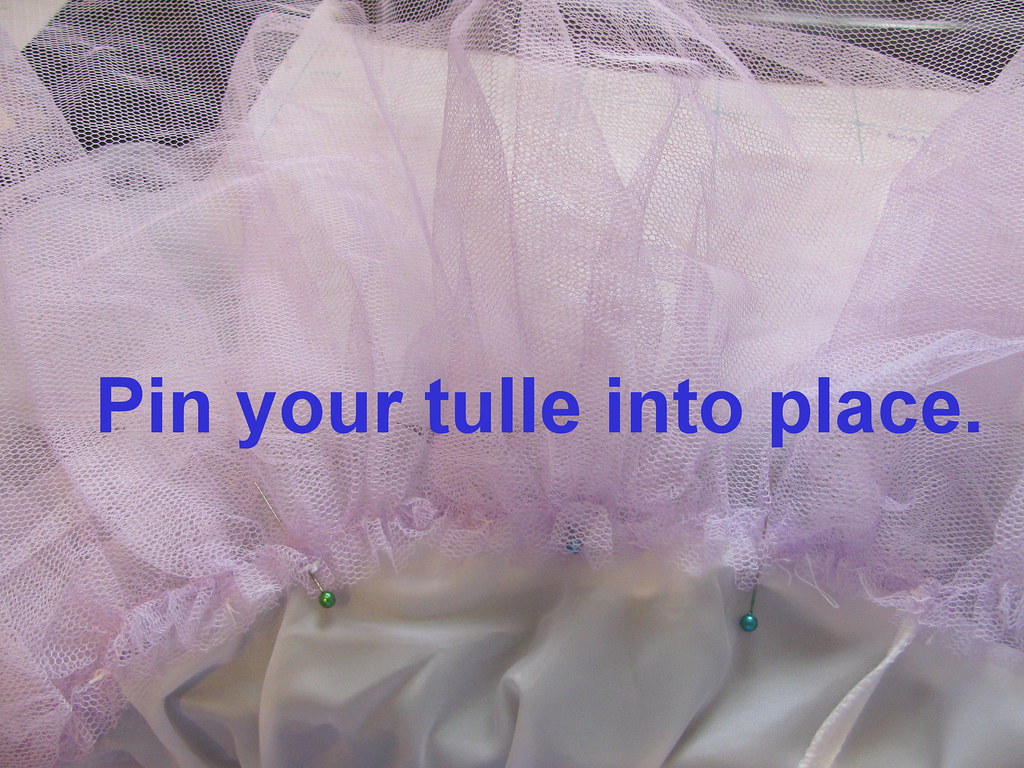
Step 4: Reattaching the tulle: When your tulle has dried completely lay out the pieces and pin them in to the skirt. I attached one layer at a time and pined and sewed it back into place, by hand, before starting the next layer.  This will take some time, unless you use a sewing machine. Either way works, I had an evening of bad tv to watch and thought it would be easier (but slower) to hand sew the tulle back onto the crinoline skirt.


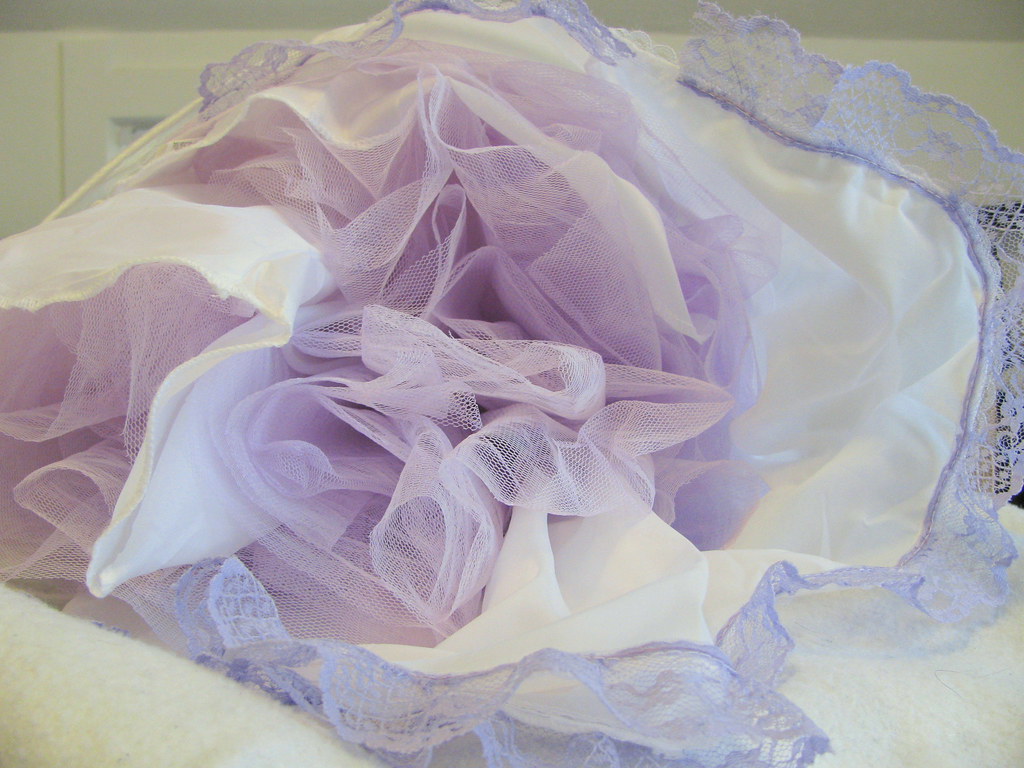
Step 5: Optional – Add a layer of lace to the inside of the outermost skirt for a bonus pop of color.  I picked up a roll of lace at Hobby Lobby while it was on sale (mine was 9 yards long and just enough).  It was a $1 addition that I think finished off the crinoline nicely.  Pin the lace in place and run it through a sewing machine or attach by hand. 

Photo Credit: Metzger Studios
Bride's shoes: Miss L. Fire
Groom's socks: Express Men


Monday, June 4, 2012

The Waiting Game Has Me Crafting Up a Storm!

This is my second submission for the Dollar Store Crafts Wedding Crafts Contest!!

I'm in a weird waiting period between the time that I've submitted my dissertation to my committee and when I actually will hold my defense (which is actually tomorrow.  This post got pushed back a bit. Wish me luck!!) Since I've done everything else I can think of for my dissertation (bibliography, appendices, discographies, miscellaneous paperwork, etc.) I've been using the rest of my time reading bad (read: AWESOME) books and crafting up a storm for a variety of different projects.

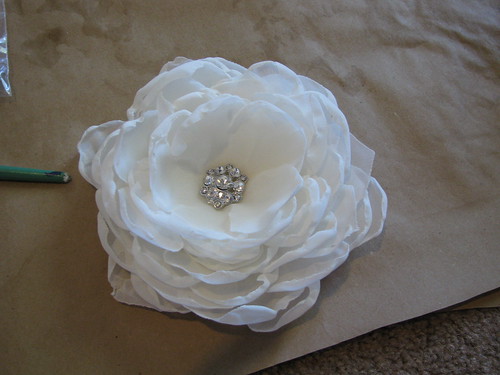
E and I attending and or are in a few weddings this summer so these were the first few projects I tackled.  Recently I made some banners (using freezer paper) for my cousin's wedding and a hair piece that my sister-in-law will wear on her wedding day. See my Etsy Shop Lavender Paper Hearts for hair pieces! I'll have a similar hair piece coming very soon!!


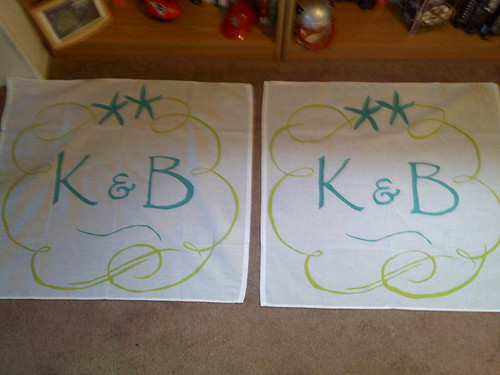
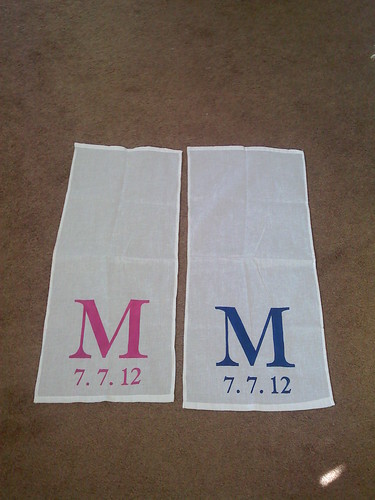
This was my first freezer paper project which I made a few months back for my SIL's bridal shower. They were used as mini-table runners for her shower and looked sweet under her cake.  My SIL is also going to use them to hang on the backs of their chairs on their wedding day!! They could even be made into little door hangs, or if you added a small dowel and grabbed a cute Sheppard's hook from the Dollar Tree you've got an instant welcome yard sign for any event!! 

I also used freezer paper on the wrapping paper for my cousin's wedding present.  I had to press it VERY LIGHTLY so that it didn't tear off the paper when I removed the stencil, but I think it looks pretty cute (if I do say so myself!)  You can find the paper bow tutorial here. I'm kind of in love with it!!

Seriously, if you haven't tried freezer paper stencils you totally should.  These stencils are actually pretty easy to do if you have a little time and patience. You can use them on all kinds of things too! We even had a little baby onesie decorating party for a baby shower this last January!!


Freezer Paper Stencil Tutorial - For Banners or Monograms


For this project I used the following supplies:
  • Freezer Paper -I found mine at my local big box store for $7. I have enough to make stencils for the rest of my life.
  • Flour Sack Towels from the Dollar Tree - If you don't want to sew be sure to check out the towels. I found that sometimes they have all 4 sides hemmed, sometimes just 3, sometimes just two.  It saves a little time if you can find some that are hemmed on all four sides, but it's a quick zip through a sewing machine if they're not finished. 
  • Paper clips or binder clips - on hand
  • Acrylic Paint(s) & Brush(s) or Sponges (I used sponges from the Dollar Tree) - on hand 
  • Paper, computer, printer - Basically you need these to get your stencil - if you draw it by hand even easier!
  • X-acto knife - on hand
  • Iron - on hand
  • Cardboard - on hand - I don't know about you, but I LOVE to keep the cardboard that comes with dresses and shirts that I buy online. I may have a supply hoarding problem.
  • Sewing machine (optional)- If you find a flour sack with hemmed sides you're golden OR if you like the rustic chic look be bold and don't bother to hem!!
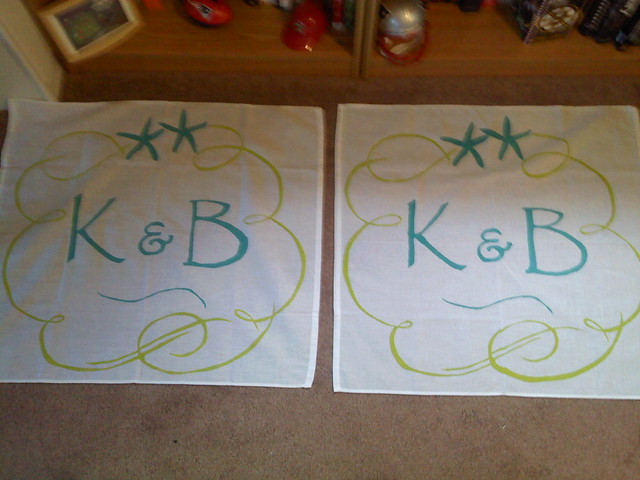
Step 1: Basically what you want to do first is figure out what awesomeness you want to create into a stencil.  I used a free online downloadable monogram from Wedding Chicks (who have amazing free downloads!)  Because I knew my cousin wasn't into anchors for her wedding day I used photoshop to modify the design and I added two sea stars which were more her speed.  (Yay for beach weddings!!)  Since the flour sack towels are 3ft by 3ft I blew up my image in Publisher so I could print it poster size. I then taped the sheets together.  (Just to give you an idea - I had 16 sheets total for the larger monogram in this tutorial.)


TA-DAAAA - one ginormous stencil!! You can see in the top right hand corner that I am apparently not very good at matching up lines. I had to fudge part of the swirl by drawing it in my hand in order to make them meet... it seemed easier than taking the whole thing apart and retaping. 

Step 2: Now, because the stencil was so big, I had to tape together two strips of freezer paper. I don't have a photo, but I just laid the two sheets on top of the stencil to see how big they needed to be and then got out my tape and stuck the sheets together.  Note: The shiny side is the part that sticks to the fabric so you want to draw on the dull side. When you open up the package of freezer paper this will be very obvious. Next you'll need your pencil or sharpie and you just start tracing away so that you copy your design onto your freezer paper. *Helpful hint: I also paper clipped the stencil and the freezer paper together since it was such a large job and I didn't want it to shift! I would say it took me about 15 minutes of laying on my kitchen floor to trace this onto the freezer paper.

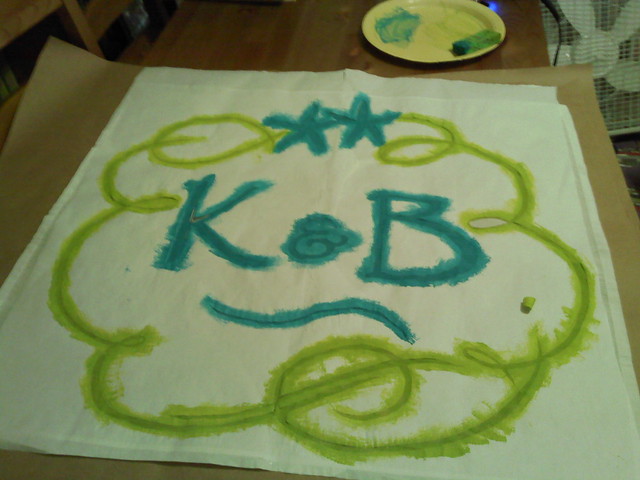
Step 3: Next I got out a thick piece of cardboard and my x-acto knife and I started to carefully cut out the stencil.  **REMEMBER TO SAVE THE LITTLE FILLER BITS - I don't have a photo of this step, but you can see in the photo below how I had to fill in the bubble part of the letter B. These are strips/shapes that you cut out but you need to remember to save them because they fill in the letter - without them my B would look like a weird D.  I had a few more of these filler bits from some of the swirls too so I laid them out in order as I cut them out so I would remember where they went.


Step 4: Once you've cut out your entire stencil you want to iron your flour sack to make sure it has no creases. This will REALLY help you out when you try to iron on the stencil - I promise!! (I tried to cheat this on my second flour sack and it was terrible and required a lot of fixing. Learn from me - don't be lazy!)  Then carefully lay out your gimongo stencil on top of the flour sack and fiddle with it for a bit until it lays down exactly how you want it.  Leave out the filler bits for now.  After setting your iron to medium high heat with no steam start in one corner and carefully begin to iron on the stencil.  Take your time because you want to make sure it's iron down correctly. If you make a mistake you can carefully pull up the paper (CAREFULLY) and re-iron it into place.  Once you've ironed the whole stencil go back and place in the little filler pieces one by one and press them with the iron onto the flour sack.  Your finished work should look sort of like the image above.

Step 5: Now that you've got your stencil in place it's time to paint.  Put a piece of cardboard behind your fabric/stencil so that it won't leak onto whatever surface you're painting on. For good measure I clipped my fabric to the cardboard so that it wouldn't wiggle and smudge paint on the back side.

Using a brush or a sponge (I used a sponge I cut in half) carefully begin to blot on your paint.  You don't want to add too much at first because the fabric will soak it up. 


Step 6: Once you've applied all of your paint let the whole thing dry for a while.  I let mine dry for about 30 minutes before I attempted to peel the stencil off. I wanted to reuse the stencil for a second flour sack to save me some time so I peeled it away really carefully.


You can reuse the stencils about 2-3 times before they start to not really work any more.  To reapply the stencil I used a sheet of packing paper between the stencil (which now had paint on it) and my iron so I wouldn't hurt my iron - it worked perfectly!

If it's a smaller less detailed stencil you can just cut a new one. For the little monogrammed banners I made for my sister-in-law I just cut a new stencil.  You also might notice that those are smaller - I only used one flour sack that I cut in half and then I hemmed up the raw edges with my sewing machine.

These banners are going to be used as decoration for my cousin's wedding.  They can be hung up on a bar, draped across a table - you could even get a dowel and some yarn and hang them from a sheppard's hook (the Dollar Tree usually has really cute ones in the summertime!!)

---

Lastly, be sure to check back frequently - I'm really excitedly working with a fantastic wedding blog, Big Day for 10k, to  host a giveaway for one of my hair pieces in the next few weeks!! I'll make a post as soon as it's all nailed down!! :)

Please follow me on this blog or 'Like' my shop on Facebook for product updates in my shop and other fun posts from my blog!


Friday, June 1, 2012

Craft Challenge: Wedding Crafts for Dollar Store Crafts

Okay - So this post is a two-fer.  It's a great excuse to share a tutorial on this blog, but it's also an entry I'm submitting for the Dollar Store Crafts Wedding Crafts Contest.  A little known secret is that I freaking LOVE the Dollar Tree... Okay, well this isn't really a secret because I'm pretty sure I mention it all the time to pretty much anyone who will listen!!  I always find really great things there to use and/or repurpose for crafts and a LOT of the projects I used for my own wedding as well as other miscellaneous crafts have been made with materials from the awesome Dollar Tree I have down the street.

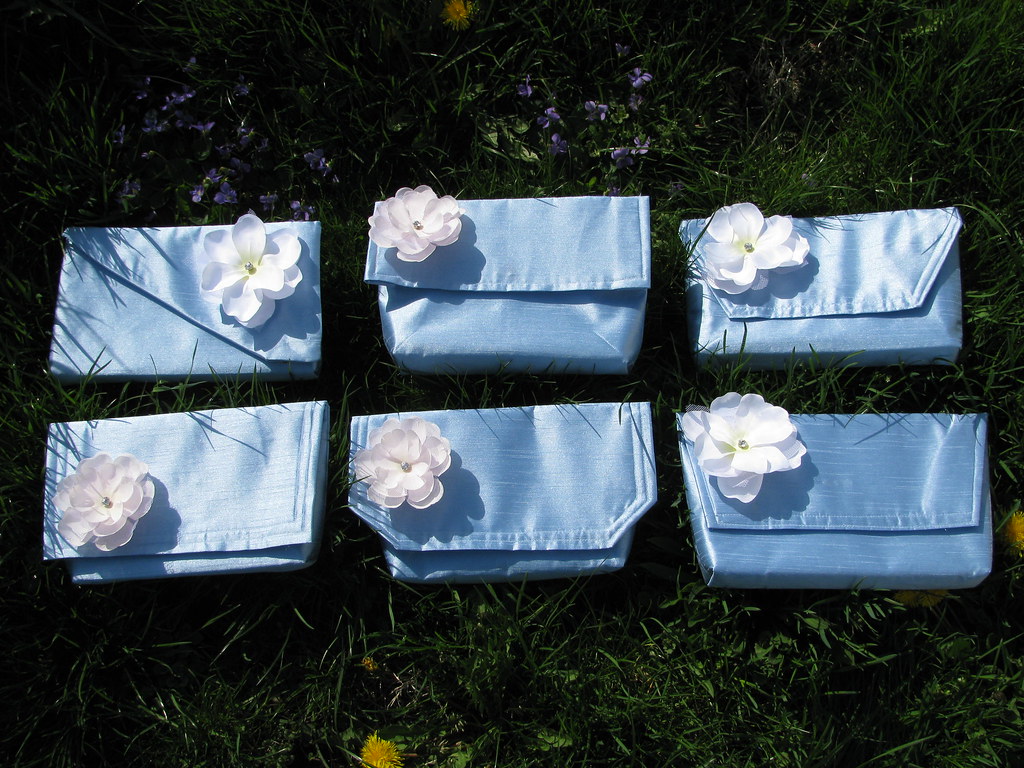
The craft I wanted to share with you (and submit to the contest) is a tutorial for clutches that I made for my bridesmaids for my wedding.  I've been in a handful of weddings and I always feel like there is "stuff" I want to carry whether that's my phone, camera, lipstick, band-aids, etc. I thought it would be a nice gift for my ladies to store their own stuff on our big day!!

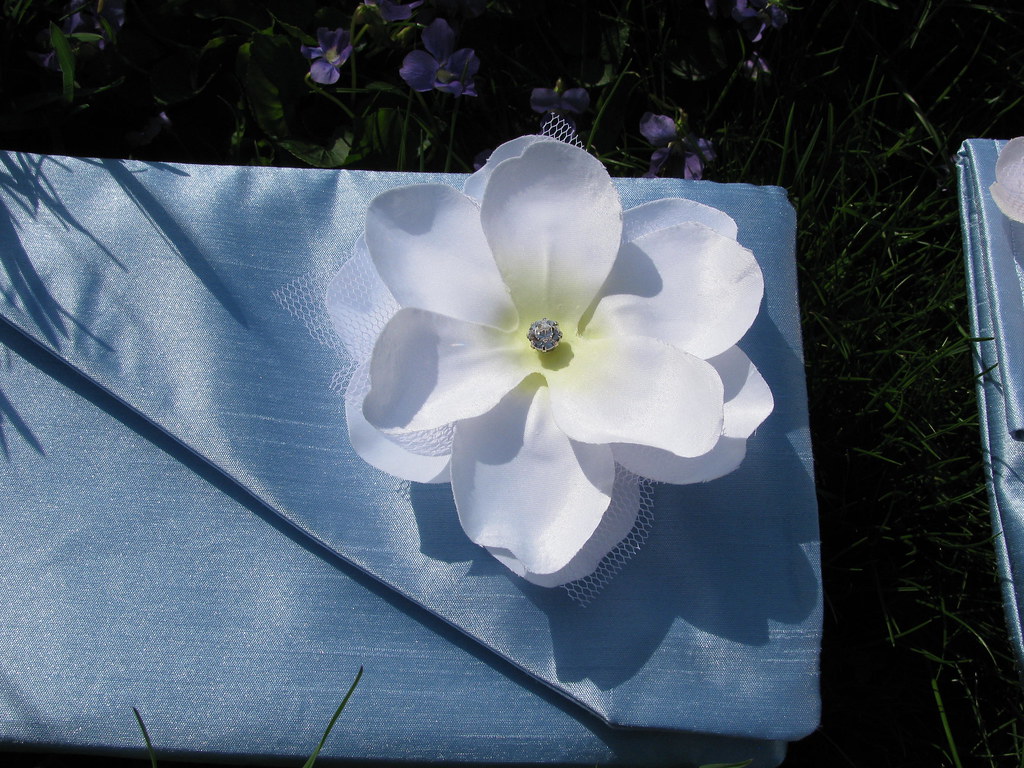
 Close up of the clutch I made for my MOH & super awesome sister!  I made flowers for each clutch (with a pin and clip) that my bridesmaids also wore in their hair on our wedding day.  Similar flowers can now be found in my Etsy Shop
  
Easy Peasy Pretty Placement Clutch Tutorial

This project is SUPER easy. I think they’re pretty darn cute AND useful (if I do say so myself)!

What you need:

  • Pretty placemats!! Mine were $1 each and I found them at The Dollar Tree. 
  • Depending on the thickness of your placemat you might consider using iron on-heavy weight interlining. This makes your clutch feel like it’s got a bit of thickness/body and help keep its shape. The clutch will feel thin without it.  Feel your clutch and decide how thick you want yours.  I used Pellon 809.  I found this at Joann’s and with a coupon one yard was $1.99.  This is enough to use double layers of interlining on 4 clutches.
  • Silver magnetic snap closure. I got 3 for $1.99 at Joann’s (also with a coupon).
  • Sewing Machine
  • Scissors
  • Ruler
  • Sewing pins
  • Iron & board
  • Cardboard and extra fabric on hand (optional)
  • Flower or brooch for decoration (optional) 
 Step 1: Decide which side of the placemat you’d like to be on the outside of the clutch and which side you’d like on the inside.  Play around folding the placemat with the “good/outside” clutch fabric inside, to decide how deep you want your clutch to be.  A good rule of thumb is folding the clutch so it’s close to thirds.  If you want to box out the bottom, you might want to make the top/flap portion of your clutch a little bit smaller compared to the bottom 2/3rds (the pocket portion).  Once you’ve played around and found a shape you like, with your iron, gently press your clutch shape.  This helps you to see the shape you’re working with moving forward. This is not necessary, but really super helpful. Now rip the seam on the top end of your placemat, where the top flap of your clutch will be.


Step 2: Next, cut the interlining so that it will fit just within the seams of your placemat.  If you use two pieces of interlining you can iron them together so they won’t slide around.  Place the interlining inside the placemat and iron again.  If you’re using a magnetic snap closure on the clutch, fold the placemat in half to find the middle of the clutch.  Measure about 4 inches down on the body part of the clutch, and follow the directions on the package to attach the first magnet button.
...oops, I forgot to take a photo of this step. 

Step 3: Now you’re going to sew up the sides of your clutch by sewing along the sides of the placemat. Remember that the "pocket" portion of the clutch needs to be turned inside out so that the seam will be hidden in the final product. I wanted my clutch to be a bit narrower than the size of the placemat so I lined up my foot about ¼ inch from the placemat’s already stitched line. 


 Step 4: Once you’ve sewed the seams on either side of the clutch, you can either leave the bag as it is (which will create an envelope type clutch) OR you can box out the corners of the clutch to give a little space for all of your stuff.  Either option is lovely, but I like to be able to carry around random “necessary” junk, so I went with boxed corners. 


 To box the corners, stick your finger inside one corner and fold the seams on either side until you get a triangle at the top.  Iron the seam open, making sure that the seam is truly centered (it should look like a perfect triangle) by laying a ruler on the seam.  Mark a line, depending on how wide you want the box at the bottom of your seam, and sew along this line.  If you’re not sure, start with a smaller triangle.  You can always re-sew the line further out to make your clutch bottom bigger.  (For reference, I made my triangles about 1.25 inches.)

Step 5: Turn your clutch right side out.  Now you’ve got to focus on the top/flap portion of the clutch.  You can pick any design you want.  Rectangular flap, turn in triangles, severe triangle… the possibilities/combos are endless.  I made each of my clutches a little different so no one girl has the same true pattern.  Once you’ve laid out a design you like, iron it down and pin to secure.  Be sure to add your second magnetic snap at this point, just before you pin the very top seam.  Sew along top portion of the clutch.  You might want two lines, depending on style and or to secure your pattern.  


Step 6 (optional):
1. You can make the bottom of the clutch a little stiffer by tracing the bottom of the clutch on some cardboard, wrapping some leftover fabric scraps around the cardboard and then sliding it into the bottom of the clutch.  I did this with all of the clutches but it's an extra/optional step so I did not photograph it.

2. Add a pin or flower or leave them plain.  I ended up making hair pieces for my bridesmaids which also had pins on them so they could double as brooches. I added them to the clutches when I gave them to the girls, but they took the flowers off on the day of to wear them in their hair.

Enjoy!!


Stay tuned for another tutorial later in the week!!  :)