Showing posts with label recipe. Show all posts

Wednesday, August 28, 2013

Recipe: Salsa-y Salsa Fresca

Let's talk salsa! When I was growing up we used to always have an inordinate amount of tomatoes growing in the backyard during the summer. At some point, you can only eat so many tomato salads before you need to branch out, and fast. I thought a lot of people in So Cal made their own salsa but when I asked some of my girlfriends for their recipes they laughed and said they buy stuff from a jar. To be fair, growing up in Southern California means you can get really really good salsa from a jar - not that Tostitos stuff (though secretly that's yummy in a pinch).  I guess we used to make our own because of the WAY TOO MANY TOMATOES thing happening in our backyard.  

Have you ever wondered the difference between pico de gallo (also known as salsa fresca) and regular salsa are? I never really thought about it much until a few months ago when we were talking about it with some friends. I decided to Google it and find out exactly what the difference is. Here's what I found: Salsa tends to have ingredients in it that are cooked in some capacity, and it also tends to have much more liquid. Pico de gallo, tends to be used as toppings on tacos etc. and is made with ingredients that are not cooked. It also tends to be chunkier.  

In the grand scheme of things I like my salsa to have a bit more chunks in it than the blended style. I like to chew it a bit more than slurp it up with a chip.  My recipe isn't a true salsa fresca nor a true salsa which is why I'm calling it the ridiculous name: Salsa-y Salsa Fresca. I've been making variations of this salsa recipe since I was in high school and the recipe has developed over the years. For instance, the roasted corn is now a must have in nachos or in salsa for me.  The nice thing about the recipe, too, is that it's totally modifiable to your tastes. I tend to not use jalapenos because they're too hot for me, but I do use cayenne. I also sometimes add half a cup of black beans to the recipe to make it a black bean salsa.  

*Why is it always overcast on the days I decide to do a food tutorial?? 
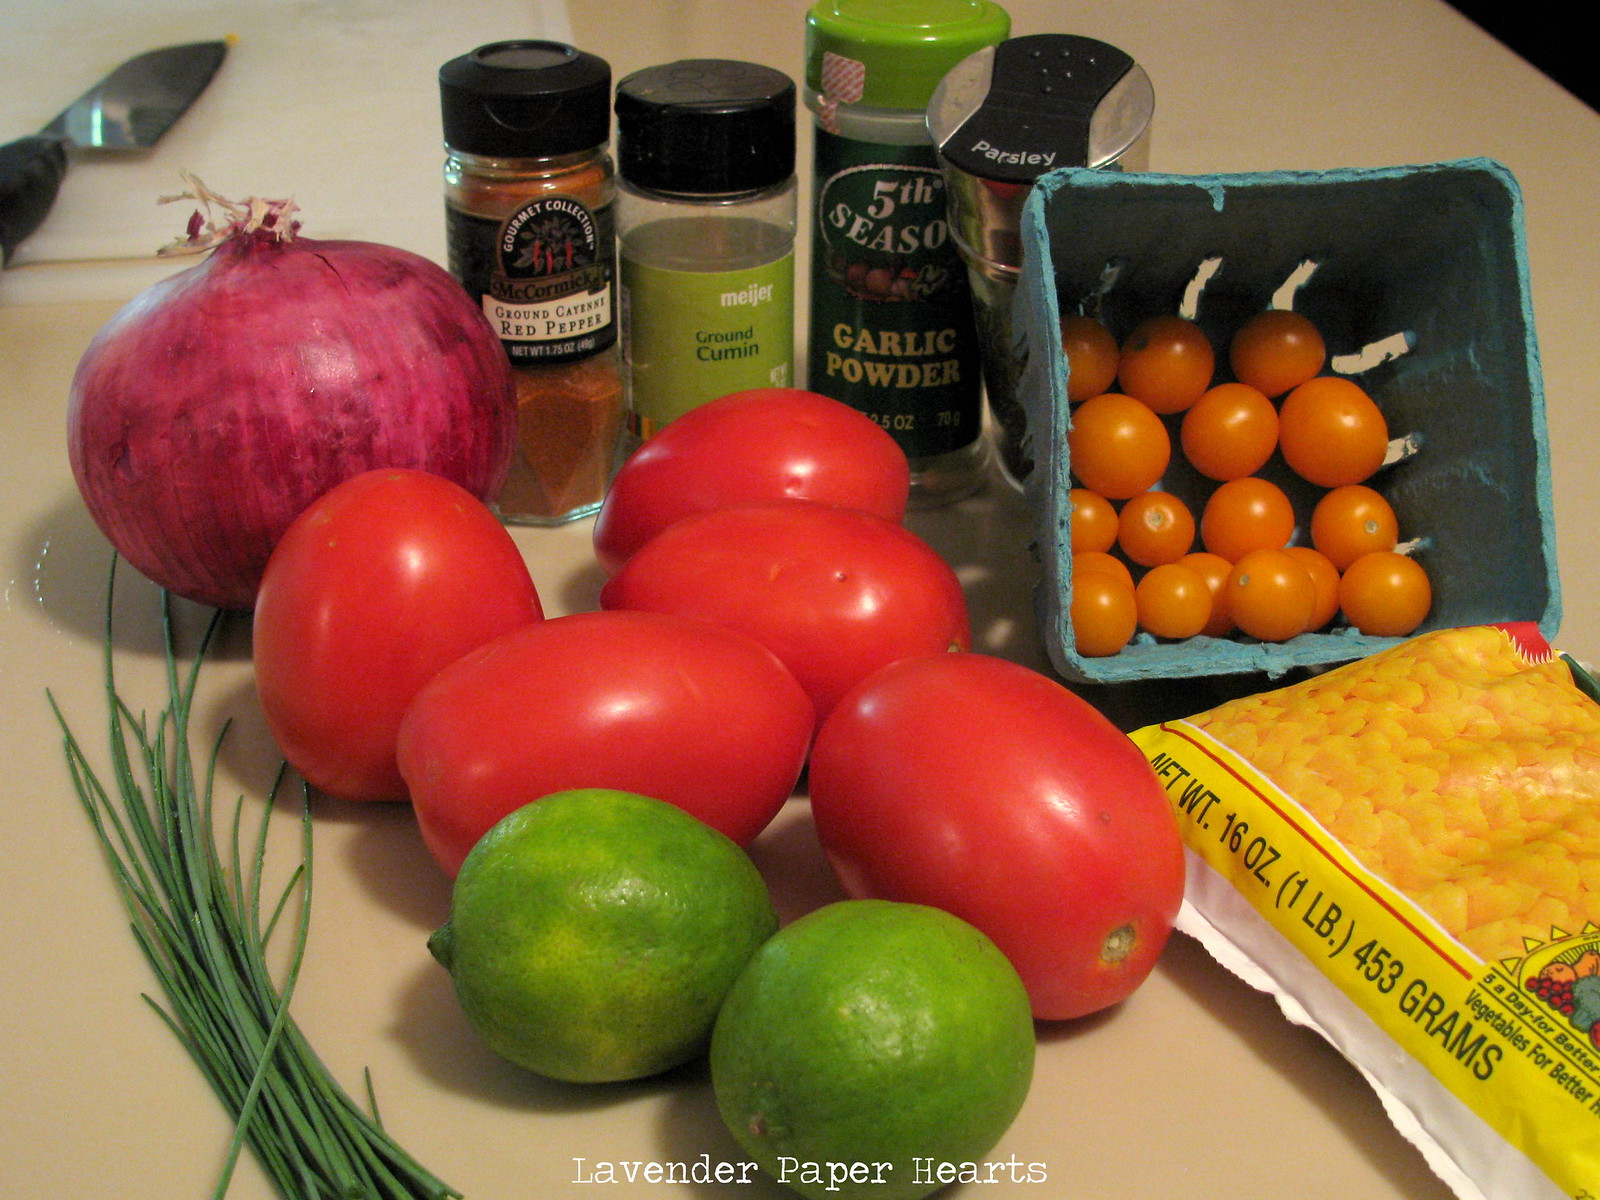
*This photo has orange cherry tomatoes in it. I added them because they're so pretty! 

Salsa-y Salsa Fresca

Ingredients: 

3/4 cup diced red onion
3 cups Roma tomatoes diced - remove the seeds and inside stems
3/4 cup corn - frozen or fresh
1 Tbs chives - fresh
Juice of 1 lime
Parsley - fresh or dried
Cayenne pepper - or a jalapeno (too hot for me)
Cumin
Garlic Powder (or you can use fresh)
Salt
Pepper

This salsa develops it's flavors - so I would recommend making it the night before you're going to serve it or at least several hours in advance. Using kitchen scissors cut up your chives so they're 1 cm pieces or smaller and toss them into a large bowl.  Next, heat up a pan. When it's good and hot toss in your corn and shake the pan so the corn makes a single layer in the pan.  Once you've got a good single layer don't touch or stir the corn. What you're trying to do here is roast the corn so it's important to let it sit still. It will take a few minutes (or more if your corn is frozen) to start to get the brown sear marks. You can tell that the corn is really starting to cook when you start to smell what sort of smells like pop corn.  If you're concerned you're burning the corn use a spoon and push around some corn in just one small space.  You can start on your tomatoes while this is cooking.


Okay, so while that's cooking cut your tomatoes in half and scoop out the seeds and centers. You don't want to add the seeds and pulp because it will make the salsa too watery - no bueno. Dice them up and toss them into your bowl.
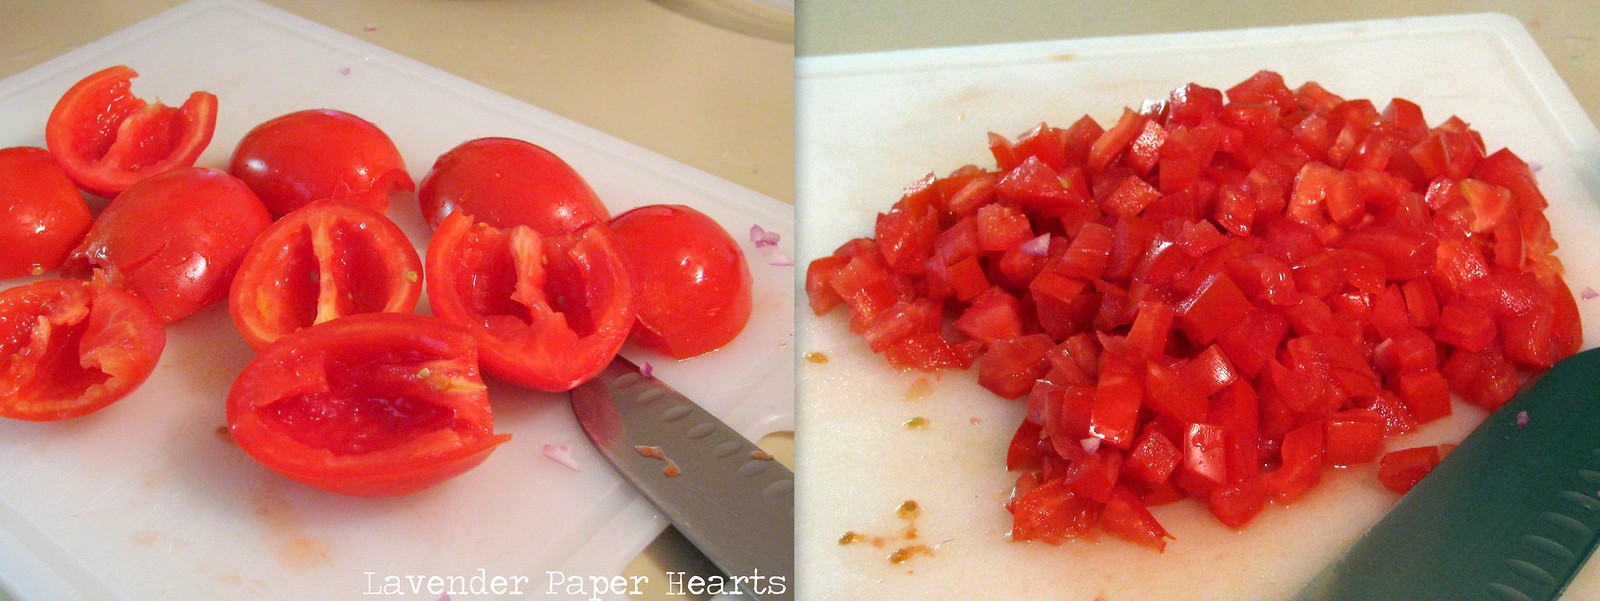

Check your corn and stir it once when it's gotten a bit brown. You'll want to then let it cook a bit more once you've stirred it so try getting a single layer again.  
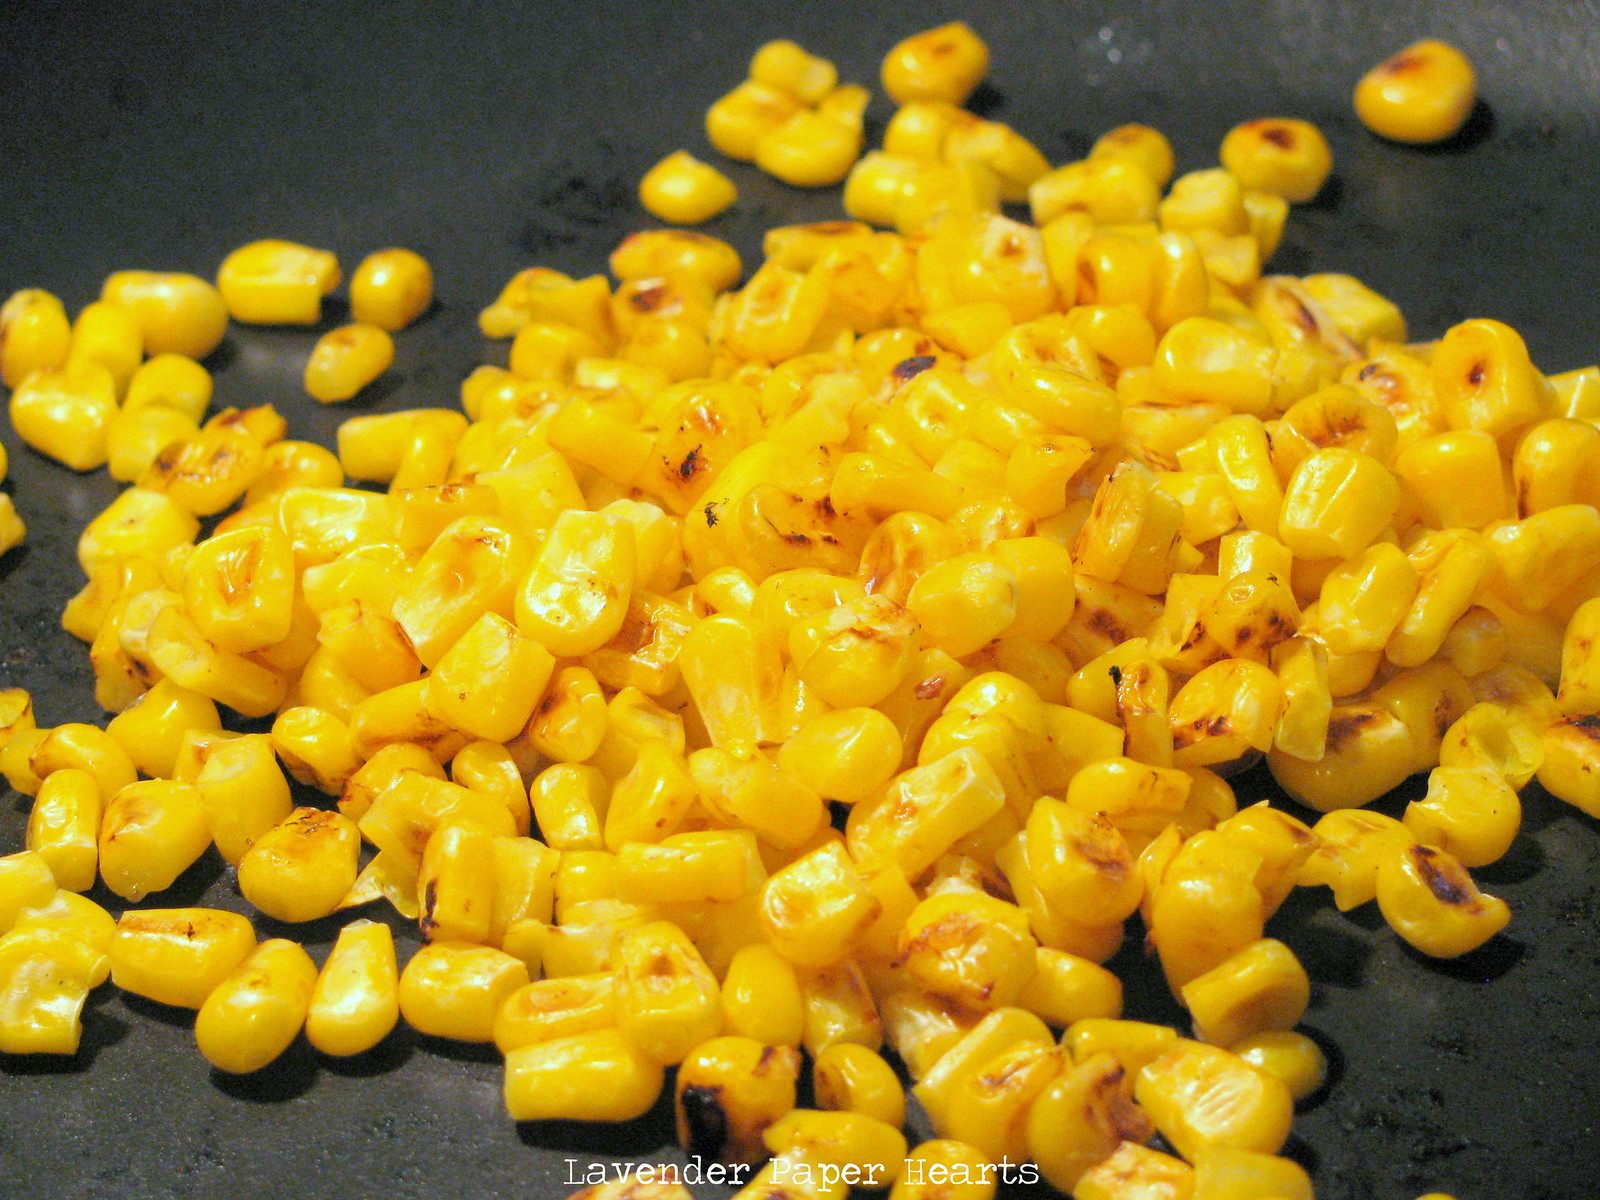

Pour your corn into the bowl and then put the pan back on the heat.  Now, it's up to you if you'd like to cook the onion just a bit or not. I like onion, but I don't like the taste to linger around in my mouth for-ever (it feels like forever.) So if you cook your onion for 20 seconds (seriously, 20 seconds, it doesn't need to be longer) it helps the onion maintain most of its crunch while not leaving an onion taste in your mouth all day.  If you use fresh garlic you can also add it in with the onions.  Toss them into the bowl.  You'll want to cut your lime in half and juice that into the bowl too. Zest in a little lime peel too if you want to up the fresh flavor of lime!!
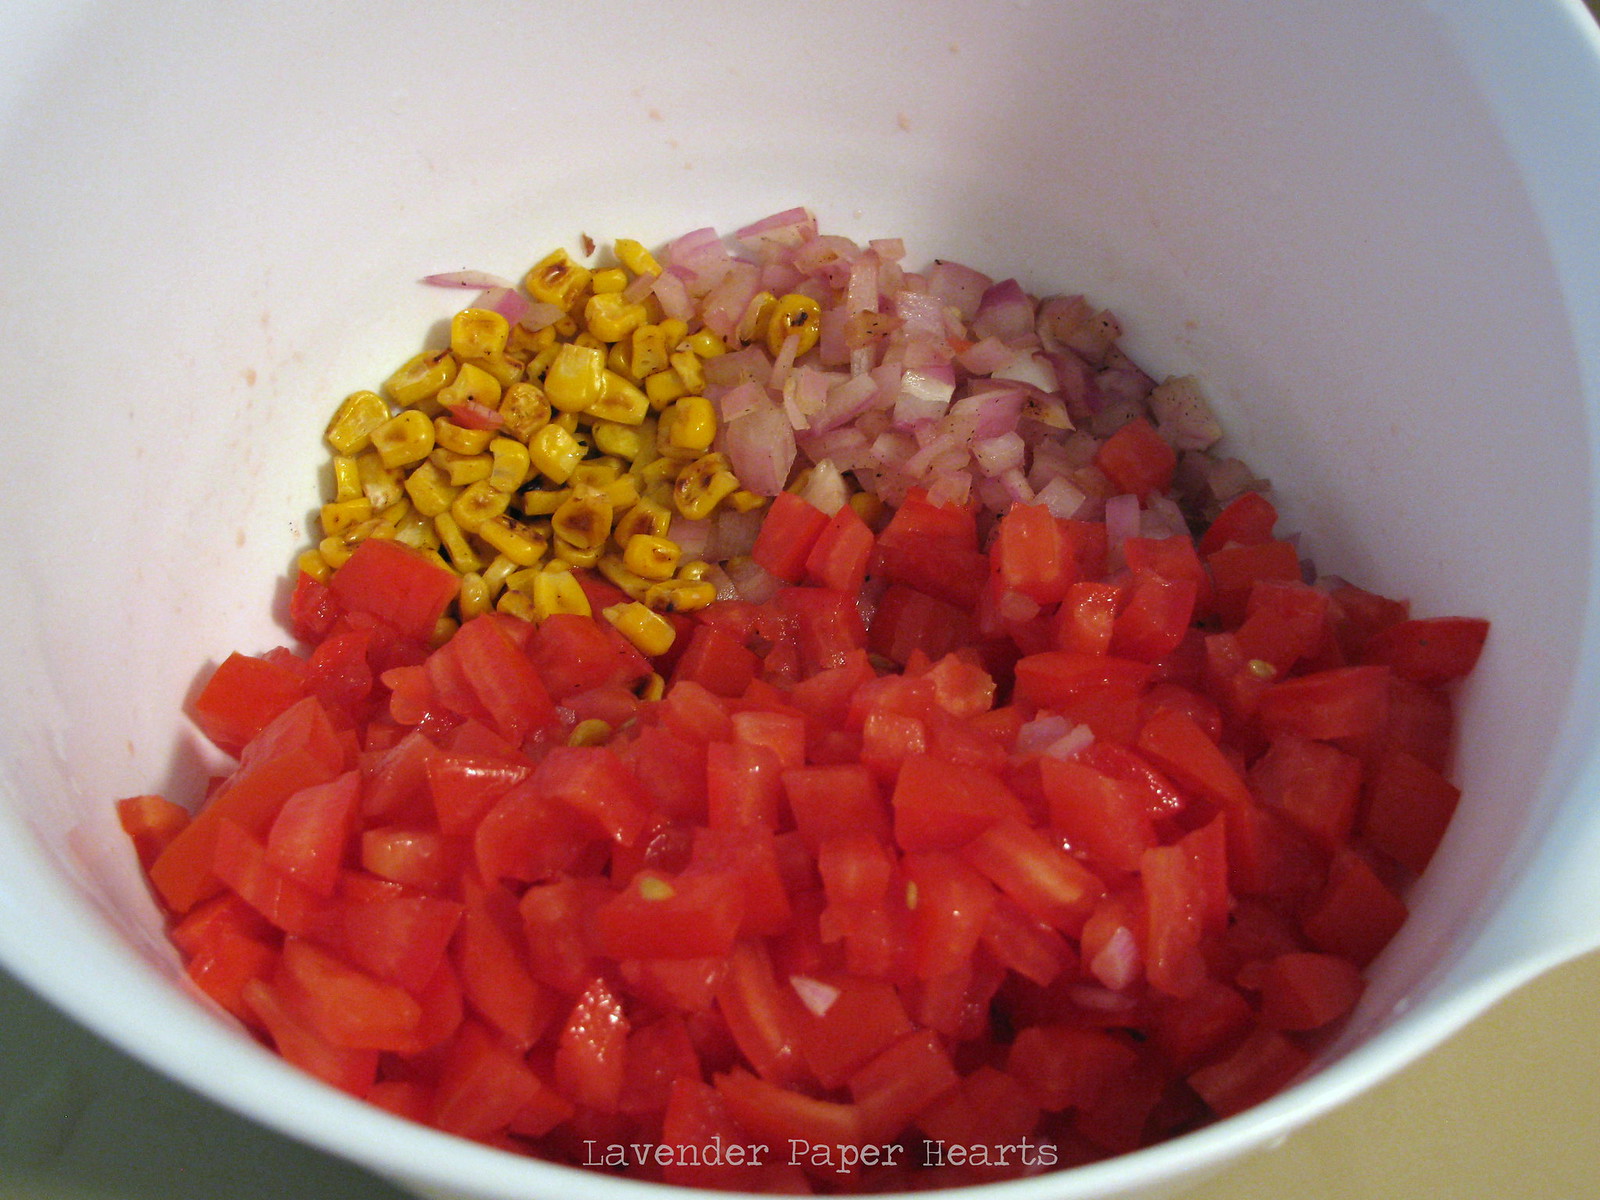

Now to add your spices. Start with your salt and pepper and add a pinch of each. The rest of the spices are based on personal taste so you can add as little or as much as you'd like. I add about 1/4 cumin, 1/8 cayenne pepper, 1/4 garlic powder, and 1/4 parsley.  Usually I let the salsa sit over night and then the next day I taste it to make sure it tastes how I want it. If it's not quite right I add more spices.

This recipe is really flexible.  You can add and remove most ingredients (aside from the tomatoes obviously), and you could also add cilantro. Real Mexican salsa has cilantro, but I can't get over cilantro tasting like soap so I don't add it.
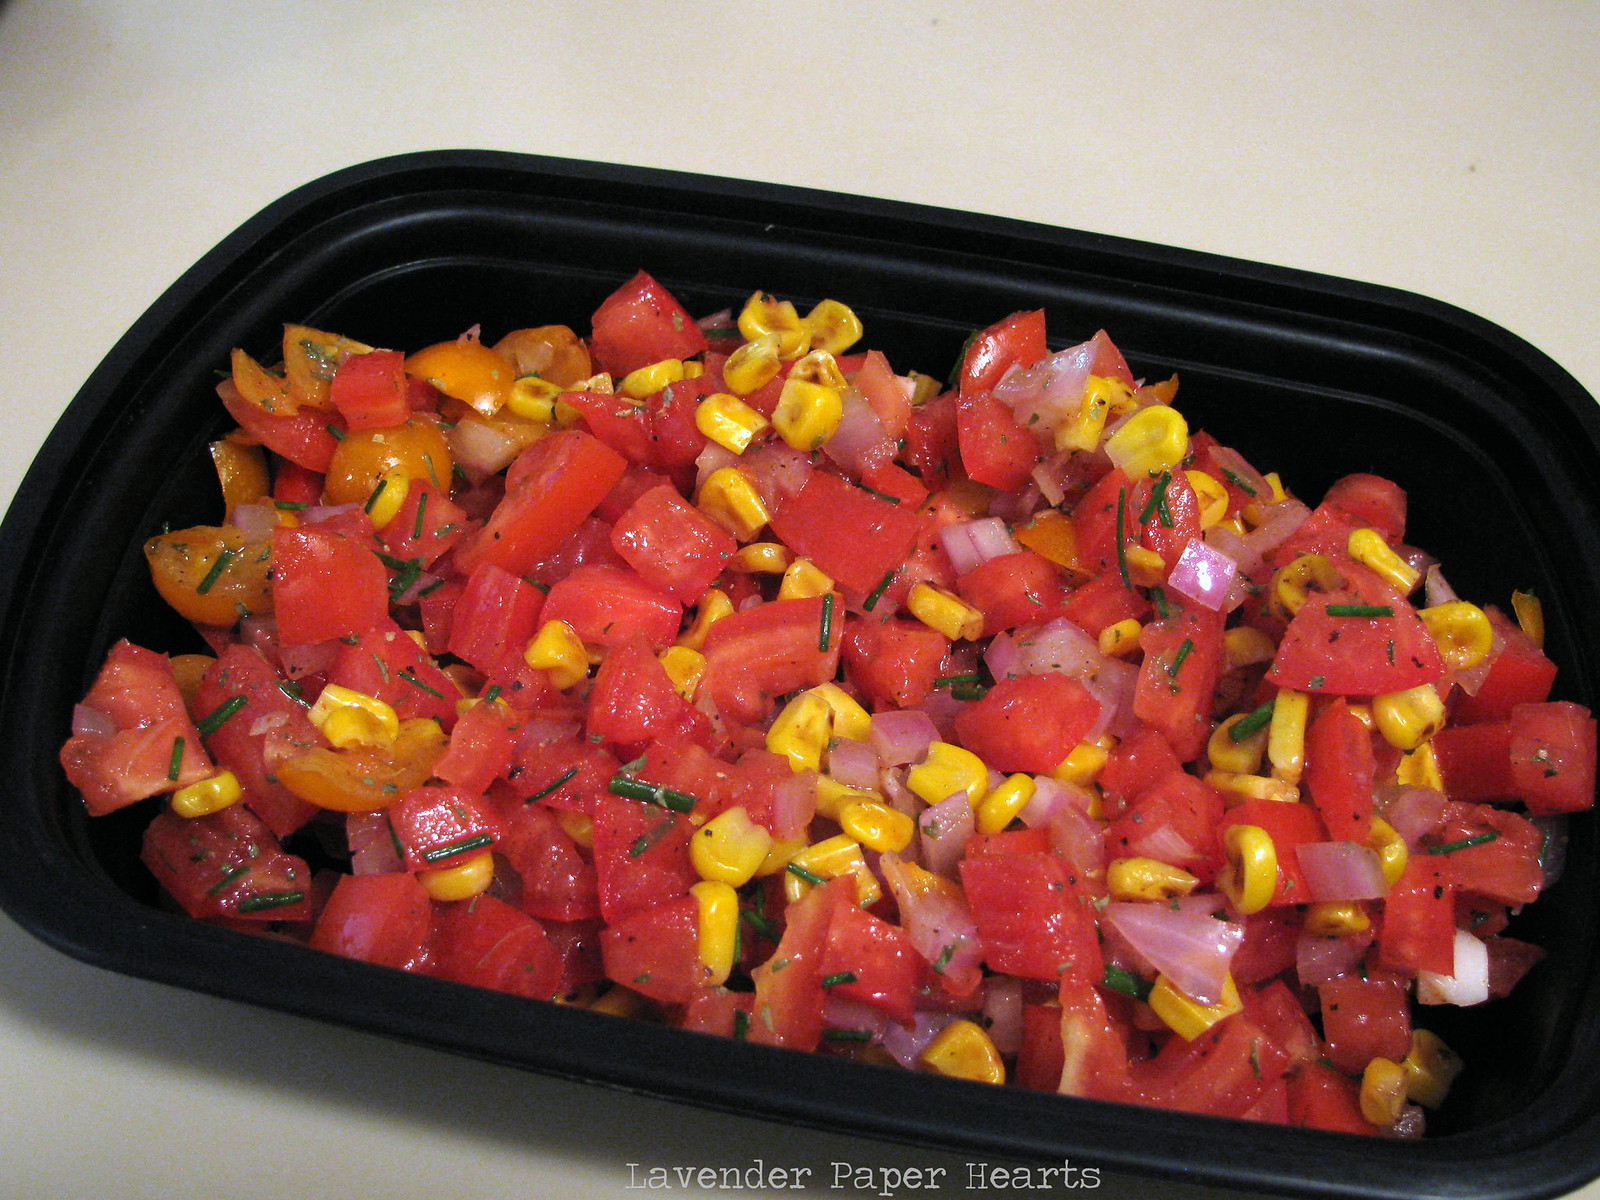

Here's the full recipe. Just copy and paste it into a document and you can print it out!

Salsa-y Salsa Fresca

Ingredients: 

3/4 cup diced red onion
3 cups Roma tomatoes diced - remove the seeds and inside stems
3/4 cup corn - frozen or fresh
1 Tbs chives - fresh
Juice of 1 lime
Parsley - fresh or dried
Cayenne pepper - or a jalapeno (too hot for me)
Cumin
Garlic Powder (or you can use fresh)
Salt
Pepper

This salsa develops it's flavors - so I would recommend making it the night before you're going to serve it or at least several hours in advance. Using kitchen scissors cut up your chives so they're 1 cm pieces or smaller and toss them into a large bowl.  Next, heat up a pan. When it's good and hot toss in your corn and shake the pan so the corn makes a single layer in the pan.  Once you've got a good single layer don't touch or stir the corn. What you're trying to do here is roast the corn so it's important to let it sit still. It will take a few minutes (or more if your corn is frozen) to start to get the brown sear marks. You can tell that the corn is really starting to cook when you start to smell what sort of smells like pop corn.  If you're concerned you're burning the corn use a spoon and push around some corn in just one small space.  You can start on your tomatoes while this is cooking.

Okay, so while that's cooking cut your tomatoes in half and scoop out the seeds and centers. You don't want to add the seeds and pulp because it will make the salsa too watery - no bueno. Dice them up and toss them into your bowl. Check your corn and stir it once when it's gotten a bit brown. You'll want to then let it cook a bit more once you've stirred it so try getting a single layer again.  

Pour your corn into the bowl and then put the pan back on the heat.  Now, it's up to you if you'd like to cook the onion just a bit or not. I like onion, but I don't like the taste to linger around in my mouth for-ever (it feels like forever.) So if you cook your onion for 20 seconds (seriously, 20 seconds, it doesn't need to be longer) it helps the onion maintain most of its crunch while not leaving an onion taste in your mouth all day.  If you use fresh garlic you can also add it in with the onions.  Toss them into the bowl.  You'll want to cut your lime in half and juice that into the bowl too. Zest in a little lime peel too if you want to up the fresh flavor of lime!!

Now to add your spices. Start with your salt and pepper and add a pinch of each. The rest of the spices are based on personal taste so you can add as little or as much as you'd like. I add about 1/4 cumin, 1/8 cayenne pepper, 1/4 garlic powder, and 1/4 parsley.  Usually I let the salsa sit over night and then the next day I taste it to make sure it tastes how I want it. If it's not quite right I add more spices.

This recipe is really flexible.  You can add and remove most ingredients (aside from the tomatoes obviously), and you could also add cilantro. Real Mexican salsa has cilantro, but I can't get over cilantro tasting like soap so I don't add it.

Wednesday, August 7, 2013

Dulce de Leche Ice Cream

It's summertime and officially ice cream season. If I'm honest, it's ALWAYS ice cream season in our house, but summer always seems a bit more legitimate than, say, February.  My dad used to make ice cream when I was younger so making it always reminds me of him. It was always made in the summer months, and often around the 4th of July if we were home (instead of in Indiana). He used to make strawberry and chocolate and sometimes he would mix it up with peach too. I don't even like peaches, but his homemade peach ice cream was always like heaven.  We had a classic ice cream machine that required adding ice and salt around the edge of the ice cream pot and it always seemed to take hours to make... though that could just have been my impatience.  I use a Kitchen Aid ice cream bowl attachment that we got as a wedding present. My pro-tip for using this is to wrap a clean towel around the top of the bowl to help separate the churning ice cream's exposure to the temperature in your kitchen. It helps it set up faster. We were also given a Cuisinart ice cream maker last year when our friends were moving out of the country. Yes, having 2 ice cream makers makes life even more dangerous.


I've been making ice cream for a few years now but I'm always in search of new and inventive recipes. I tend to rely on my 1978 5 ring red binder Betty Crocker cookbook (FAR superior to the newer versions where the recipes have changed) to start the base for my ice cream. My parents got this when they got married and it was used so much when I was growing up. I found mine on Ebay - and they don't go for cheap either because I think people recognize they're superior!!  I've tried other ice cream recipes but the vanilla ice cream is the one I tend to go back to - at least as far as the ingredient ratios are concerned.  I'd also seen a recipe online from the blog My Big Fat Cuban Family for Dulce de Leche ice cream so I borrowed her method of incorporating the actual dulce de leche into the ice cream.

The third thing I tried was trying to lighten up the recipe. I know you're saying, but you dumped in a whole can of dulce de leche, but the base of the ice cream was in fact lighter - I swear!! I'd been reading ice cream recipes over at Cooking Light and they recommended substituting light or fat free Evaporated milk for whole milk in ice cream recipes and also substituting whipping cream with half and half.  Both of the new substitutions are lighter in calories, but still have a heavy milk weight feel in your mouth so your brain doesn't exactly know what it's missing (the calories - do we ever miss calories?).

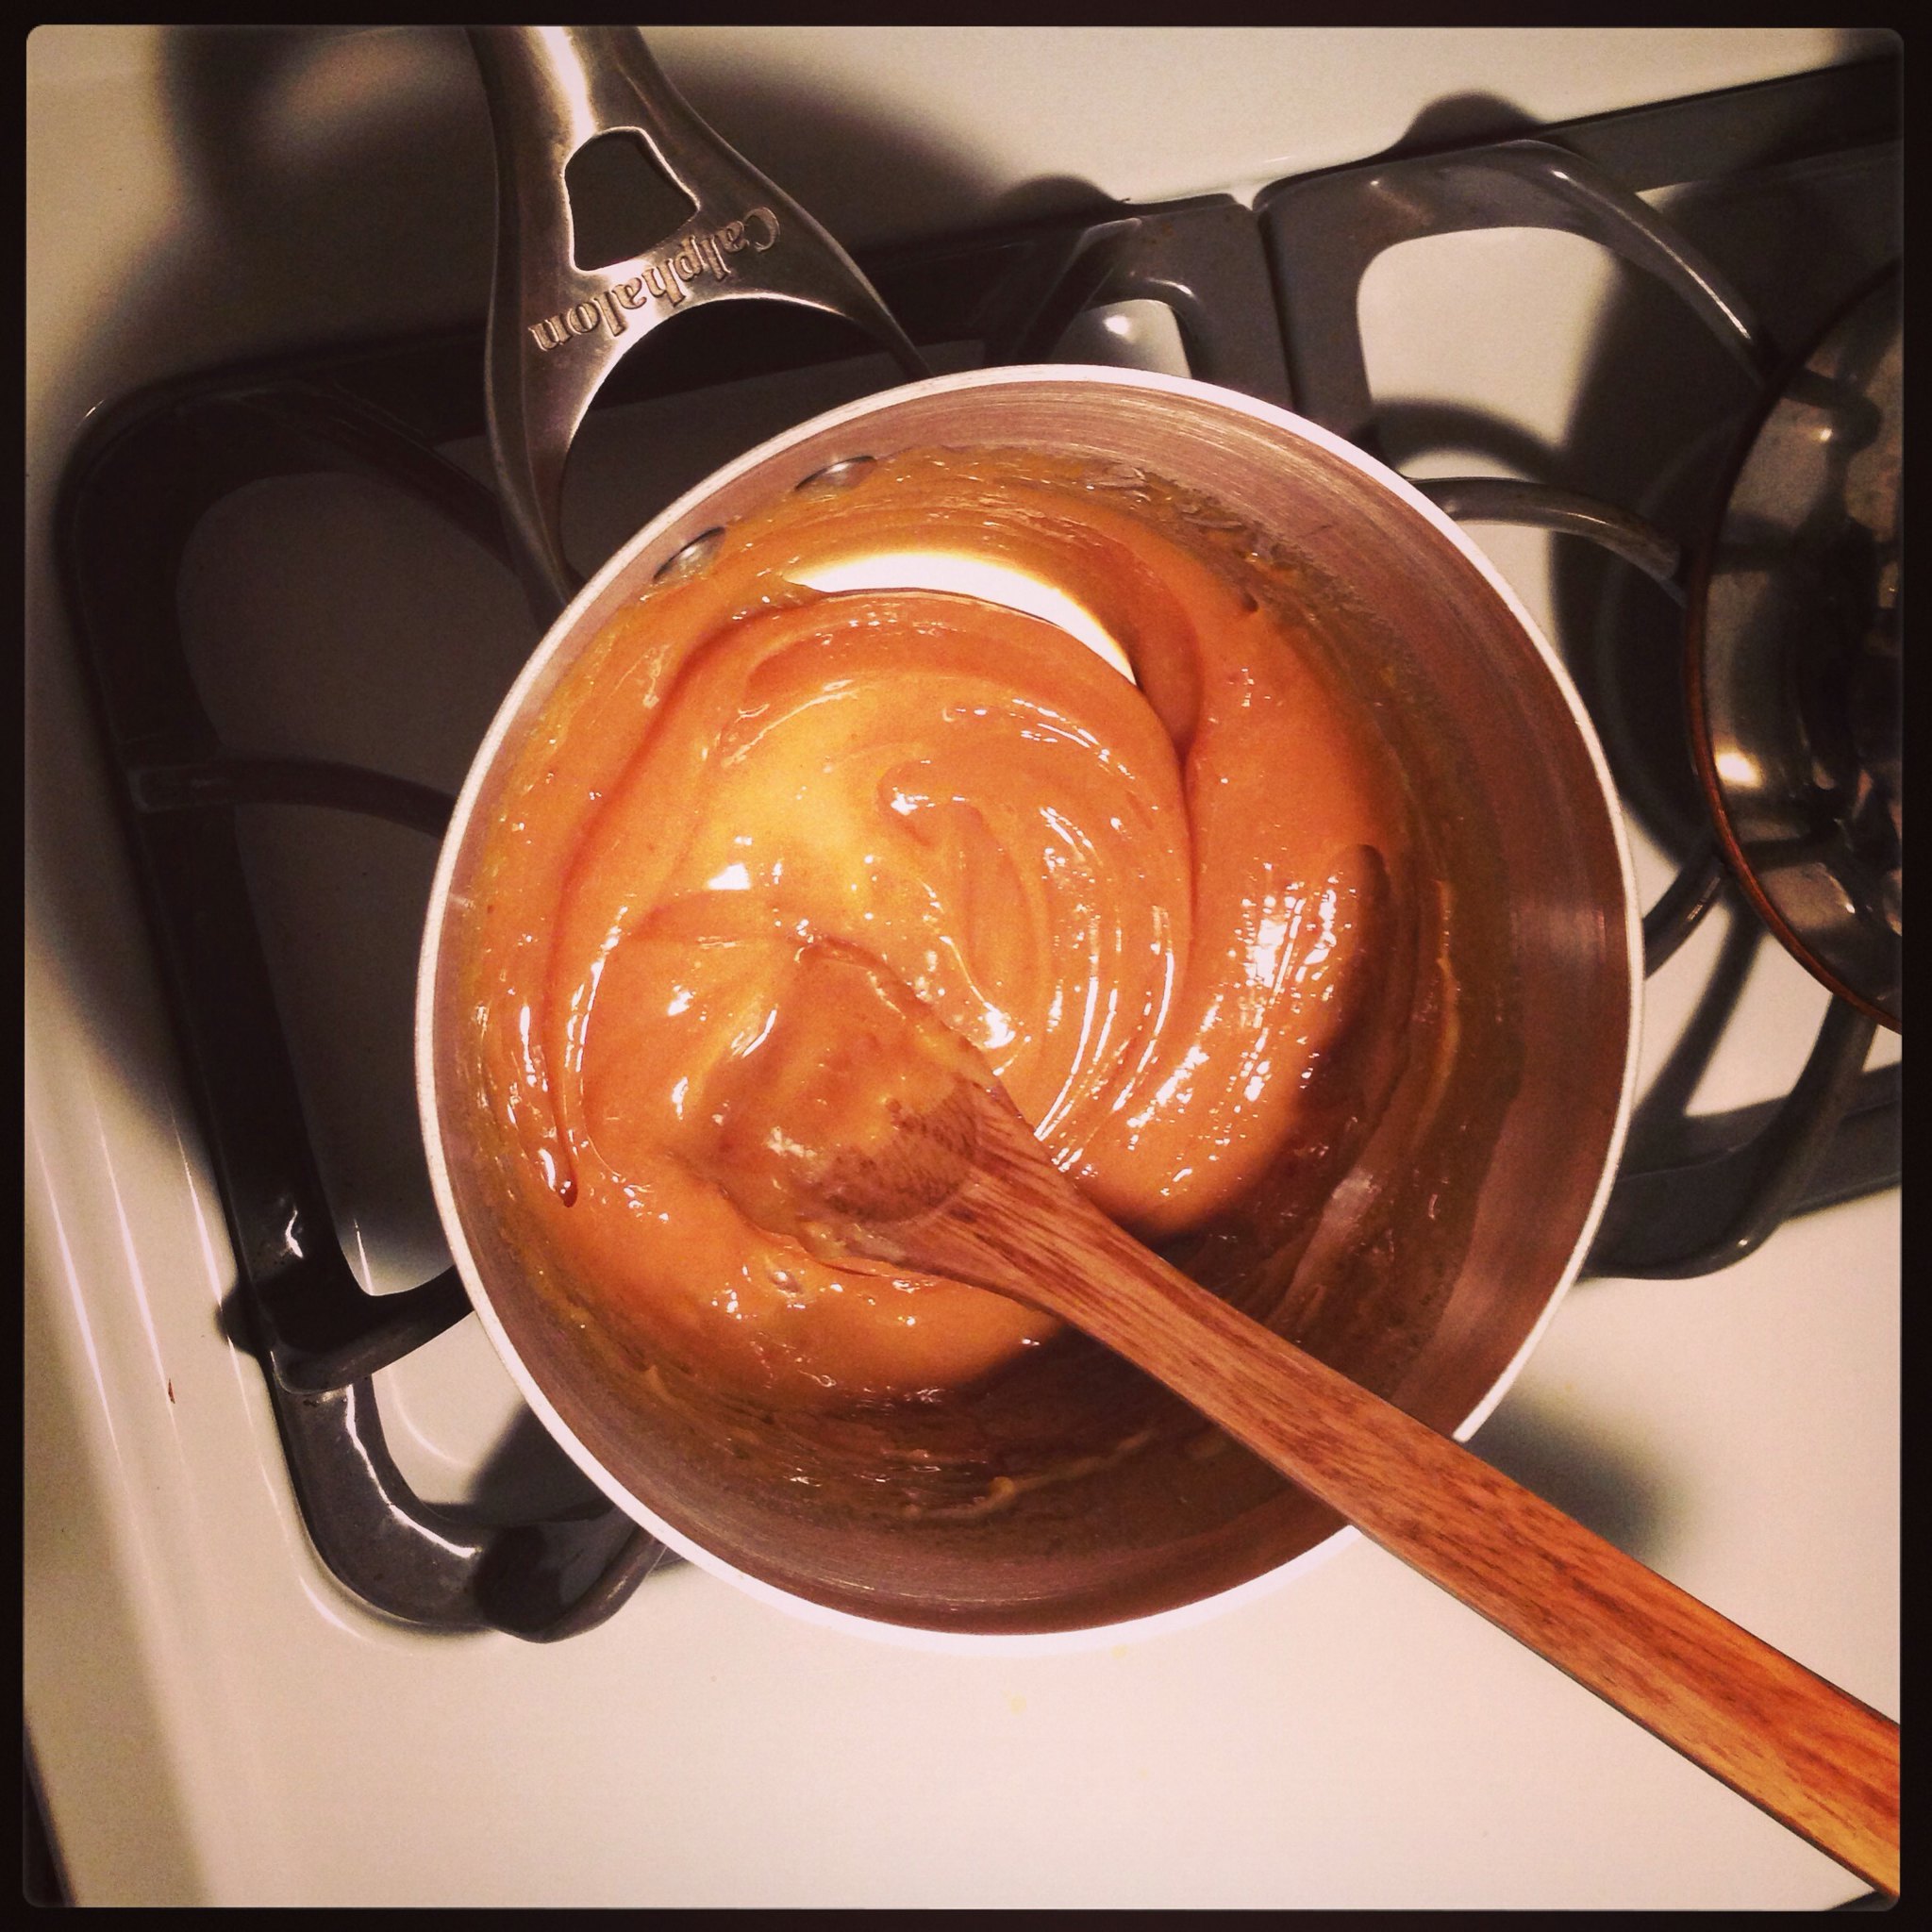
A couple of days before you want to make your ice cream (or even a week in advance) make your dulce de leche.  There are TONS of methods to make this that you can find online. I tend to do the lazy/quick version where you just dump a can of sweet and condensed milk into a sauce pan at medium heat and stir CONSTANTLY (all over in the pan - don't miss a side or corner) for 10-15 minutes until it gets a caramel color and covers the back of a spoon.  Put it in a glass bowl and cover it with plastic wrap and put it in your fridge to use later.


The night before you'll need to put your ice cream canister in the freezer (if this is the method you're using). While you're at it you might as well make your ice cream custard. You need to your ice cream base to be cold before you put it into your canister. The custard takes maybe 15 minutes to make.


Here's my recipe:

Dulce de Leche Ice Cream 

3 egg yolks
1/2 cup sugar
1/8 tsp salt
1 cup Fat Free/Light Evaporated Milk
Dulce de Leche
2 cups Half and Half

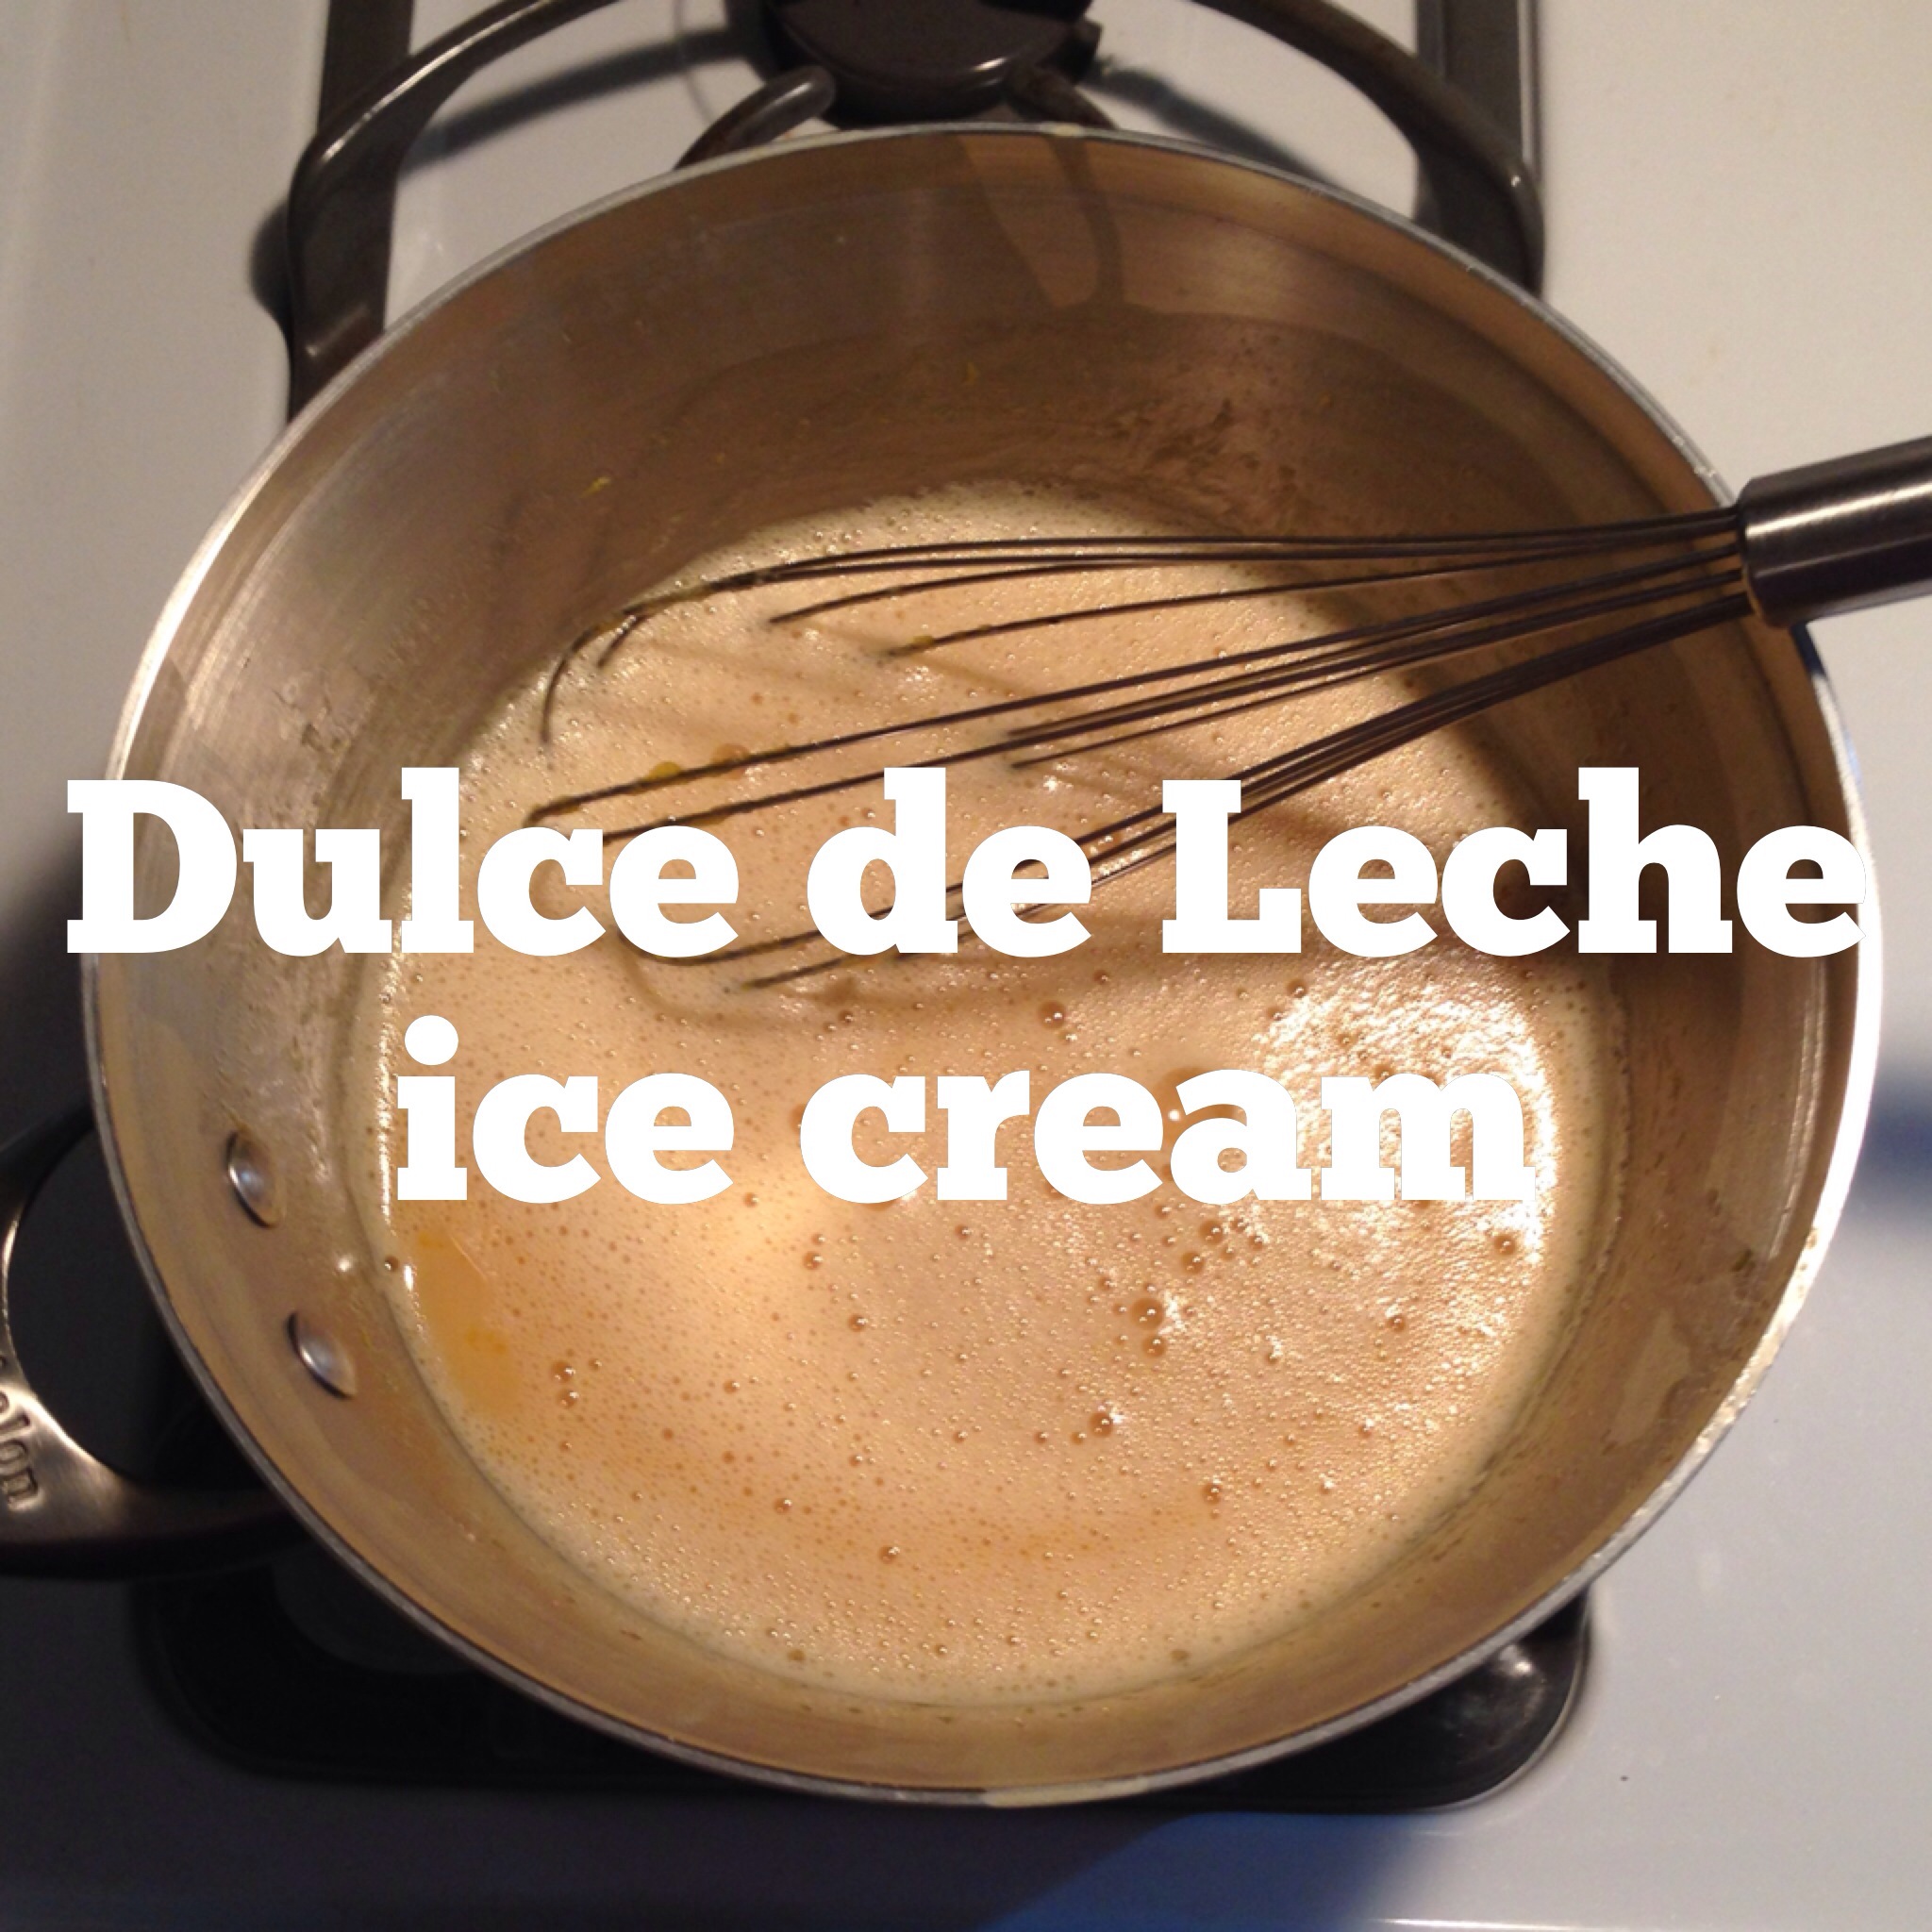
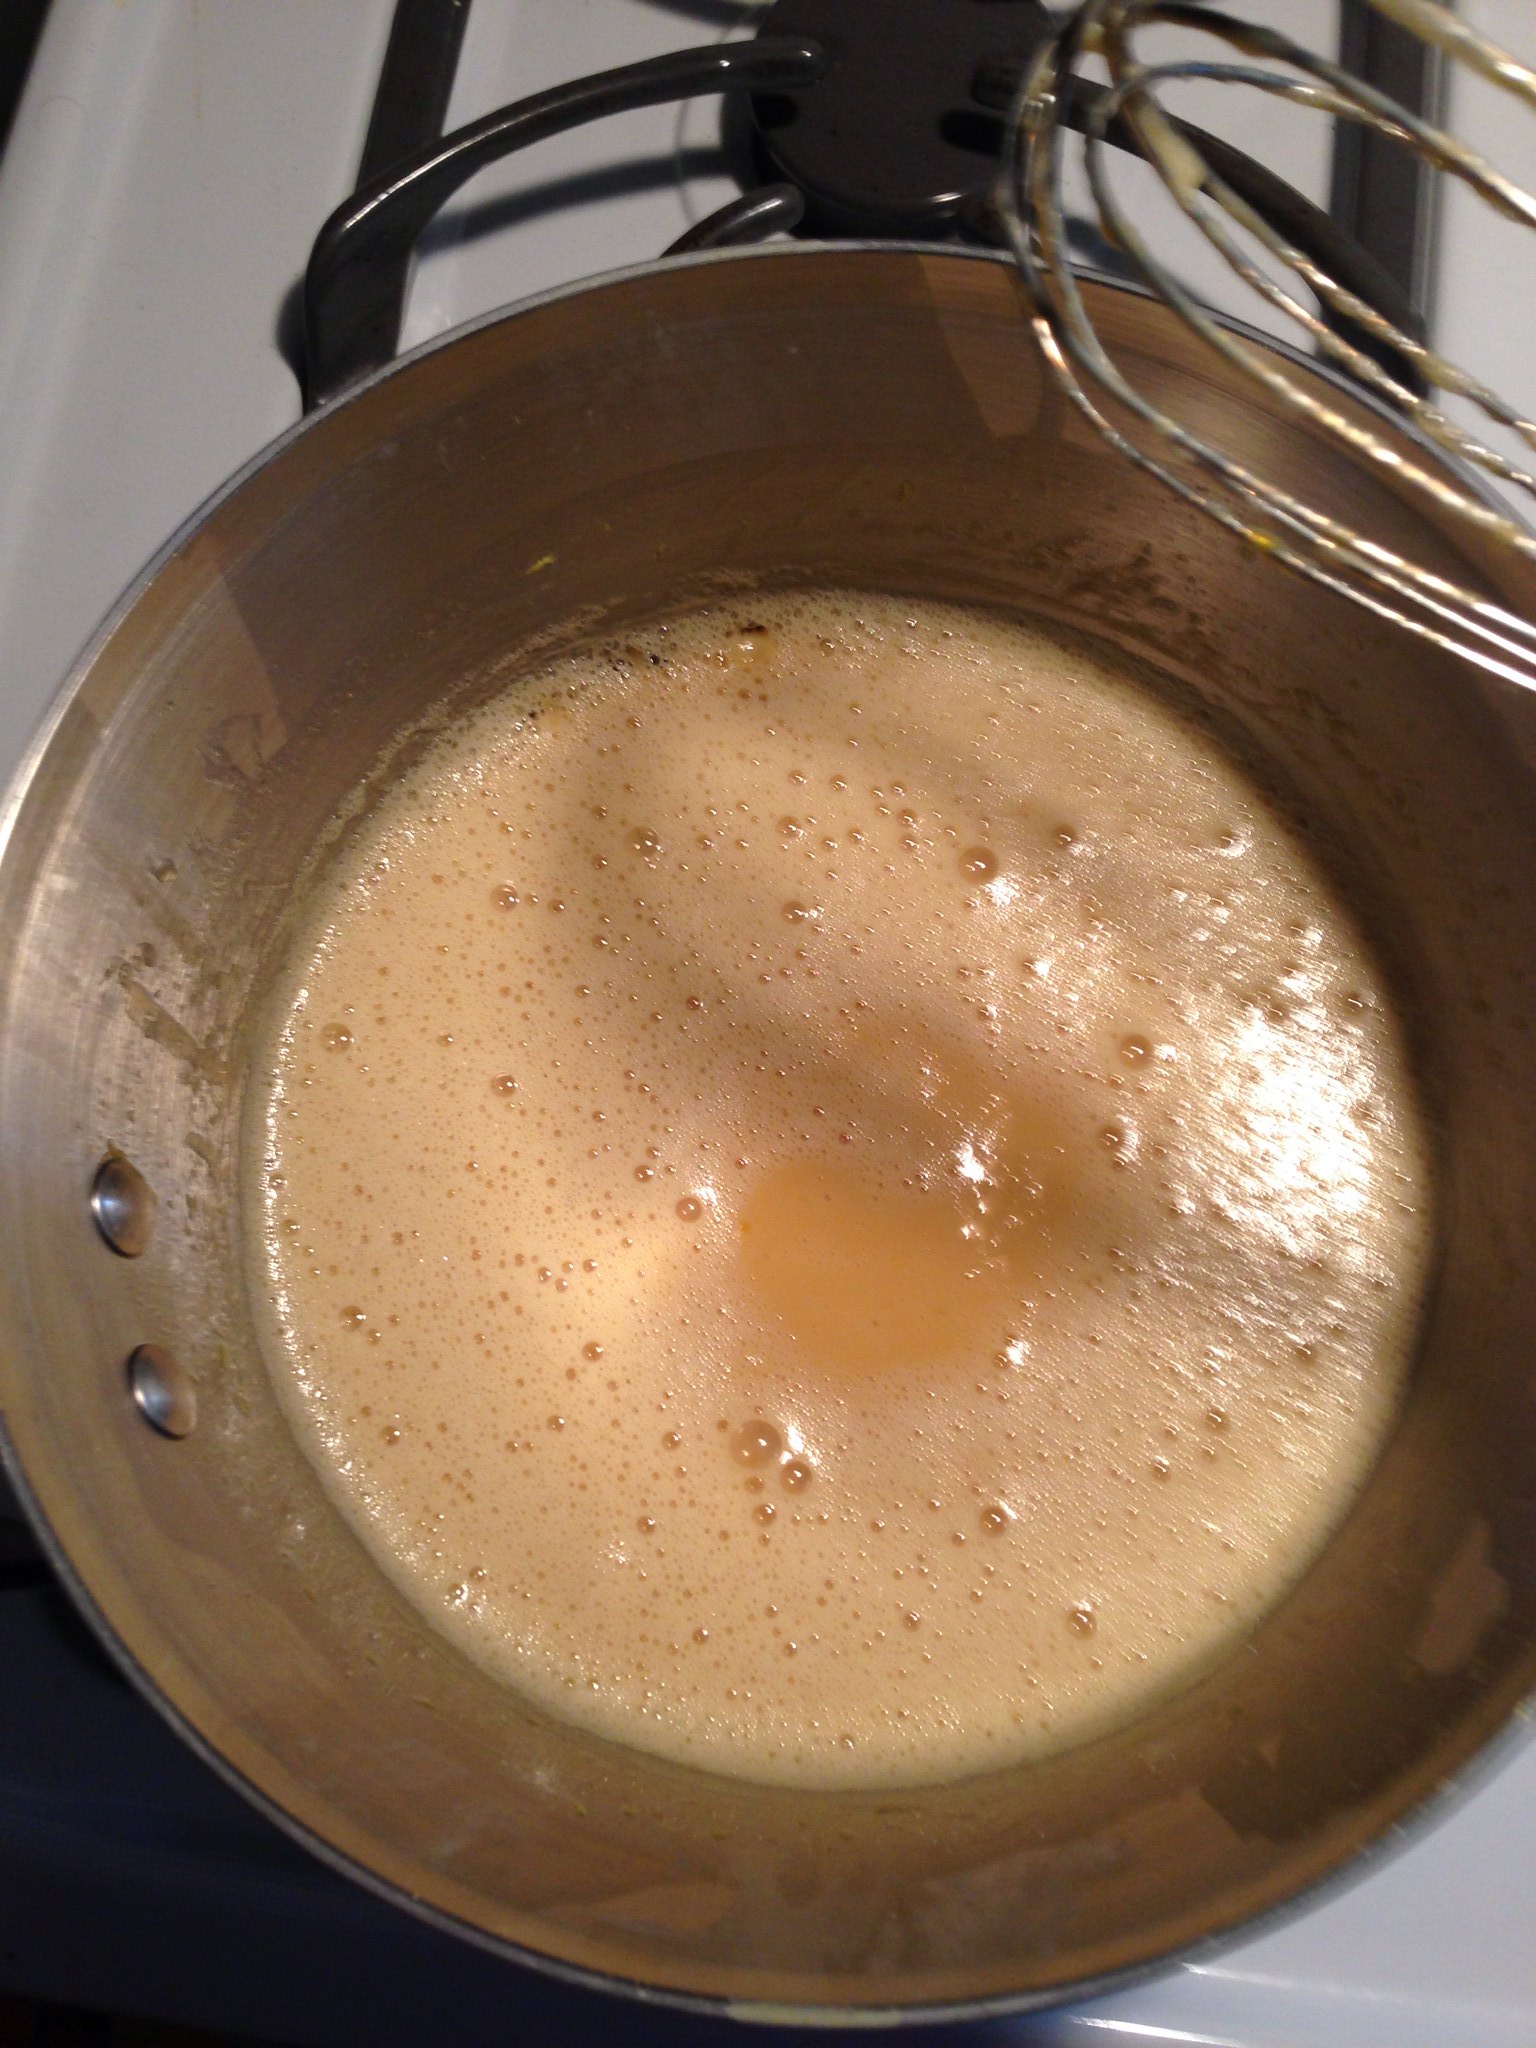
In a sauce pan at medium low heat mix together egg yolks, sugar, salt and Evaporated milk. Make sure it's well combined before you then spoon in 3/4 of the dulce de leche.  Whisk constantly - you don't want your eggs to cook like scrambled eggs, you want the whole liquidy goodness to heat up slowly and together. You'll also need the dulce de leche to melt into the milky mixture so make sure you keep stirring.  When the mixture starts to thicken and you see small bubbles start to form along the outside edge of the pan is when the ice cream mixture is done. This is essentially the ice cream starting to boiling - but don't let it really boil a ton. This takes a while, but when it's ready it happens fast.


Another obstacle is that the dulce de leche makes the mixture froth a bit, so make sure you stop once in a while and check to see if you can find the bubbles along the outside of the pan.  Look in the middle though. Do you see the caramel colored ice cream base goodness in the middle? Yum.

Once the base starts to thicken you'll want to take it off the stove and strain it thought a strainer if you have one fine enough. If you don't, drape some cheese cloth over your strainer and it'll help catch some of the imperfections in the base. Pour the ice cream base into a container with a lid and put it in the fridge. Once it's cool you'll want to add in the half and half and then put the base back in the fridge to continue to cool.


Once your base is cold you can start to make your ice cream. I recommend you chill it for at least 5 hours or over night. Now it's ICE CREAM TIMEEEE!!! Follow your ice cream maker's directions for making your ice cream. For mine, I put my frozen bowl in place, add the churning mechanism, and turn on the machine. Then I slowly pour in the ice cream base and then cover the top with a towel. In 20 minutes I've got ice cream!!  A few minutes before the ice cream is done, I spooned in the leftover dulce de leche and let it incorporate into the ice cream. (If your dulce de leche is too thick, try stirring in some evaporated milk to thin it out a bit.)  Scoop the ice cream into a freezer safe container and pop it in the freezer for a few hours to harden up a bit more.  The only problem you might have at this point is not eating it all at once.  If your ice cream is a bit hard when you're ready to eat it - let it sit on the counter for 5-10 minutes or put it in the fridge for 20 minutes before scooping.

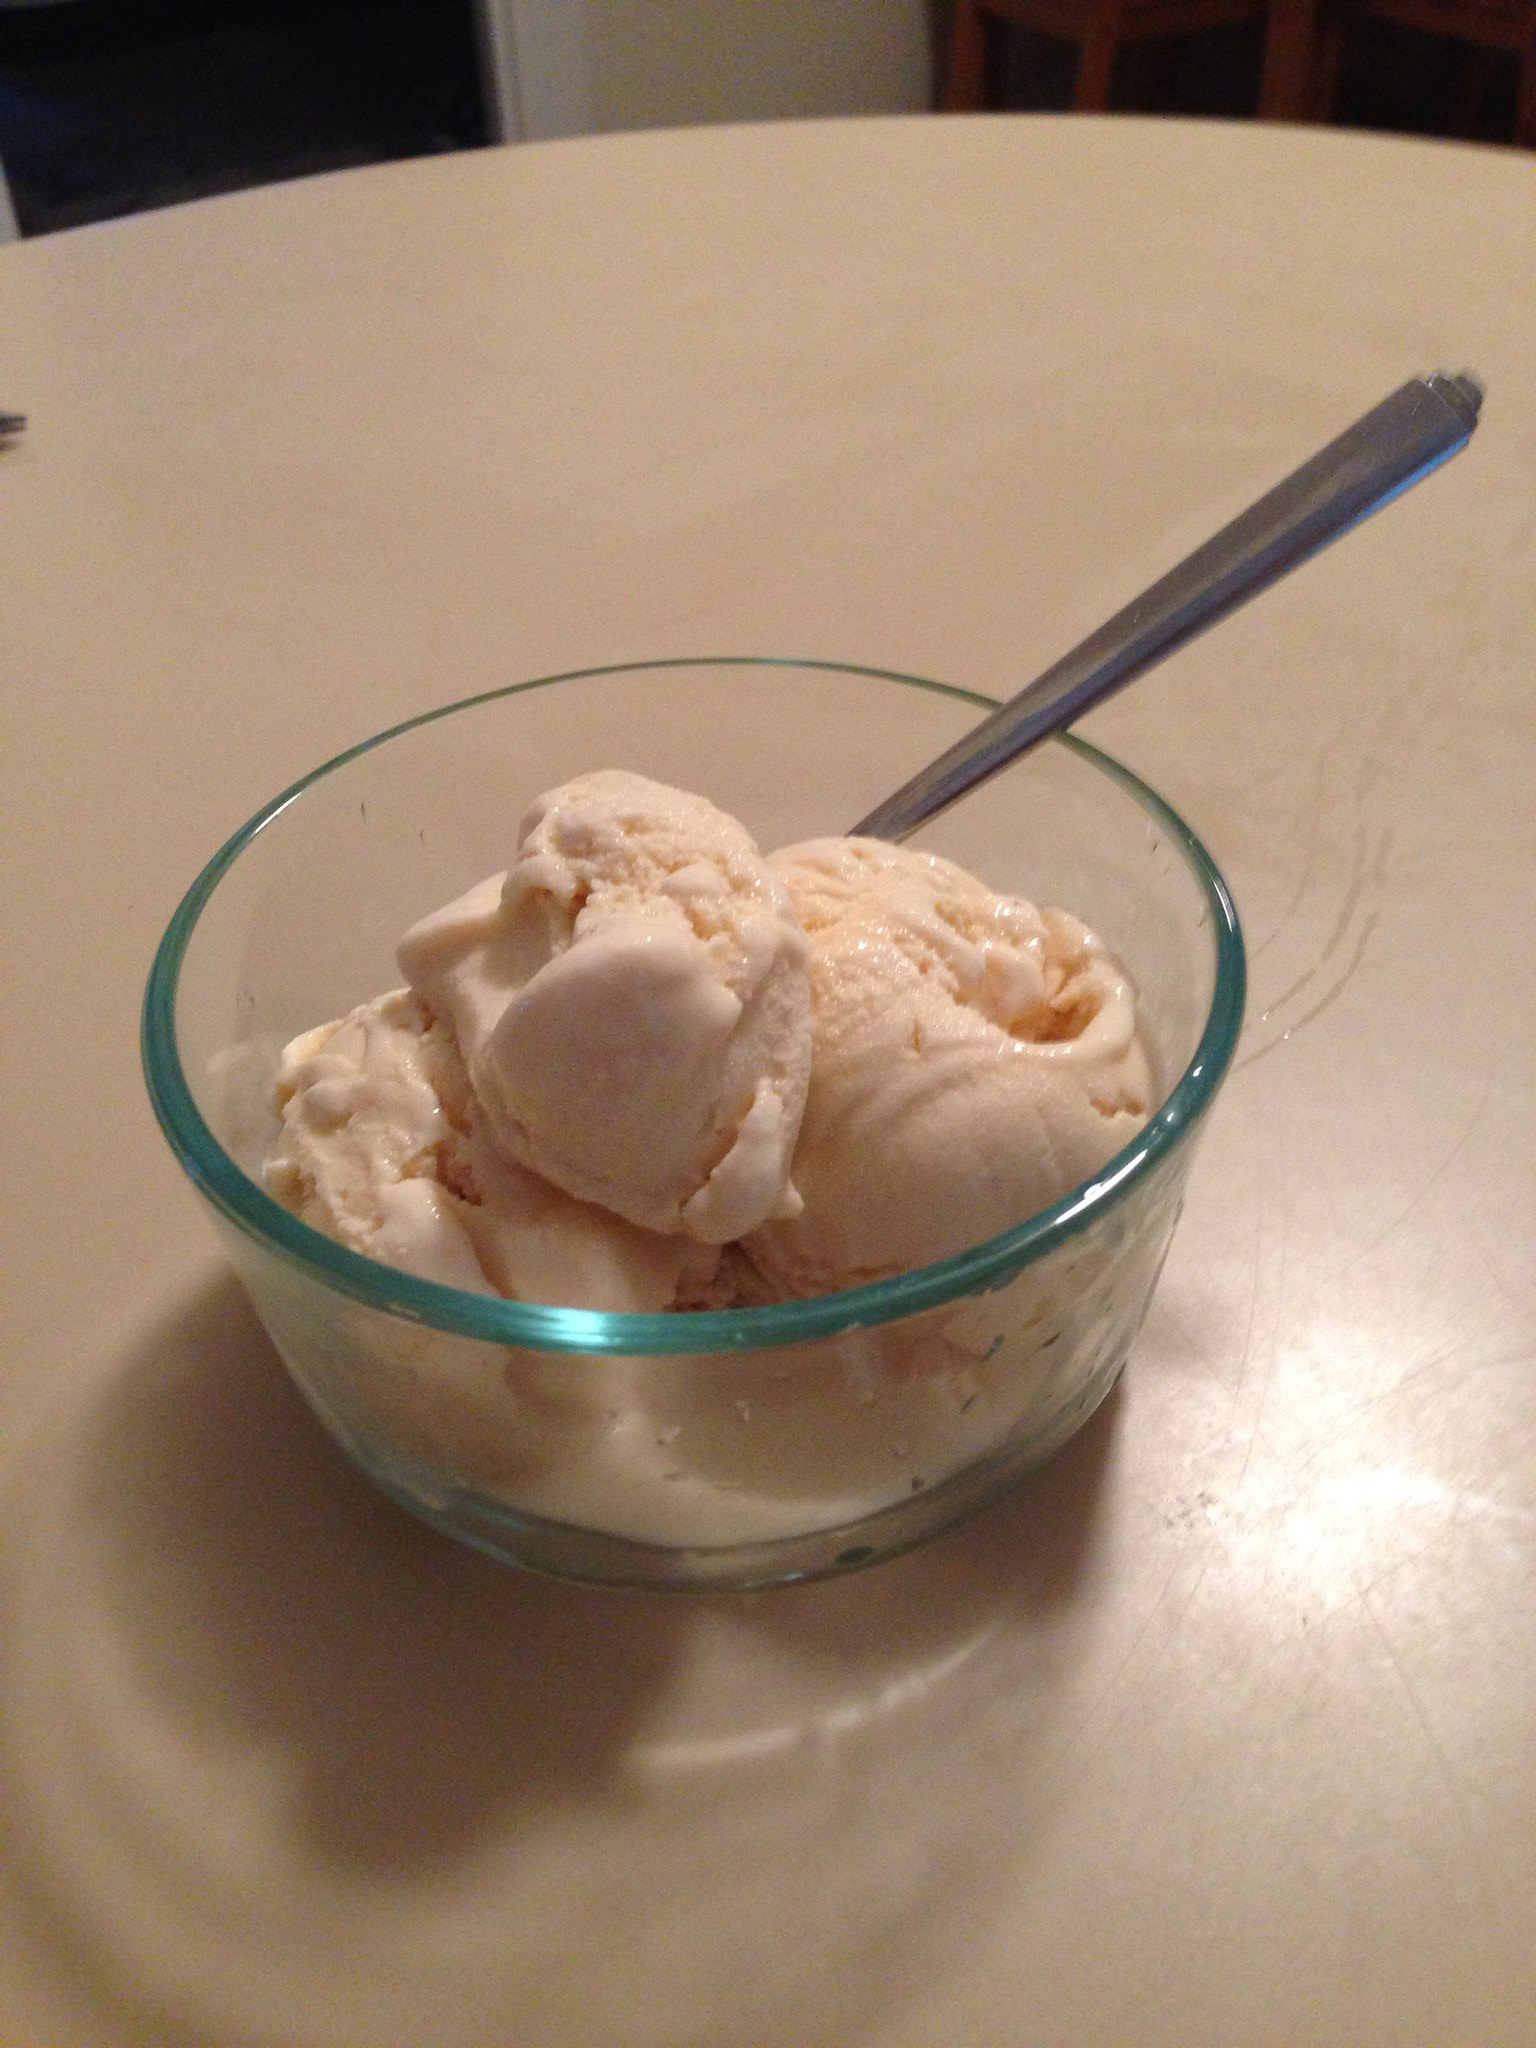
Now I know this isn't the greatest photo ever, but we were more focused on getting the yummy goodness in our bellies. Make some and I promise you won't be disappointed. 

What's your favorite ice cream flavor??

Wednesday, July 10, 2013

Recipe: Cold Brew Coffee

It's summertime and officially cold brew coffee time for me!! I love to have coffee in the morning but once the heat starts in I can't deal with having hot coffee. Who wants to sweat first thing in the morning?!! Plus, if I was to buy an iced coffee most mornings that would add up pretty quickly. I stumbled across the cold brew concept a few summers ago. Making this coffee is a bit different than most might be used to. It involves steeping coffee overnight (or a minimum of 8 hours).  You can read more about it here and here.  I also just found a recipe for a blood orange ice coffee here that sounds amazing.

Cold brew coffee makes for a still really lovey tasting and less acidic coffee. Since you store it in the fridge when it's finished, you've got cold coffee at the ready for as long as your pitcher lasts you.  Don't worry, it's really easy to make big batches at a time. In the interest of saving space in our refrigerator I use a 2 liter pitcher which lasts me about a week and a half. (I tend to one small glass in the am only.)


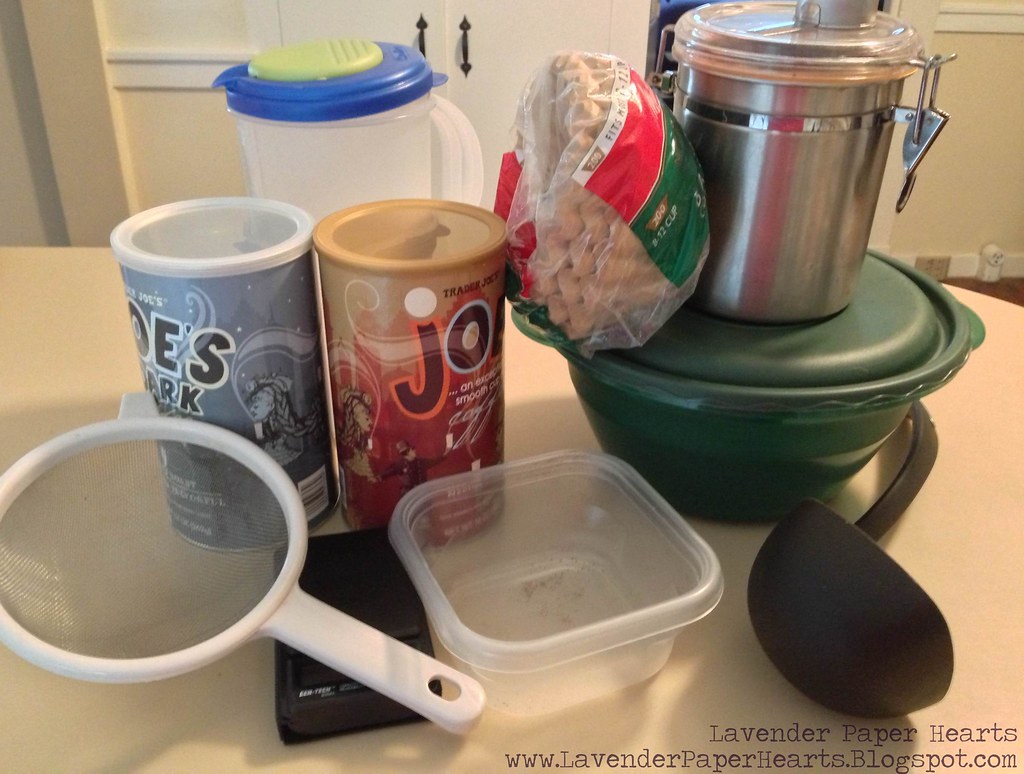
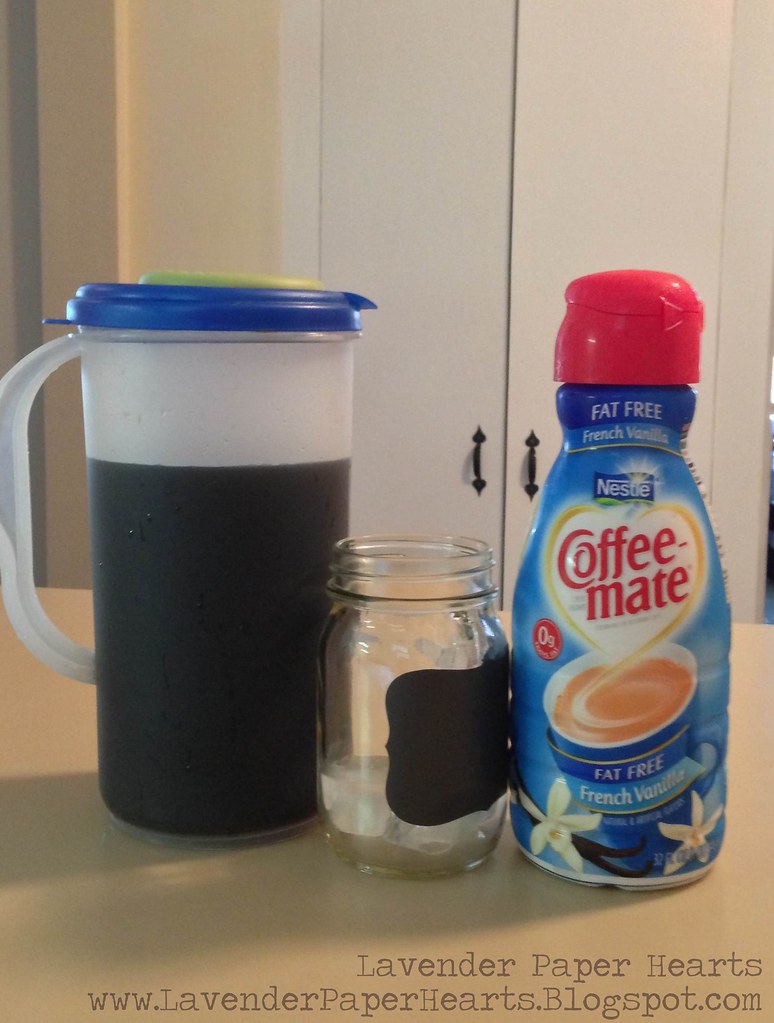
Above are the items you'll need for this recipe. Remember that you make the coffee in two stages so you won't need all of these items all at once.

Glorious Cold Brew Coffee

Ingredients:
  • 4 oz (about 1 1/4 cup + 1 Tbs) good quality coffee - I use a blend of medium and dark coffee
  • 8 cups of water - room temperature

Tools:
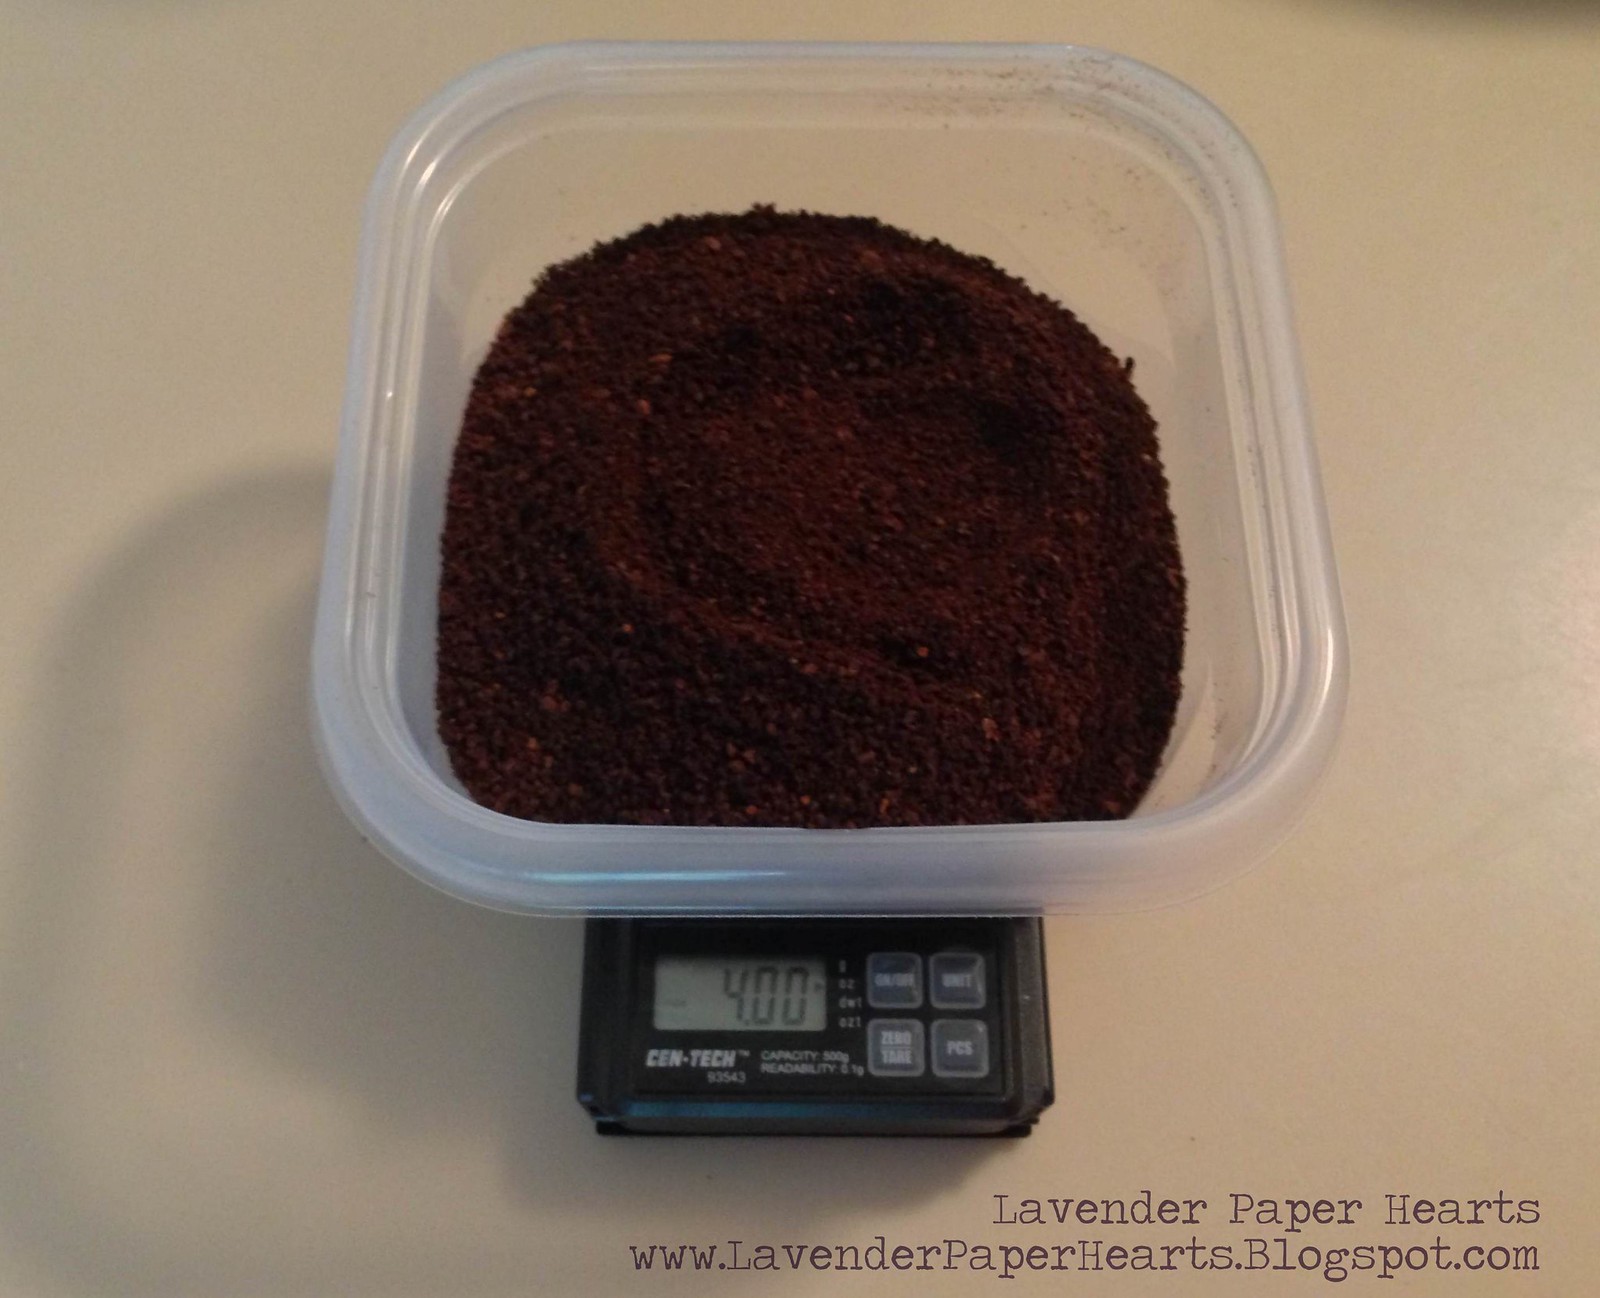
  • If you're using a scale to measure your coffee you'll that and a container (*mine wasn't actually dirty, I'd already poured some coffee into it before taking the photo)
  • Strainer
  • Cheese cloth or large coffee filters
  • Ladle 
  • Pitcher

Iced coffee ingredients - optional:
  • ice, milk, cream, water, sugar, etc. 

Directions: 

Measure out your coffee. The type of coffee you choose is up to you. You just must choose a well ground coffee. Or make sure it's really well ground if you do it yourself. The original recipe I tried from Pioneer Woman used Cuban espresso and it was SUPER STRONG. It's a coffee I use regularly when making Cuban coffee but it was just too much for me. I made it a few times before figuring out that it made me feel bad (sometimes I'm slow).  Don't get me wrong, I love strong coffee, but that was just TOO STRONG for me. I use coffee beans that I get from Trader Joe's and then I grind myself. I make my own blend of the TJ's medium and dark roast coffees. I've used coffees like Dunkin' Donuts (in an attempt to appease my husband's tastes) and ended up using more coffee because it wasn't strong enough.  I've also used Starbuck's medium and dark roasts independent of one another and they were also really good.  You can use pre-ground coffee if that's what works for you! 


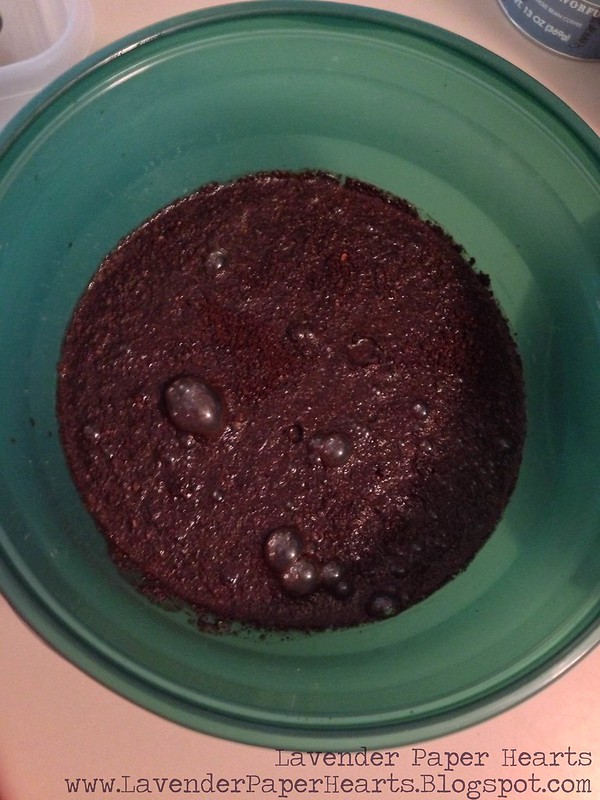
Pour your coffee into a large bowl and then pour your water over the coffee. Give it a stir and then cover it. (True fact: I don't always bother to stir it if I swirl the water in!)  Leave it in a spot in your kitchen where it won't get bumped and forget it for 8 - 24 hours. The nicest thing about this recipe is that you can't really mess it up.


The longer you seep your coffee the stronger it gets, so soak time is up to you (but it needs at least 8 hours). Another trick is if you decide you've made your coffee too strong (which happens) you just need to add more water to the coffee concentrate. It won't ruin it, it'll just cut down the strength a bit. (Be sure to add a little at a time.)  
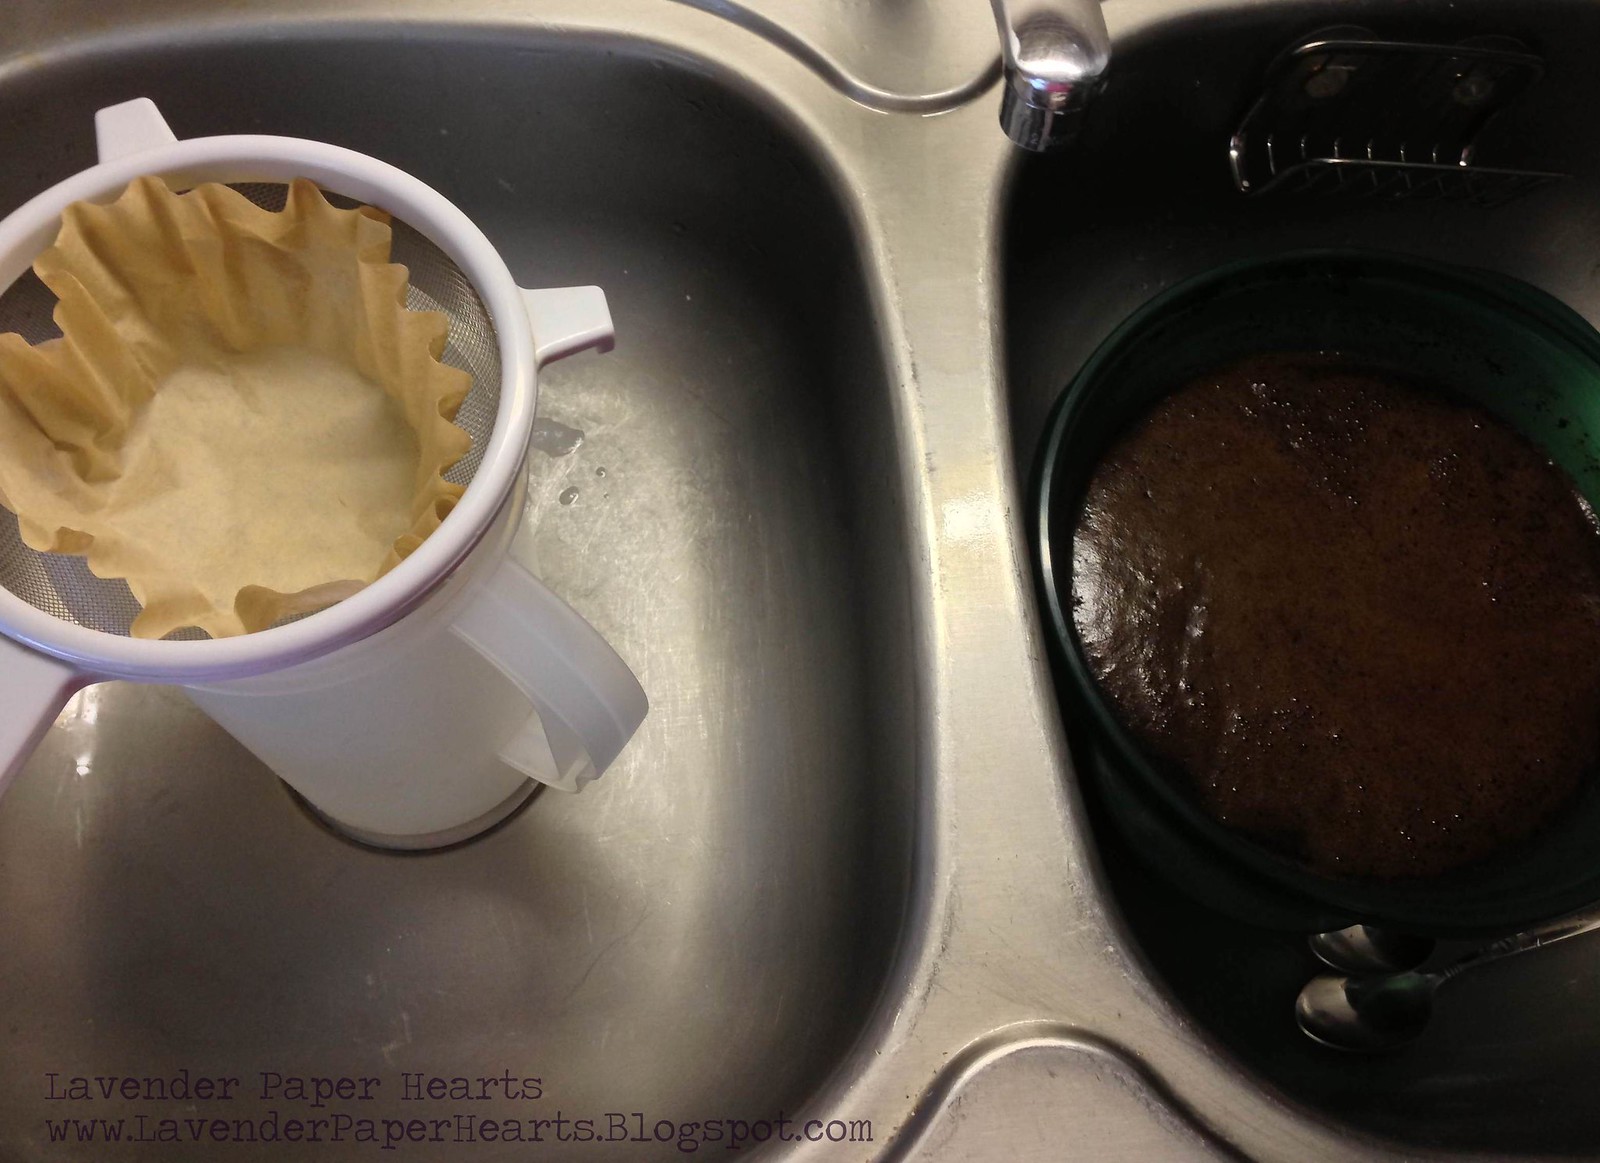
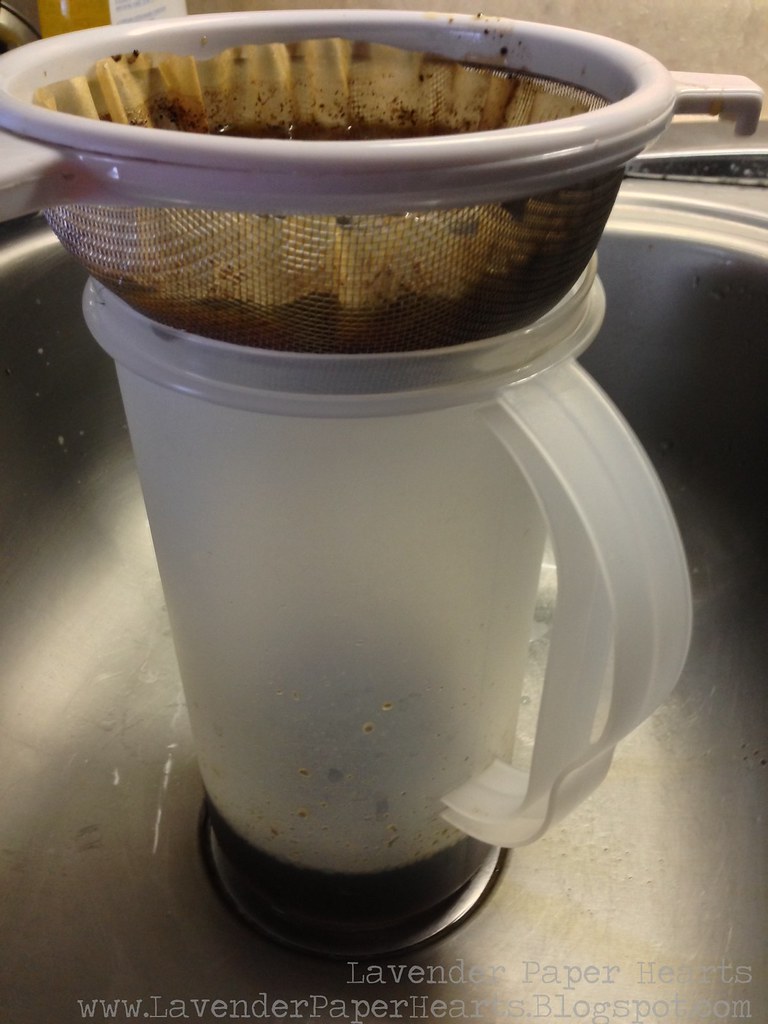
Once you're done letting your coffee steep, get out a strainer and either cheese cloth or large coffee filters that will fit in the strainer.  I like to do this step in the sink because I'm a klutz and I have knocked my drip coffee over before, so I don't take any chances and I just do it in the sink. You'll notice I also put the coffee bowl in the sink so that if any drips when I'm ladling it into the filter set-up I don't have to worry about making a mess. 


Mmmm! Sometimes I have to change out the filter if there are too many grounds in there - which can happen. If you don't want to bother changing the filter and you just have to wait a bit longer to strain the coffee. Walk away and do something else, it will, eventually, drop into your pitcher. It just might take a little more time.  I'd say this process takes about 15 - 20 minutes depending on how much I walk away to let it strain thoroughly. 


Once you're all done, you've now got liquid gold!! Put the pitcher in the fridge and you can either enjoy it right away, or wait until it's nice and cold and go from there. 


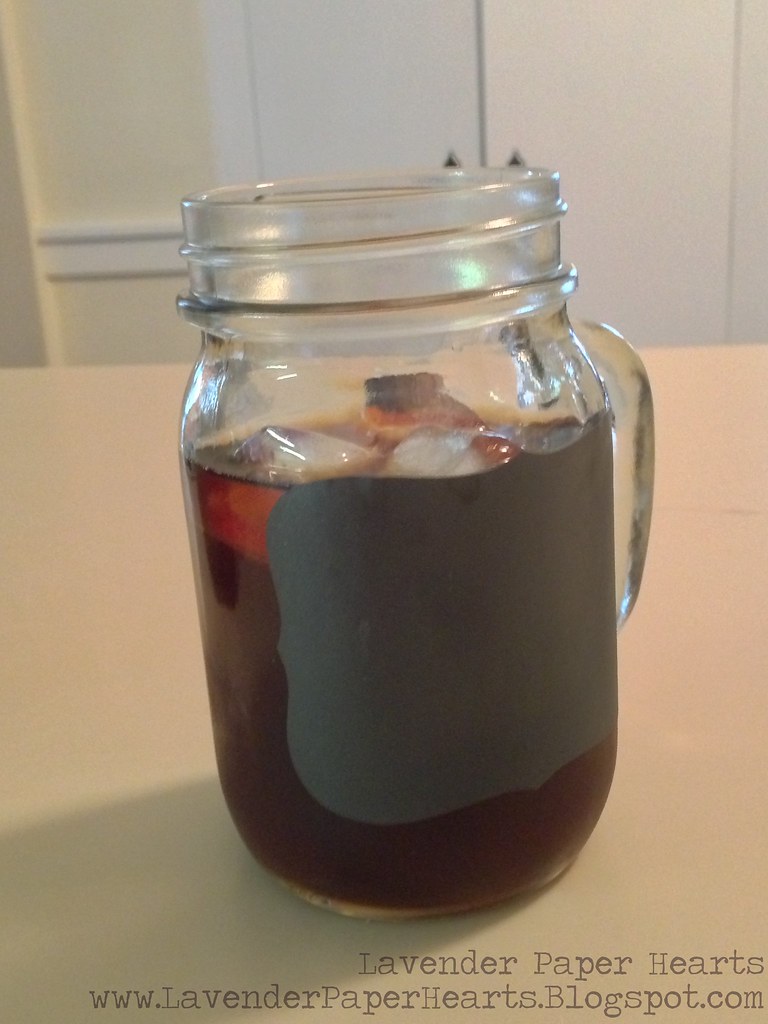
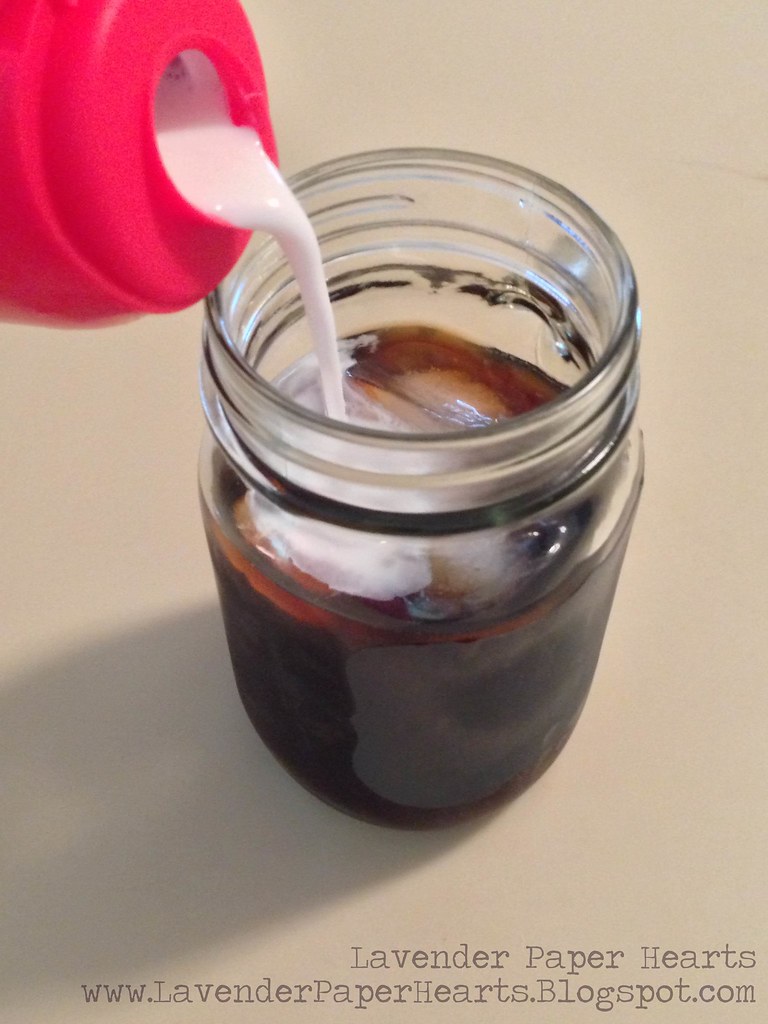
When I make hot coffee, I tend to drink it black, but there's something about iced coffee that makes me crave something a little sweet. I use 3 big ice cubes, and a splash of French Vanilla Coffee Mate. Perfection!! 

(07.01.2014 - ADDITION) I've started trying to stay away from extra soy and unpronounceable chemicals in my diet so I've been making my own creamer. Here's what I do: In a jar I mix together 3/4 cup almond milk with 3/4 cup coconut milk, and a few healthy dashes of vanilla extract. Put on the lid, shake, shake, shake, and you've got delish creamer to go with your coffee!!  (Some brands in the refrigerator section of the store sell this combo in one carton making for instant creamer - even easier!)

 + 


When I made this batch (using only 8 cups of water) it was a bit strong so I added 1 cup of water to my pitcher.  It should be just perfect!! 

Enjoy some cold brew coffee next time you get a hankering for coffee!! There's nothing more lovely in the morning than a cup of iced coffee.  I prefer to take it out to enjoy on the porch along with a good book. It's usually still a bit cool and with my iced coffee and book it's like a glorious little escape a little before I start my day. 

Wednesday, May 22, 2013

Happy Birthday Bailey & Pup Cupcake Recipe!!

So the in-house model, Bailey, who belongs to my sister and brother in law, celebrated his first birthday on Sunday!! Even if it's a bit silly, we wanted to get together to celebrate our favorite little dog!  First, let me tell you a little about Bailey. 

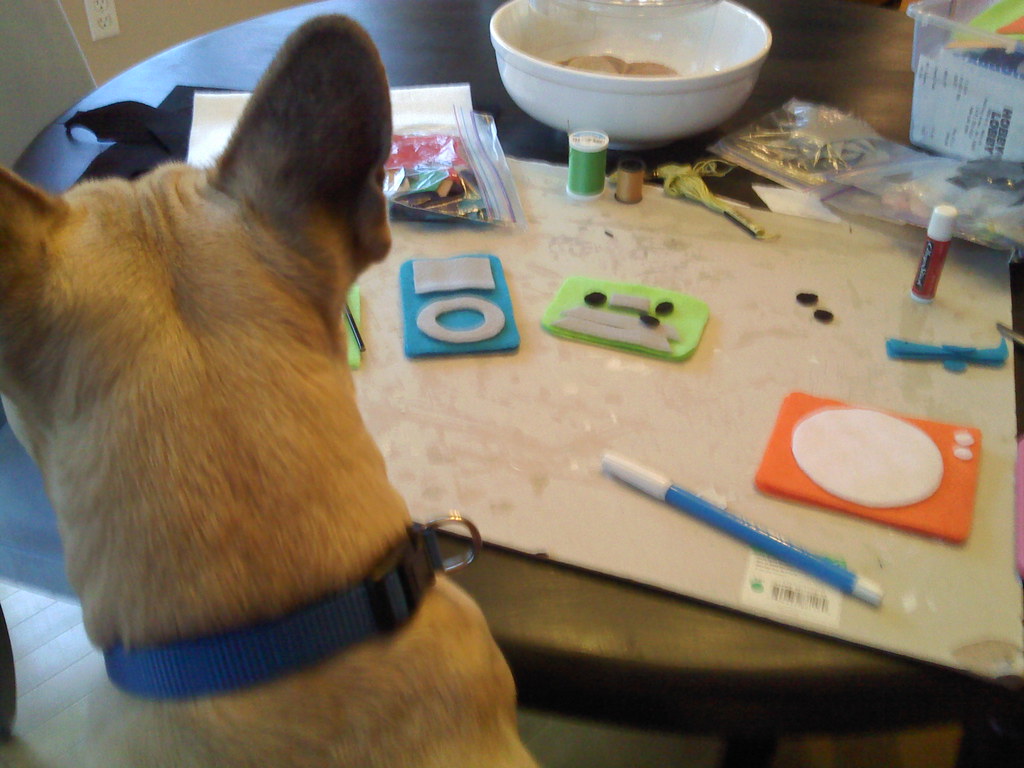
Bailey is not just any ol' dog. See, Bailey is super helpful with the shop. So he's not only the in-house model, but he also supervises my work from time to time: 

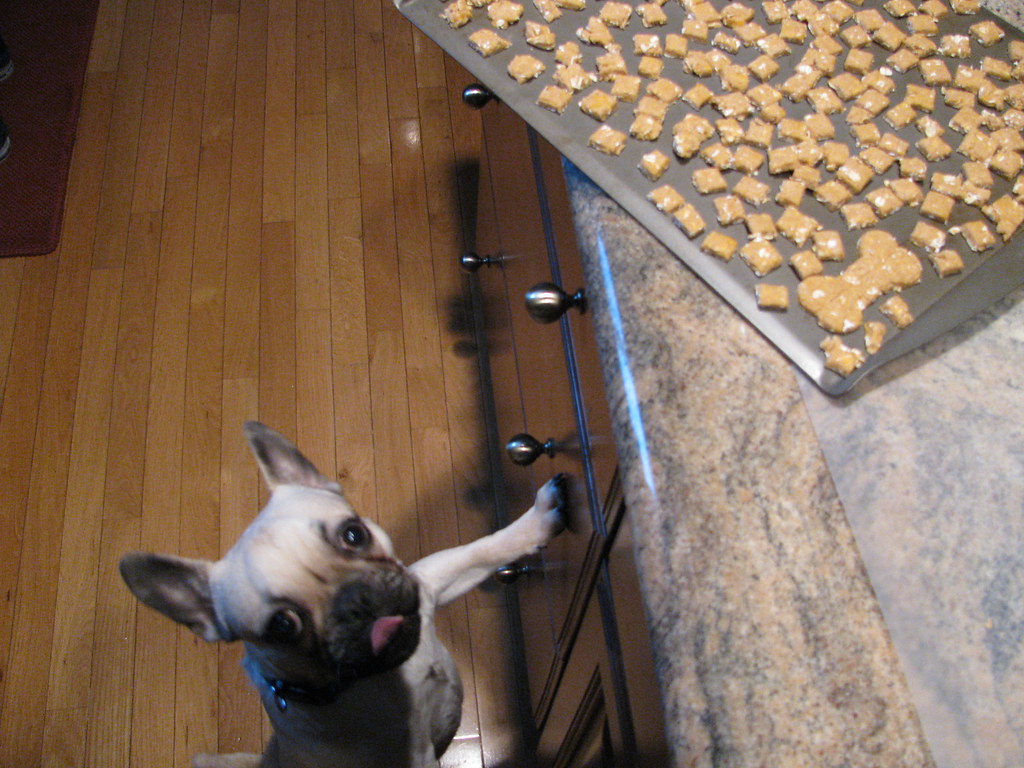
He's also a dedicated taste tester and focuses on quality control:
For my Bailey approved Dog Treat recipe - click HERE.

And, let's be honest, he makes my bowties look extra dapper:
Lavender Paper Hearts Handmade: Satin Fancy Pet Bowtie

But he also helps out in my other line of work - teaching:

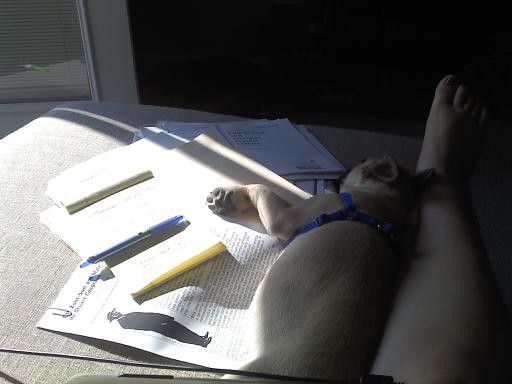
Bailey loves to help lesson plan... See? He's letting me know which article is useful for class by drooling (or sometimes chewing) on the articles he likes.

He also watches me like a hawk to make sure I'm fair when grading:

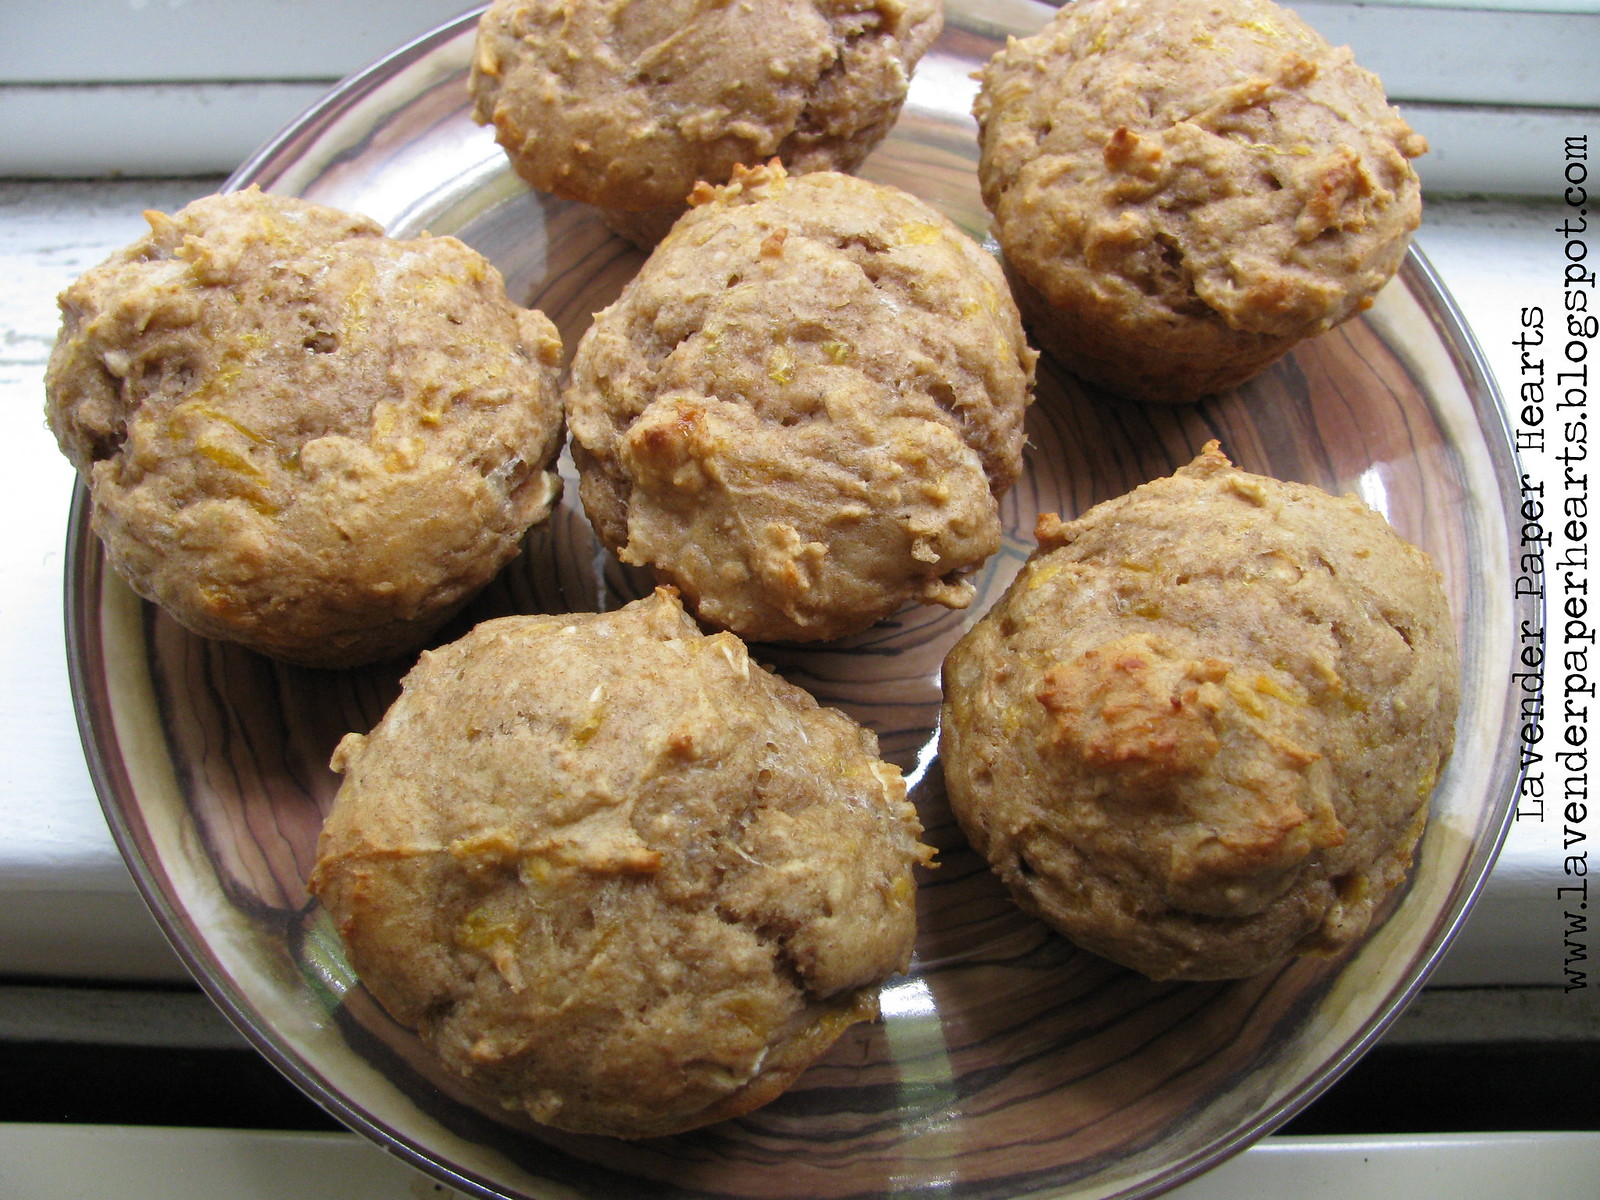
Since Bailey is so helpful, it seemed only fair that we really make sure his birthday was extra special. I fell into a Pinterest loophole one evening a few months back and came across a dog cupcake recipe. I knew that I could modify the recipe to suit Bailey's tastes. It's his birthday after all so I figured he might as well get what he likes!!  Plus, as I found with the dog treat recipes out there, a lot of the recipes have ingredients in them that I just don't think dogs need.  I eliminated the honey, for example, because my version has bananas that will give them lots of flavor - plus dogs don't really need honey?! I mean, I guess it can't hurt, but I figured that if I can easily eliminated it, why not. (Pro-tip: I also halved the recipe since he's the only dog around. Extra cupcakes can be frozen and defrosted when needed). 


Peanut Butter Banana Pup Cupcakes
(makes 6 big cupcakes)

Ingredients
1/4 teaspoon of baking soda

1/4 cup plain yogurt (I used Greek)
1/4 cup peanut butter 
1 Tbs water
1/2 heaping cup ripe bananas (1 large banana or 2 small)
3/4 cups whole wheat flour1/8 cup oatmeal
1 teaspoon of baking powder
1 egg
2 heaping Tbs grated cheese

Optional Frosting
1/2 stick of low fat cream cheese, room temperature
2-3 Tbs creamy peanut butter

Preheat oven at 375 degrees and grease muffin tins well with butter or a spray. Don't use paper liners. Mix flour, oatmeal, baking powder and baking soda together in a large mixing bowl. Blend the yogurt, water, peanut butter, and egg together and then stir in the cheese and banana. Add the cheese mix to the flour mixture and stir until completely mixed. Have no fear if the batter looks super thick. It will still cook up gloriously.  Spoon into the muffin tins, filling each cup about three quarters full. This will make big cupcakes. I would make the cupcakes smaller next time since Bailey is a smaller dog. If you want to do the same, fill each cup just under 1/2 way full.

Bake pup-cakes for 20 minutes, or until a toothpick poked in the middle of a cupcake comes out clean.

*If your dog is allergic to wheat, you can try using Brown Rice flour as a substitution. I haven't used it, but in my researching, I read it could be good substitution.

The original recipe had a frosting of sorts, but I left that off. If you really want your dog to have frosting, I would use half a stick of low fat cream cheese at room temperature and mix it with 2-3 Tbs of creamy peanut butter.  Cream together and slather gloriously on the pup cupcakes. I will say, however, that Bailey enjoyed them without frosting so it's not necessary!!

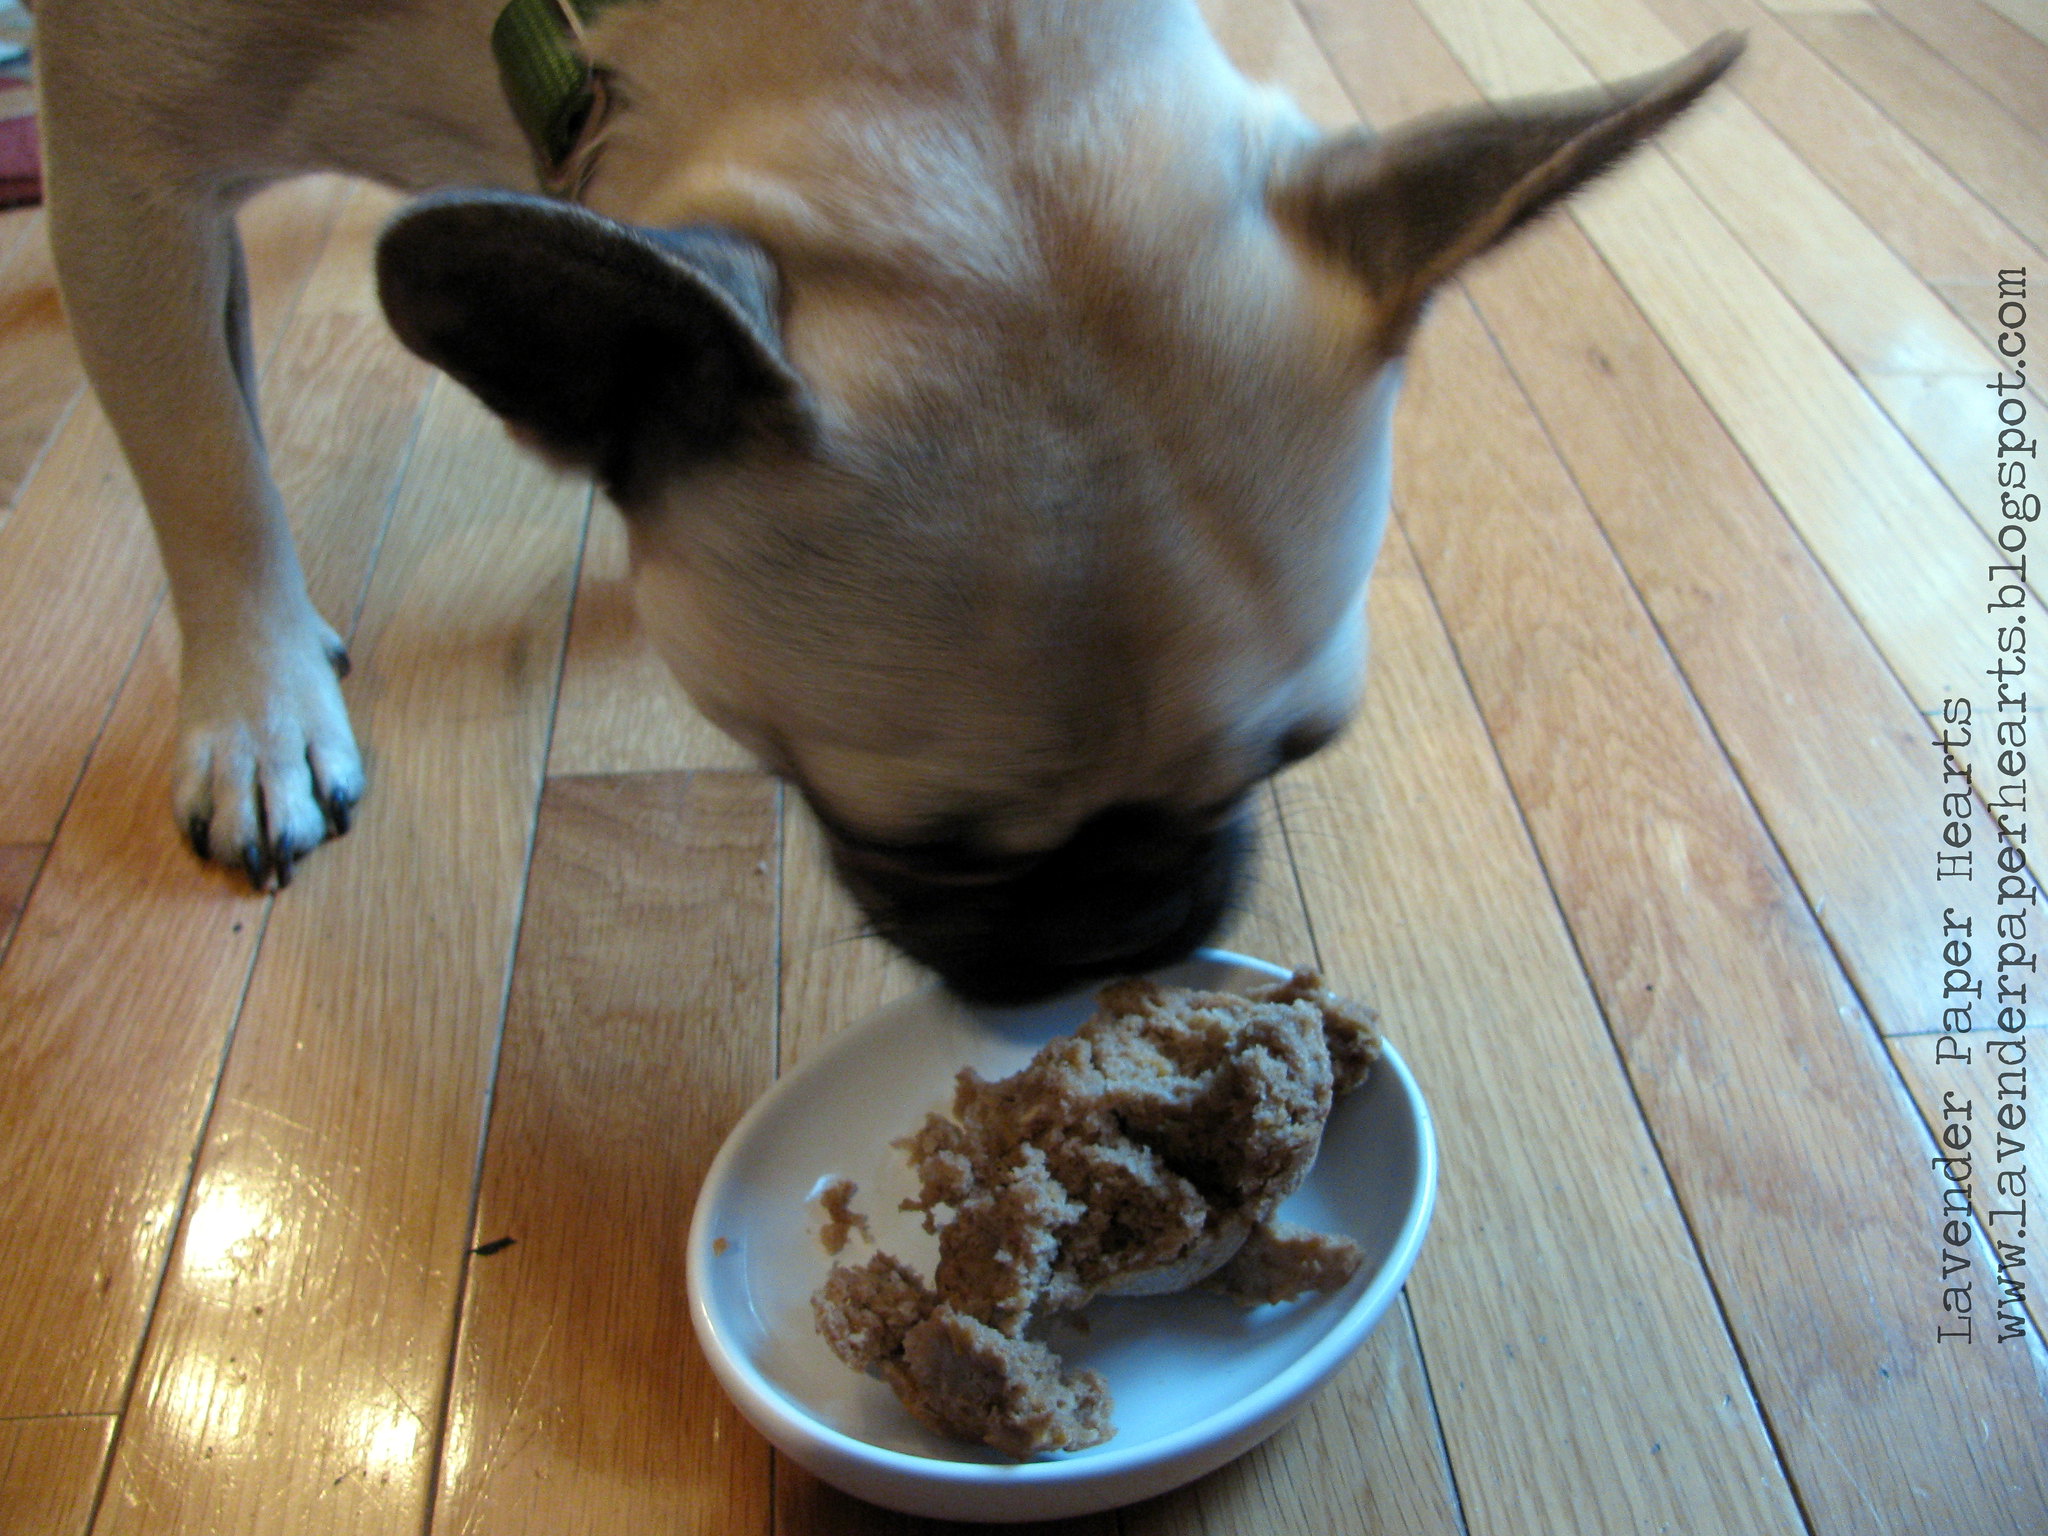
Action shot:  Bailey doesn't eat human food, so he was kind of unsure of what to do with the pup-cake. I had to tear it apart a little bit for him before he dug in.


Happy Birthday, Bailey!! 
Lavender Paper Hearts: Yellow Plaid Fancy Pet Bowties


Follow my blog with Bloglovin

Wednesday, April 3, 2013

Ode to the Blood Orange

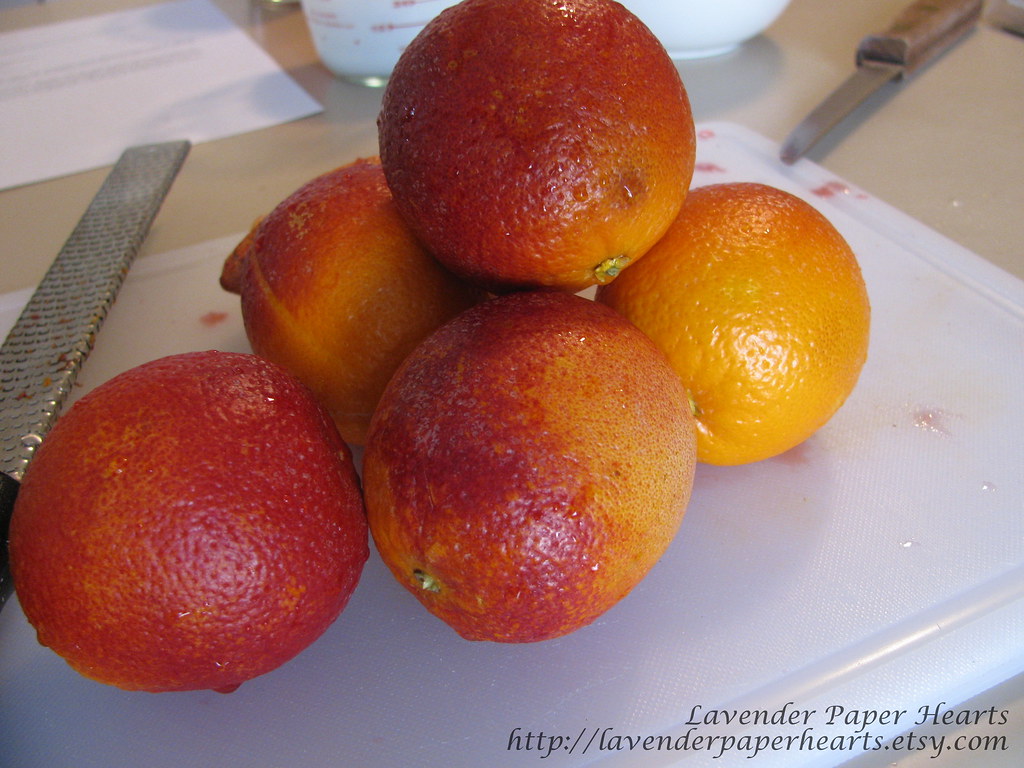
A lot of Cuban recipes call for blood oranges so they're something I've always heard of, but that's it.  These fancy oranges seem to be a bit illusive as I've never actually been able to find them in any grocery store I've ever been too - and I've lived all over the country. Apparently a lot of them are grown in California so I'm even more confused as to why I could never find them. Go figure.  So what does a blood orange taste like? Well, they're an orange that is both a bit sweet and a wee bit bitter so they're usually used in marinating and cooking pork - yum!! Since they're so difficult to find we usually substitute a combination of oranges with lemon and/or limes to mimic the flavor. Last week I was running some errands and stopped by our local fruit and vegetable stand and, lo and behold, they had mounds of blood oranges!! It turns out that blood oranges, like clementines, are a winter fruit so this may be why they've been so hard to find. How Cubans have them on hand for all their recipes is a bit more confusing, but I'll let that one go for now.  These oranges are really beautiful with their orange and red colored rinds.


Once I had the blood oranges I tried eating one like you'd eat an orange. I ripped into it with my fingers and not only was the red of the orange a bit off-putting (maybe like blue ketchup would be?) and the flavor was not to my liking.  I guess, even though that I knew they were not supposed to be super sweet, they were more bitter than I was expecting.  I now totally understand why a combination of oranges and lemons are used as a substitution though - it's exactly what they taste like!!


See how the red varies from photo to photo? I'm guessing that this has to do with the maturity of the fruit itself.  The photo in the top right was the freshest blood orange - its peel had less red on the outside and interestingly the red color seems to be spread throughout the fruit.  You can see in the top left photo that the orange is the deepest red, and the color seems to have spread to the outer most part of the fruit. 

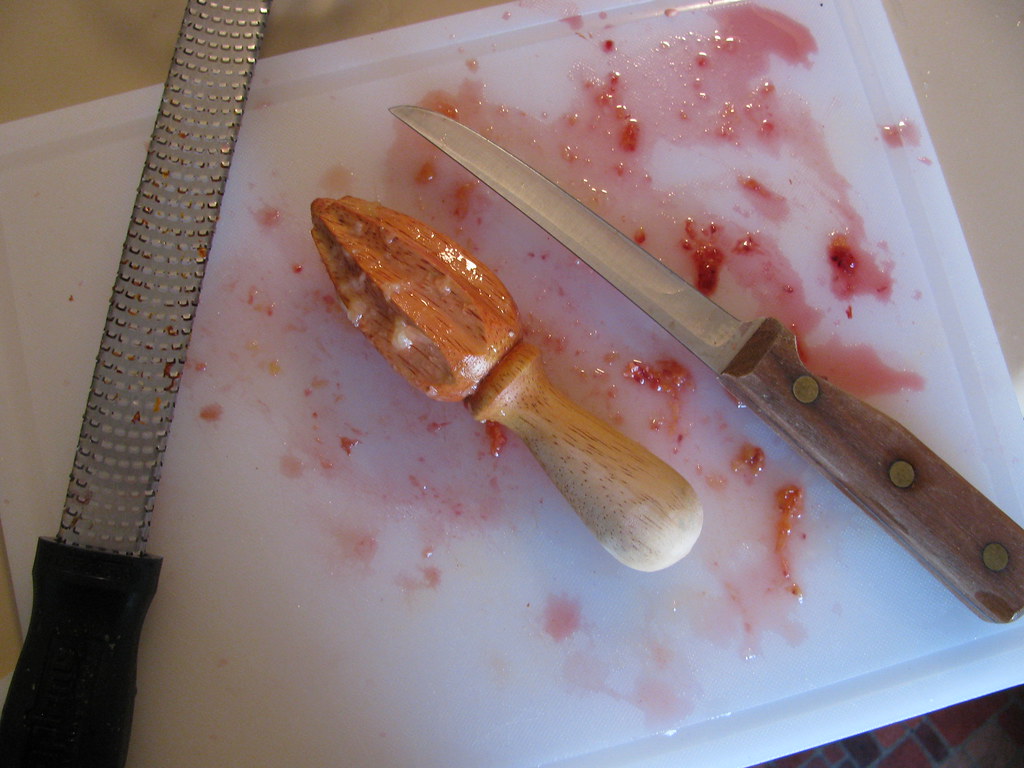
Once I had my blood orange booty I was contemplating what to do with them. I purchased about 12 of these beauties so they weren't all going to be used for marinating pork. I decided that regardless of what I was doing with them, I'd zest and juice them all and then go from there.  If you look at the photo below, no, I didn't kill something, that's what blood oranges look like - intense, right?  Halfway through juicing the oranges all I could do was laugh. It was a red blood orange mess and if you didn't know I was juicing oranges you'd think I was butchering an animal. Oy!  

Fun fact: I usually buy a bag of lemons at a time because I find it to be less expensive than buying one at a time. I don't always have a use for that many lemons at a time so I zest them, juice the lemons, and then freeze the juice.  That way I always have lemon juice on hand!! I just pull it down when I need lemon juice, defrost it, use what I need, and then refreeze the juice.  I zest my lemons (using my favorite kitchen tool - the microplane featured on the left side of the photo below) to up the lemon flavor - you don't have to, but I love citrus so the more flavor the merrier in my book.

I took this as I was cleaning up - it's a bit frightening, no?

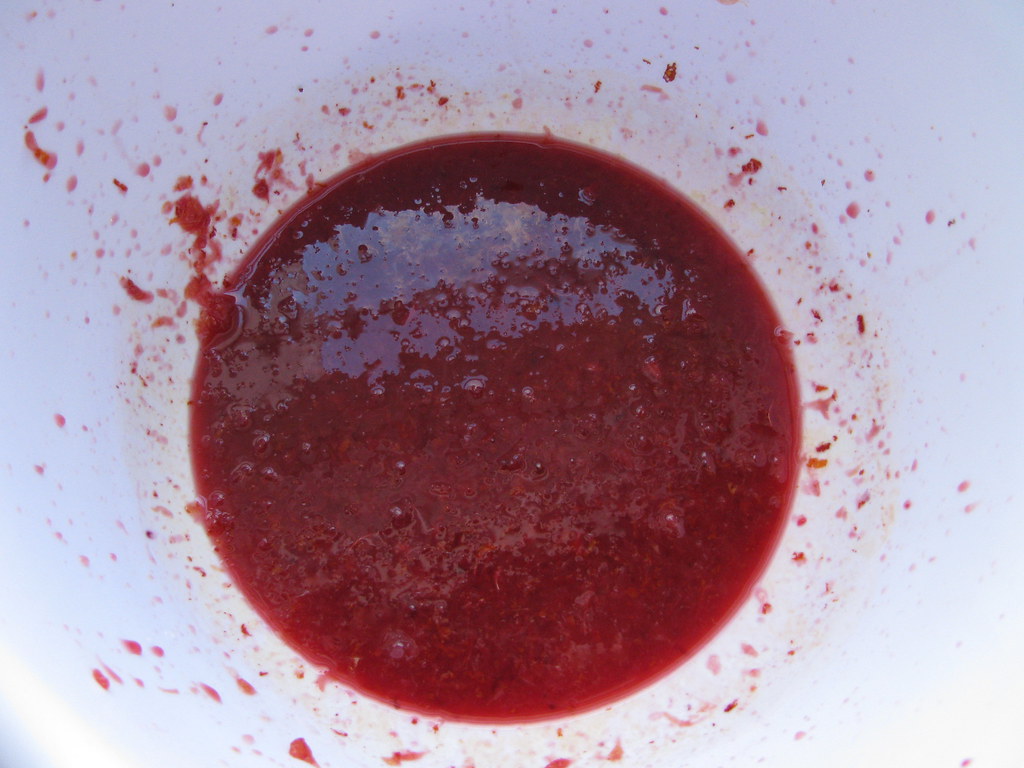
The color of the juice is really beautiful though once you separate it from the mess.  

These would make really beautiful mimosas!! I had other plans though. I was doing a lot of baking in preparation for Easter and I knew that my cake recipe called for egg whites, but then I would be left with 6 yolks. I hate throwing them away if I don't have to so I suddenly knew exactly what I was going to make - Blood Orange Curd!!  

I've made clementine curd before using a Jamie Oliver recipe, and it was pretty easy and exceptionally tasty so while the cakes were in the oven I whipped up some glorious pink blood orange curd. I used this easy and straight forward recipe from the blog Use Real Butter and after 10 minutes of whisking (with the help of my husband who took over while I cleaned up the blood orange mess) we had glorious pink-orange blood orange curd.  The only changes I made to the recipe was using salted butter, because I didn't have unsalted on hand - and it tastes just fine.  The recipe only called for 3/4 of a cup of blood oranges (and I only made half a recipe) so I've got a cup and a half to two cups of blood orange juice in my freezer!! I've already got plans to add some of the curd to ice cream later in the summer (I found a recipe for that from the blog Scoop Adventures) and depending on how much I have left, the Blood Orange Tart over at the Bonjon Gourmet looks pretty glorious as well.  In the meantime, I think I'm going to whip up some biscuits to slather it on next weekend!   

Now on to Easter!!

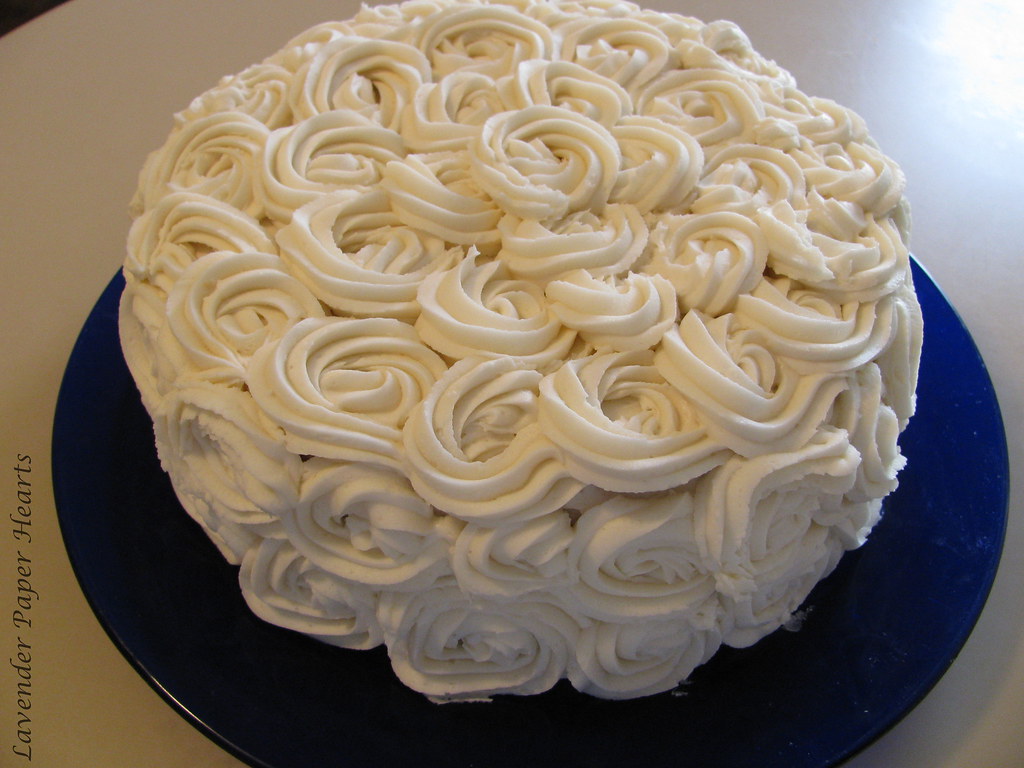
Rose Cake - White Cake, with Strawberry Filling and Buttercream Frosting

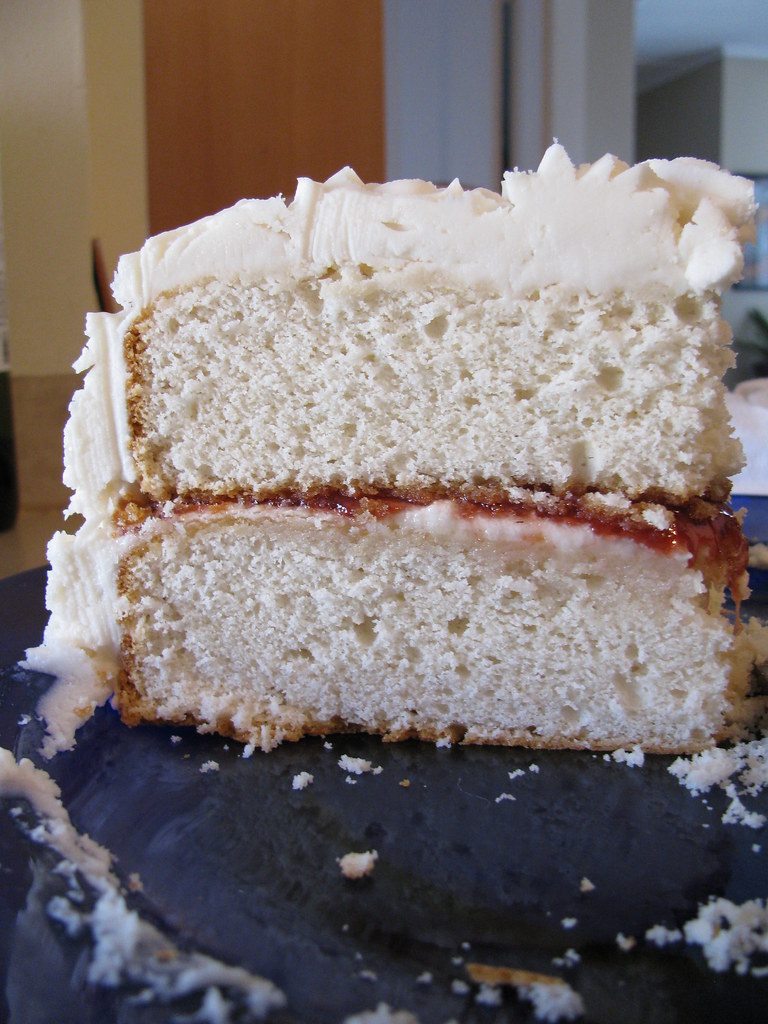
I was in charge of making the cake for Easter this year and my Sister-in-Law requested almond cake with strawberry jam filling (the same flavors as our wedding cake!) and shortly after her request I am Baker posted a fantastic looking recipe which was a white cake with almond flavor.  Perfect!  She also also has a great rose cake tutorial that I've wanted to try since I stumbled upon it so it was an I am Baker day inspired cake all around!! 

The cake batter for this recipe was glorious. It was thick and luscious and I was really excited when I was mixing it together.  Her Buttercream Frosting recipe (I used the half butter half shortening recipe listed) was also really easy - make sure your butter is really at room temperature before you start mixing or you will never get it to mix with the shortening - trust me.  

I think next time I would also take the cake out of the oven a bit earlier than I ended up doing this time; a couple of minutes seems to really make a difference.  The only things I might change was to paint on some simple syrup before assembling the cake, and then taking it out of the refrigerator for several hours before serving.  I'd followed her directions to put the cake in the fridge after frosting, but didn't realize how long it would need to come to room temperature before serving it.  The cake was still rather cold when we cut into it and it make the cake seem really dry. I thought it was a disaster. After it came to room temperature (when I had some later that night for dessert - again) it tasted MUCH better and much like it was supposed to.  Oy - that's what I get for using a bunch of new recipes all in one day, but now that I know the recipe will be glorious going forward. 


*Ignore the frosting and crumbs on the plate - this was a rushed shot. 

The rose frosting technique was also pretty easy and while I think I can make it prettier next time (and remember to make a batch and a half recipe of frosting), I was also happy with my first attempt.  I think I need to overlap my flowers more next time and remember to finish the rose at the top so it is hidden more. Here's a video on how she does it: 

Friday, August 24, 2012

Baking: Apple Hand Pies

Apple handpies for the birthday girl!!

They'll be served with salted caramel sauce and homemade whipped cream... drool.

Cheater tip: You can makes the pie crusts from empanada shells.  They taste yummy and work great if you don't have a lot of time and or don't feel like making crust from scratch. You can usually find them in the "ethnic" section of your grocery store if your grocery store carries Goya products.


Apple Hand Pies

Crust:
2 cups Flour
1 tsp Salt
3/4 cup Shortening
4-8 tbsp Cold Water

Filling
4 Apples, peeled, cored & chopped
1/4 cup Brown sugar
1/8 cup Granulated Sugar
1/8 cup Flour
3/4 tsp Cinnamon
1/8 tsp Nutmeg
1/2 tsp Vanilla
A pinch of Salt

For Golden Crust:
1/8th cup heavy cream
Sugar for sprinkling on top

Pre-heat oven to 350.


If you're not using the cheater crusts, mix together the flours and salt and then cut in the shortening using a pastry cutter if you have one (or forks).  Slowly add the water, only adding enough until you can form a ball with the dough.  Let the dough chill for about 20 minutes in the fridge and then come back to it.

Prepare apple filling by chopping up apples into small pieces. I usually aim for roughly 1 cm squared pieces, that way they’ll get soft, but not turn to mush while baking.  Toss in apples, throw other filling ingredients on top, and mix together.

Non-cheater crusts: Remove your dough from the fridge, throw some flour on the counter and roll out the dough.  Using a bowl cut out your circles. I recommend circles 5-6 inches in diameter.


Depending on the size of your crusts fill with as much apple filling as you can fit in the crust while still being able to close it. For me this was about 3 Tbs.  You can use some water around the edge of the crust to help seal it, but I don’t always do this step.  To do this dip your finger in water and drag around the edge of the pie crust, then pinch the crust closed with a fork.  Once the pies are ready for the oven brush them with heavy cream and sprinkle sugar on top.

If you’re using 5-6 inch circles the filling will fill about 14 hand pies.  Bake for 25-30 minutes or until the pies are golden brown.  Set them on a cooling rack.  If you're serving them later don't cover with cling wrap until they're completely cool. 

If you have extra filling, have no fear, just throw it in a small casserole dish, make some streusel apple pie topping and revel in the leftovers. Breakfast of champions. 


Tuesday, July 31, 2012

Lemon Cheesecake Yogurt w/ Ginger Graham Cracker Crust

Ugh - Let's try this again. I had this whole recipe post finished and I tried to push a post back but it was eaten by the internet gods... Sighhhh.

First things first, I want to throw out a few qualifiers for this post. These would be a really great and pretty easy treat for a bridal shower (or baby shower). They're cute and single serving size and they're also pretty healthy so you don't have to feel bad about eating 2 in one sitting... not that I know this from experience, I'm just, you know, guessing... Anyway, so I made these last Monday when it was almost 100 degrees out. I was a woman possessed and really wanted some cheesecake. It was really hot out and then I thought it was a good idea to turn on the oven. That said, if you make this recipe, take the 30 seconds I didn't to wipe down the sides of the ramekins once you've filled them, and before you pop them in the often. I was too hot and humid, and I just wanted to throw them in the oven and leave the kitchen asap. I also may have been slightly delirious by that point.

I should also mention that I'm kind of a, well, I'm a cheesecake snob. It's not really my fault though. See, when I was a kid we had a family friend who would make the most amazing out-of-your-mind cheesecake. It was lite and smooth and had a subtle lemon flavor and it was pretty much glorious. This cheesecake spoiled me to the point that I never order cheesecake in restaurants and generally really only eat it if it's homemade (there are obviously occasional exceptions).

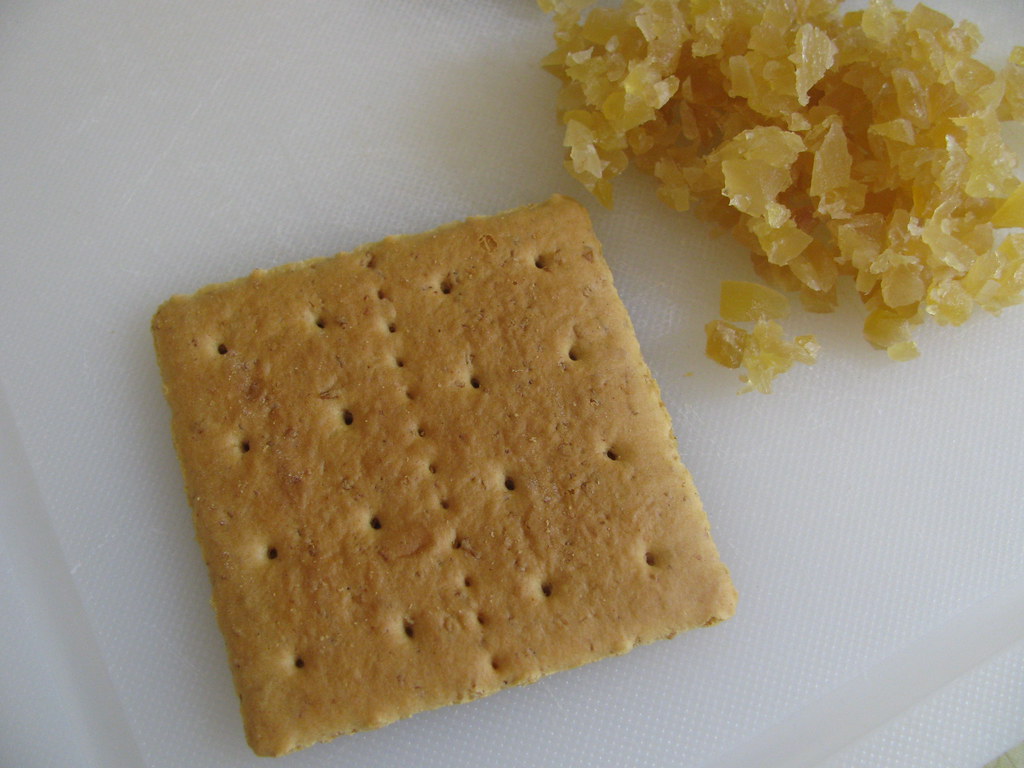
I knew when I came across this recipe I needed to give it a try. Plus, I've kind of been on a huge Greek yogurt kick lately so that made the recipe even more appealing. The filling for this recipe is adapted from the Lemon Cheesecake Yogurt Cups by Skinny Taste. I mostly adjusted to my tastes and also to take into consideration the ingredients I had in my house at the time. I changed up the crust completely though because I wanted to use graham crackers in the pantry and also because I love ginger and lemon together.


Ingredients:
  • 7 ½ graham crackers (if they come in sheets of 4 rectangles, mine come in 2 rectangle pieces which is different & awesome)
  • 2 Tbsp Butter, melted
  • 1 ½ Tbsp minced crystallized ginger
  • 8 oz fat free cream cheese, softened (If it's not softened it won't mix well into the rest of the cheesecake.)
  • 1/4 cup sugar
  • 2 tsp vanilla
  • 6 oz fat-free Greek yogurt
  • 2 large egg whites
  • 3 Tbsp lemon juice, with pulp (pulp optional, but I love lemon flavor)
  • 1 Tbsp lemon zest
  • 1 Tbsp all purpose flour
  • Strawberries (optional)
Directions:
Pre-heat oven to 350°.


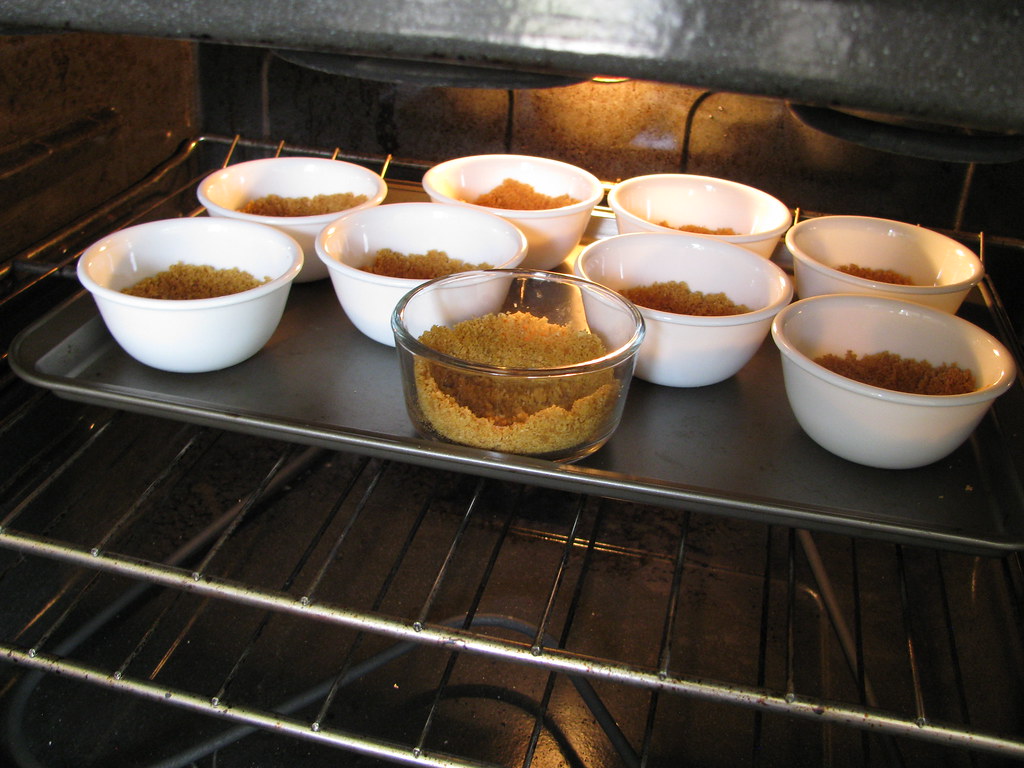
You can make these in little cupcake liners (12) or small ramekins (8), I used the later. First things first though, start by making the crust. In a food processor toss in the graham crackers and ginger and pulse until the crackers are pulverized. Next, mix in the butter and pulse to mix. (You could also make this in a gallon bag and bash the crackers with a rolling pin or meat hammer.) The mixture should look slightly moist.


Spoon a heaping table spoon into each ramekin – if you use cupcake liners you might want to use a little less. Tap the crust down and up on the sides a little if you’re using ramekins.


Gently place the cups on a baking sheet and bake the crusts for 10-15 minutes until they change color slightly. You’ll also most likely start to smell them as they get close to being done. This basically sets the crust before you fill them and bake them again.

While you’re baking your crusts you can get started on the filling. Skinny Taste warns to mix the ingredients together gently and not to over mix so keep that in mind as you mix the ingredients together.

Mix together the cream cheese, sugar, and vanilla until smooth using an electric mixer.  Slowly mix in the yogurt, egg whites, lemon juice and zest, and the flour.  Once it is all incorporated stop mixing – you don’t want to over mix.


Distribute the filling evenly into your cups and then bake for about 20 minutes until the center is almost set. Remove from the oven and let cool to room temperature before you put them in the fridge to chill.

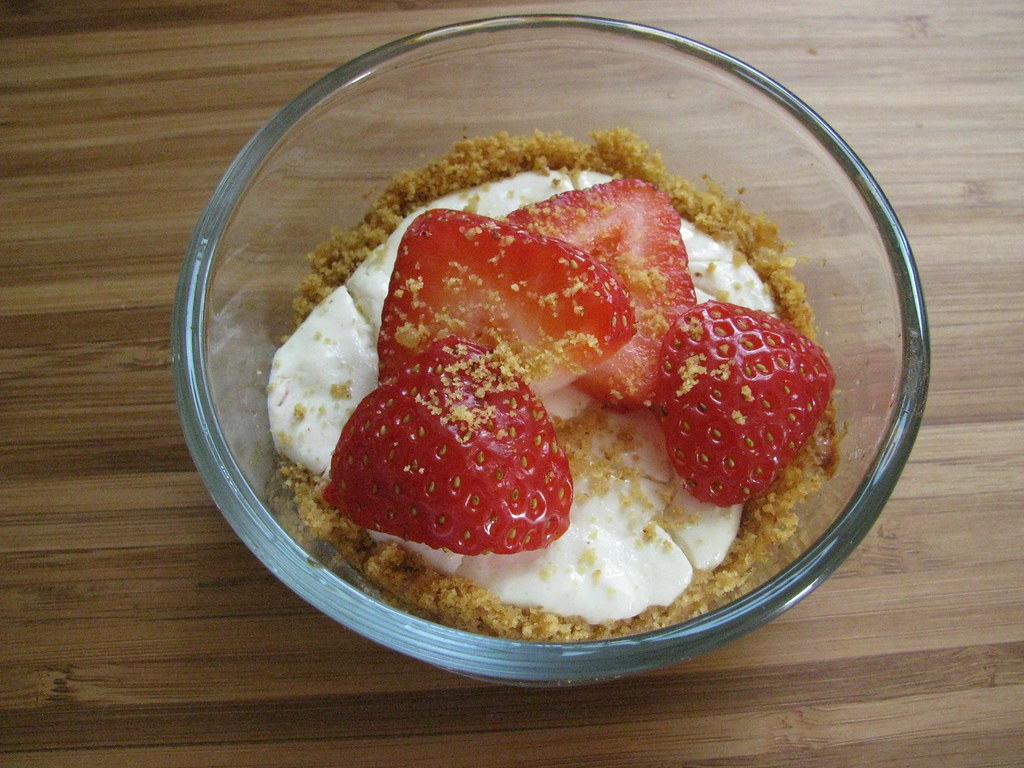
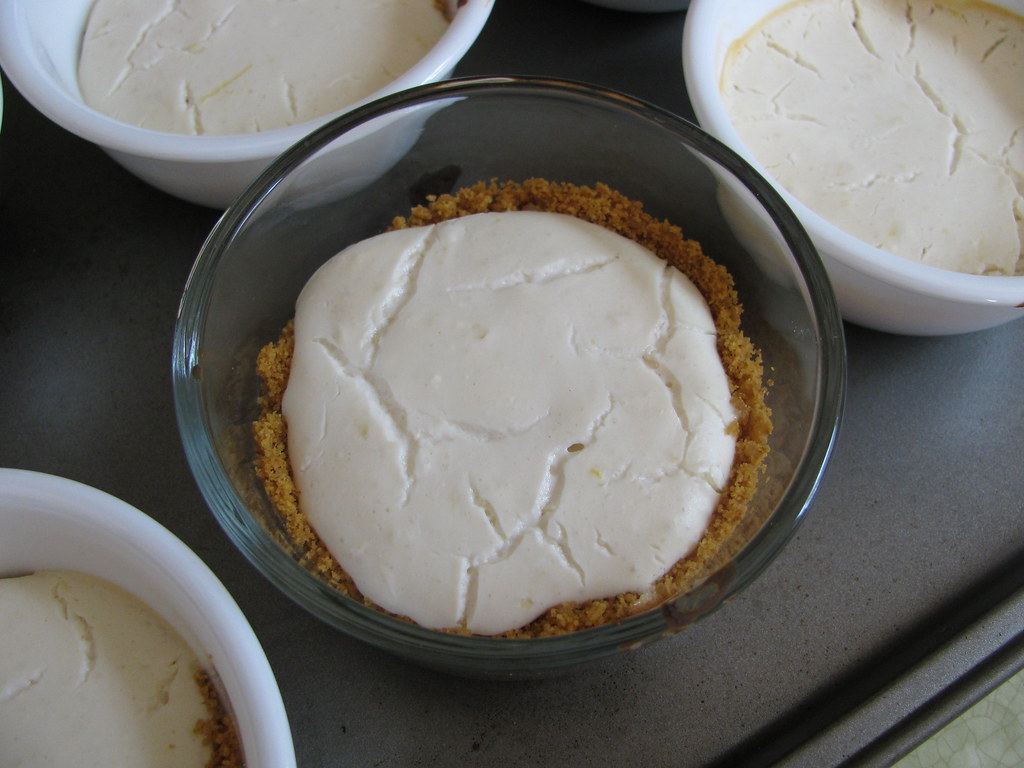
When they're done they'll look like this:

You can serve with fresh fruit on top.  I choose strawberries because I love strawberries.  The creamy cheesecake goodness is light and slightly lemony and when paired with the ginger graham cracker crust it's a super.mega yummy flavor explosion in your mouth.  Don't take my word for it - you should make this - stat!


Lemon Cheesecake Yogurt Cups w/ Ginger Graham Cracker Crust

Ingredients:
  • 7 ½ graham crackers (if they come in sheets of 4 rectangles)
  • 2 Tbsp Butter, melted
  • 1 ½ Tbsp minced crystallized ginger
  • 8 oz fat free cream cheese, softened
  • 1/4 cup sugar
  • 2 tsp vanilla
  • 6 oz fat-free Greek yogurt
  • 2 large egg whites
  • 3 Tbsp lemon juice, with pulp (optional, but I love lemon flavor)
  • 1 Tbsp lemon zest
  • 1 Tbsp all purpose flour
  • Strawberries (optional)
Directions:

Heat oven to 350°.
You can make these in little cupcake liners (12) or small ramekins (8), I used the later.  First things first though, start by making the crust.  In a food processor toss in the graham crackers and ginger and pulse until the crackers are pulverized.  Next, mix in the butter and pulse to mix.  (You could also make this in a gallon bag and bash the crackers with a rolling pin or meat hammer.)  The mixture should look slightly moist.  Spoon a heaping table spoon into each ramekin – if you use cupcake liners you might want to use a little less.  Tap the crust down and up on the sides a little if you’re using ramekins.  Gently place the cups on a baking sheet and bake the crusts for 10-15 minutes until they change color slightly.  You’ll also most likely start to smell them as they get close to being done.  This basically sets the crust before you fill them and bake them again.

While you’re baking your crusts you can get started on the filling.  Skinny Taste warns to mix the ingredients together gently and not to over mix so keep that in mind as you mix the ingredients together.  Mix together the cream cheese, sugar, and vanilla until smooth using an electric mixer.  Slowly mix in the yogurt, egg whites, lemon juice and zest, and the flour.  Once it is all incorporated stop mixing – you don’t want to over mix.  Distribute the filling evenly into your cups and then bake for about 20 minutes until the center is almost set.  Remove from the oven and let cool to room temperature before you put them in the fridge to chill.  You can serve with fresh fruit on top.  

Friday, June 29, 2012

Recipe: Watermelon Cooler

In honor of our anniversary I thought I'd share a recipe here today. I came across this drink when we were on our honeymoon up at the Inn at Mill Falls. These hotels are ABSOLUTELY AMAZING!! I totally recommend them for a weekend getaway or even to get married.  They have really lovely facilities and exceptional customer service.  Also the rooms are just out of this world... and the BEDS... OMG the BEDS ARE JUST... YOU NEVER WANT TO LEAVE

The day after our wedding we drove the couple hours up to New Hampshire and were pretty much exhausted...  We were also starving.  Since we were so tired we didn't feel like getting super dressed up so we walked down to a bar just down the boardwalk from our glorious hotel.  It was this really fun restaurant called Town Docks. We sat at a picnic table and had our feet in the sand and we scarfed down pretty much everything in sight - it was fantastic!! I attempted to eat the biggest burger I've ever seen (I didn't read the menu closely, I had no idea how big it was) and also treated myself to a little something to drink: a Watermelon Cooler. I'd never had one before, but it sounded so amazeballs I ordered one right away. 

The nice thing about this drink is that it drips with summertime... It's got some mint to cool things down, watermelon which helps to quench your thirst on even the hottest of days, and vodka.  Need I say more?  Bonus: it's also super easy to make!!  You can wow your friends with this for the 4th of July. You can even make a virgin version which is also super yum by just leaving out the vodka - it's still REALLY tasty!

Watermelon Cooler

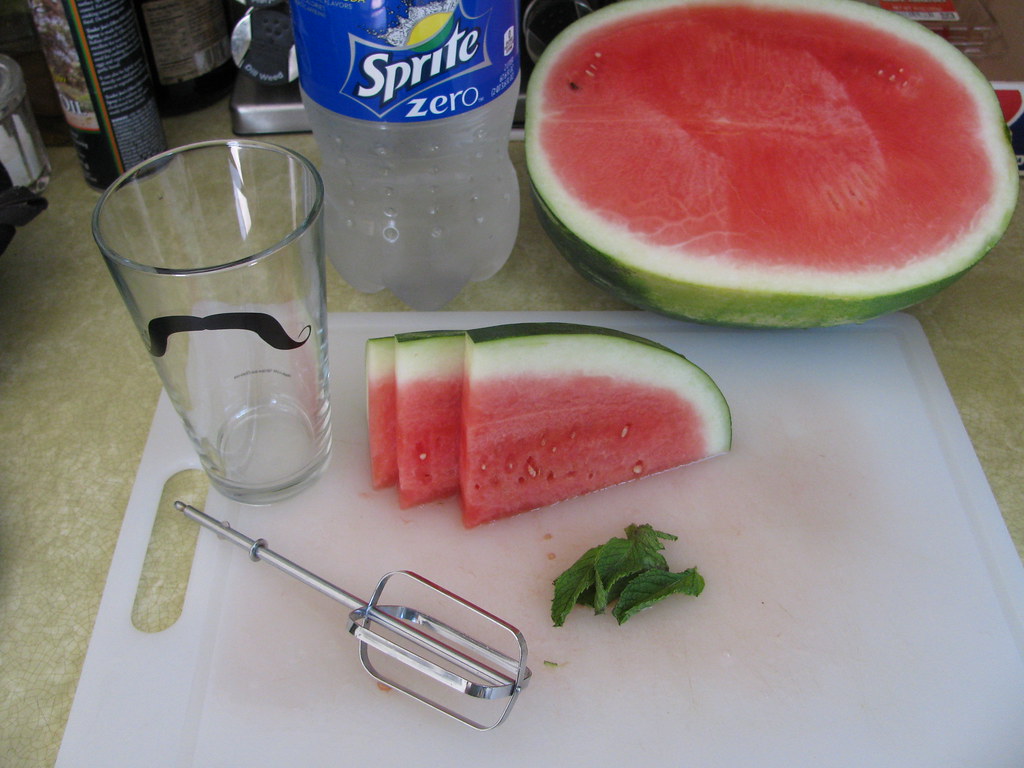
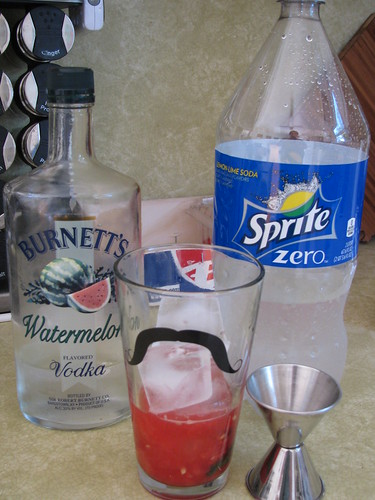
*I forgot to get out the vodka for this photo!

1 slice of watermelon
1 oz watermelon vodka (or leave this out for a virgin drink)
2-3 mint leaves (you can add more or less depending on what you like)
Ice – (or if you want to get really fancy, freeze watermelon chunks and use them!)
Sprite (I’ve been using Sprite Zero and it works just as nicely)

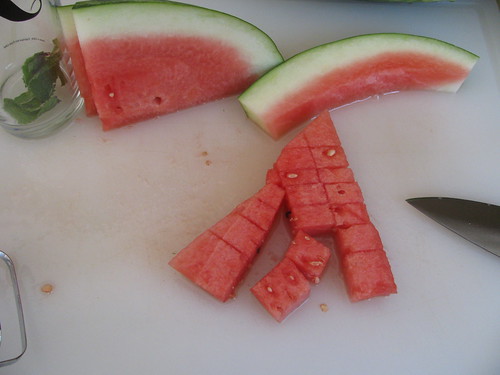
Cut up your watermelon slice. You're going to mash it, so it doesn't have to be fine diced or anything. Sometimes if I'm feeling particularly lazy I just rip off the pink parts with my hands... but don't be like me, use a knife.

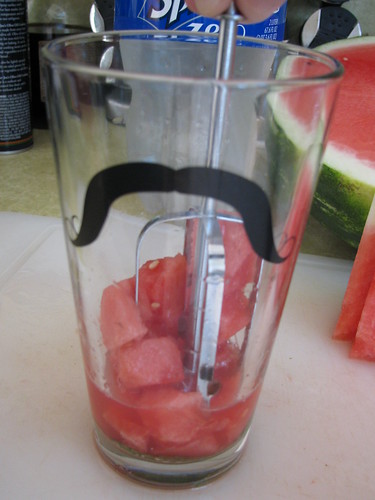
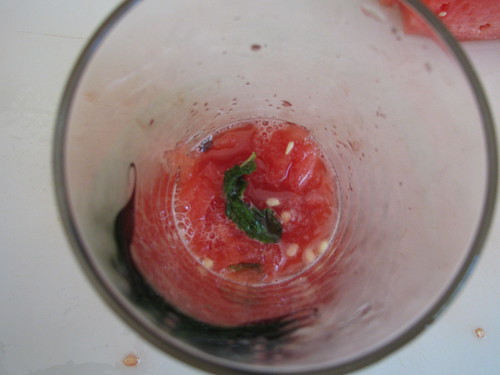
 In a highball glass (or a pint glass) cut up your watermelon and toss in the mint. Using a muddler (or a super classy hand mixer beater) mash the heck out of the watermelon and mint. 


It should look like watermelon soup when you're done. 


When it’s sufficiently pulverized, add a shot of watermelon vodka (or more depending on your tastes), a few cubes of ice, and top off with sprite (until the glass is full). 


Stir it a bit with your straw, sip, and enjoy!!


Watermelon Cooler
1 slice of watermelon
1 shot watermelon vodka (or leave this out for a virgin drink)
2-3 mint leaves
Ice – (or if you want to get really fancy, freeze watermelon chunks and use them!)
Sprite (I’ve been using Sprite Zero and it works just as nicely)

Cut up your watermelon slice. You're going to mash it, so it doesn't have to be fine diced or anything. Sometimes if I'm feeling particularly lazy I just rip off the pink parts with my hands... but don't be like me, use a knife.  In a highball glass (or a pint glass) cut up your watermelon and toss in the mint. Using a muddler (or a hand mixer beater) mash the heck out of the watermelon and mint. It should look like watermelon soup when you're done. When it’s sufficiently pulverized, add a shot of watermelon vodka (or more to match your tastes), a few cubes of ice, and top off with Sprite (until the glass is full). Stir with a straw (or spoon) and sip away!!