
My sister-in-law, Meghan got married two weekends ago to her now hubs Eric M. Their big day was really lovely from start to finish and it felt extra special because they asked both my husband (Meghan's brother) and me to be in their bridal party, so we got to be involved in all of the action!
Earlier this year Meghan emailed me to ask if I'd make a hair piece for her big day - of course I was super flattered and, moreso, really excited to get to create something she'd wear on such an important day. Her dress was top secret - as in she swore me to secrecy about the dress!! I was not to show it to anyone. I took this seriously and didn't even show it to her brother!! Since her wedding has now passed I'm pretty sure she wouldn't mind me sharing the process and the details now...
The way that my brain works is really visual. When I'm making a custom piece for a specific event it really helps me to see the dress (or outfit) to start to develop designs in my head. I like to see the material, texture, color, and style and design of the dress so I can try and do my best to evoke that in the hair piece. The designer for Meghan's wedding dress was Sottero and Midgley (sidebar: I LOVE Maggie dresses, I wore one myself!) and the style is called Sidney. The dress is made of ivory chiffon so I used that as a starting point for the fabric I was going to use for the hair piece. It was also a material I'd never used before so it was a great new challenge... Plus, let's be real - this was for my SISTER-IN-LAW'S WEDDING - it was kind of a super big deal.
Here's a close up on the detail on her lovely dress:

Photo credit: Probably by my MIL
The details are great, right? And that's not even the whole dress (which you can check out here)!!
I spent a lot of time tracking down a rhinestone button center that closely resembled the rhinestones on her dress. I needed to find something similar so it looked like it flowed with the dress and didn't stick out by being too different aesthetically.
The hair piece is actually quite time intensive as it involved cutting and then molding each individual petal layer. This piece has about 15 layers all together. When I was getting done with fiddling with all of the petal layers I played around with the shape and volume and sent Meghan photos so she could see the designs I came up with. She gave me a lot of free reign on the design, so I also wanted to make sure I met the vision she had in mind. This is always the scariest part of making custom pieces for me. Just because something gets translated in my brain a certain way doesn't mean it will speak to the person I'm making it for in the same way. In the photo below you can see the different layers stacked up. The flower with the rhinestone was a less full version I fiddled with. We ended up going with a much fuller version which I think worked better anyway!!
I also got to get a little creative with the supplies I used to shape the petals themselves. When poking around my kitchen for the perfect shapes I ended up pulling out an antique champagne glass to help me get the smaller center petal layers just the shape I was looking for!
This is the finished product:

I have a similar piece in my shop right now in my shop on Etsy.
And this is the final product on my SIL after she got her hair done on her wedding day. Thankfully her MOH remembered to snap a photo of the flower in action because I was running around and it totally slipped my mind!!
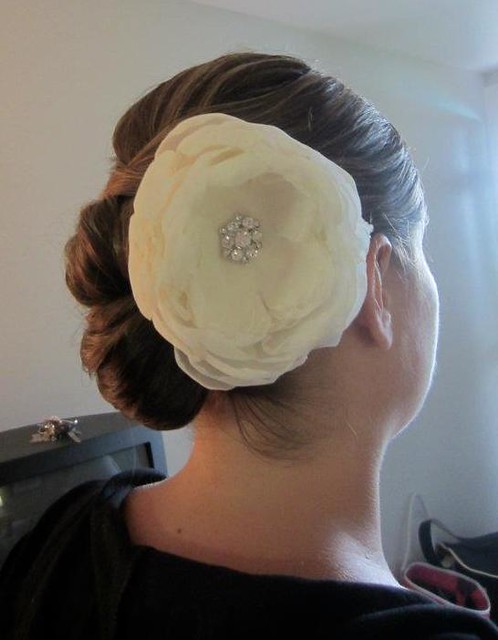
Photo used with permission from MOH
<3
Congratulations Meghan & Eric!!
First dance as husband and wife! Just look how cute they are!!
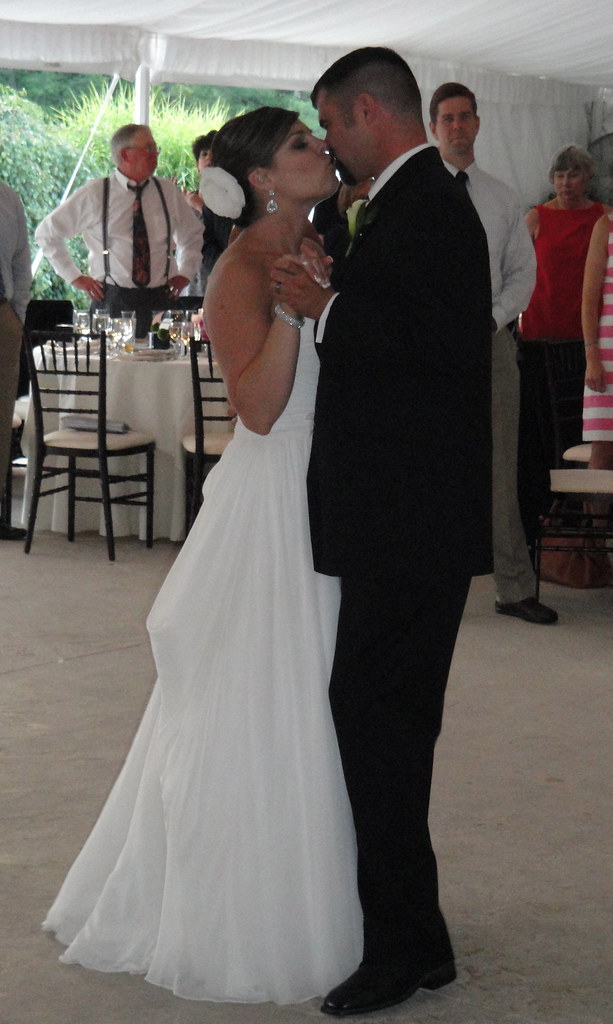
Photo borrowed with permission from David L.
---
I have another DIY tutorial coming up next week. It's going to be hosted over at Bridesmaids and Weddings first so be sure to check back for more info!!
Other wedding craft:
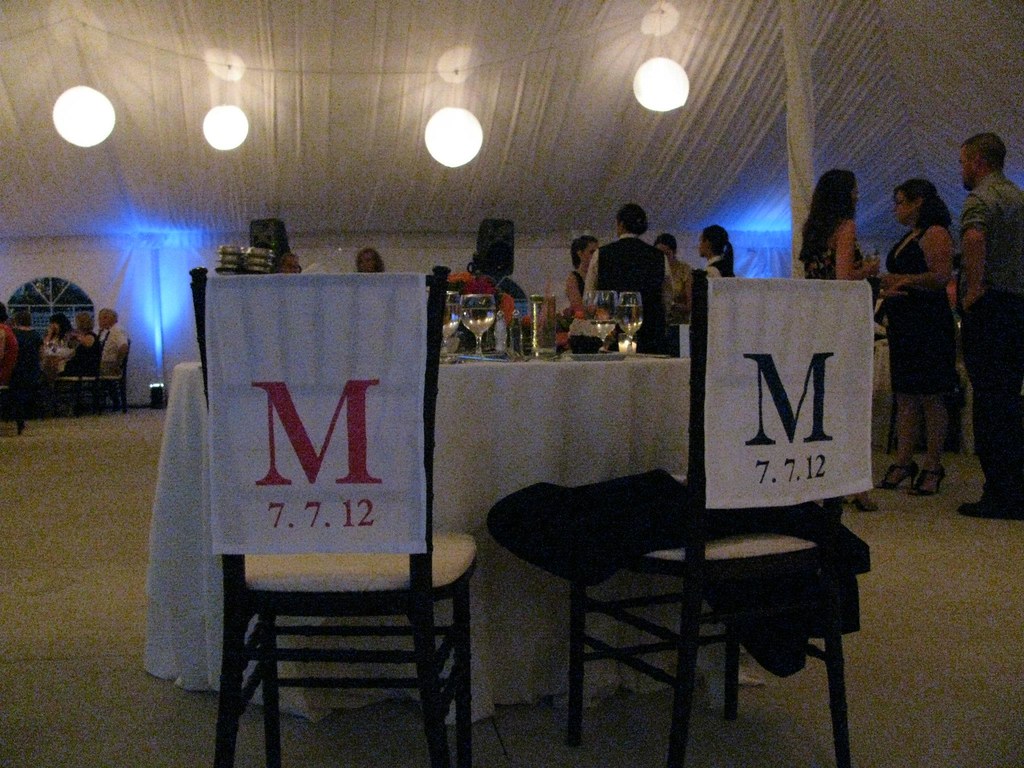
I made these for my SIL's bridal shower and they ended up using them for their wedding day, too! I think they look super cute on the back of the new couple's chairs!! If anyone is interested ordering these I can make them via custom order in my Etsy shop.
Other wedding craft:
I made these for my SIL's bridal shower and they ended up using them for their wedding day, too! I think they look super cute on the back of the new couple's chairs!! If anyone is interested ordering these I can make them via custom order in my Etsy shop.
No comments:
Post a Comment