Wednesday, June 19, 2013

Freezer Paper Onesies!!

I love freezer paper stencils and they're a great and pretty easy way to jazz up a plain onesie!! You can check out my Freezer Paper Stencil Tutorial from last year to learn how to make these!!

Here are a few onesies I made recently:

This onesie is actually for Ali & Jen's brother Andrew (or Pooter as we call him) and his wife Lauren. They're also expecting a baby in July (and yes, they're a very fertile family!)  Lauren is actually half Puerto Rican and I thought that this onesie could be a fun and funny nod to her heritage.  I know it's rather simplistic, but for some reason "no hablo" (which translates to "I don't speak" in English) coming from a baby/on the onesie cracks me up to no end.


Pooter and Lauren run an amazing photography business. Andrew takes the pictures, and Lauren helps out in all capacities. You should check out Andrew's work here:  Collective Perception Photography. CPP shoots all over California and they specialize in weddings, engagement shoots, great family photos, and even sweet photos of children!!  Andrew does an incredible job of capturing the personalities of the people he's photographing and he really gives them all a sense of feeling.  Below is a stunning photo Andrew shot to commemorate Lauren's beautiful baby bump and to celebrate baby Darko (as they're calling him/her for now).  You can find more up on CPP's Facebook page.   


This onesie is for baby Nessie whose mobile was featured last week.  For some reason Ali and Andy have always thought that Jackalopes, the mythical creatures that are part rabbit and part antelope, are awesome.  So putting this design on a onesie for their baby has actually been a must-do item in my idea folder for ages - even before I found out they were pregnant!!  It's simple, playful, and fun - just like them!!


Have you given freezer paper stencils a try before?  If you haven't they're so easy and fun. Check out my tutorial HERE.  Happy Crafting!!


Friday, June 14, 2013

Nessie Stuffed Animal

So when my friend Ali announced she was having a baby and that they'd conceived while on vacation in Scotland I knew instantly that I wanted to incorporate the Loch Ness Monster into something that I made for her baby. I found some great green fluffy fabric one day at Jo-Anns and thought I'd try my hand at making a stuffed animal!!  This isn't really a tutorial because I don't have any measurements, and I basically made it up as I went, but I do talk through the process in this post.


I basically made up the template and process as I went along. I free handed a body which took a few tries until I got something right. 


The basic shape is here. It's blurry because I was in a hurry (and took it with my cell phone), but you can see the outline. I doubled up the fabric (folded it over) and pinned around the Nessie drawing (pinning the two halves together) so that the fabric wouldn't shift when I cut it out.  I ended up with 2 perfectly matching pieces.  I was careful to remember to cut it out leaving extra room to sew Nessie together.  I left an extra 1/4 inch all around. 


Below you can see when I started to pin it together to sew.  I also free handed a pointed oval pieces to use as Nessie's chest making her 3-d. I also drew a stencil of flippers mixing them up from front and back legs.


I then sewed the fins together and then pinned them in place on Nessie's body. Remember to tuck them INSIDE the shape since you're flipping the whole thing inside out. This will make sure that the flippers of the stuffed animal end up on the outside when you're done and ready to stuff it.  (Yeah, my first go I forgot and put them on the wrong side!!) I had to adjust the oval for Nessie's belly oval a bit. Since I was just guessing when I sketched it, my first guess was a bit bigger than I needed.  So I sewed the body about 3/4ths of the way (I started on one side of the body towards the bum end) and then cut and adjusted it so it would connect to her bum without giving her a HUGE belly.  I left Nessie's back end open so I could stuff her with filling. You can see what I mean in the photo below.


I then stuffed and stuffed and stuffed away until she was as full as I wanted. She's perfectly cuddly.  I had to use a pen, and stick my hand inside the stuffed animal to get the filling all the way into its head and neck.  Then I hand sewed her back side together and closed her all up.  

Since this is for a baby, I decided to not include eyes. Anything I could come up with either involved sewing on buttons - chocking hazard, or using paint or glue and that seemed like a baby possibly chewing on Nessie's head hazard. 

She's not exactly perfect if you look realllly closely, but for my first attempt at a 3-D stuffed animal that I made up in my head, without any online tutorials or templates,  I was pretty darned pleased with myself.  More to the point, I hope that Ali and Andy's little one loves it!! 


Ali sent me this cute photo the day the package arrived at their house.  She wanted to play with Nessie too!! 

Wednesday, June 12, 2013

Yay For Baby Nessie

So one of my best friends Ali, or Bird as I call her, is having her first sweet little baby this July (I'm crossing my fingers for my birthday!!) I've known Bird since 7th grade when we were in science class together.  Ali missed the first week or two of school because she had an emergency appendectomy and when she did come back our teacher used to torture her by singing her name everyday during attendance.  (The song has since escaped my memory.)  Bird and I were in school together throughout middle school, high school, and even college! We've been to so many concerts together that I can't even begin to count them, and gone on many many adventures both big and small.  We're friends for life.  Her family is my family and I love them all.  I made the Star Wars themed mobile for her big sister Jen's baby, Luke, last summer.  (The Star Wars mobile is now in my shop.)

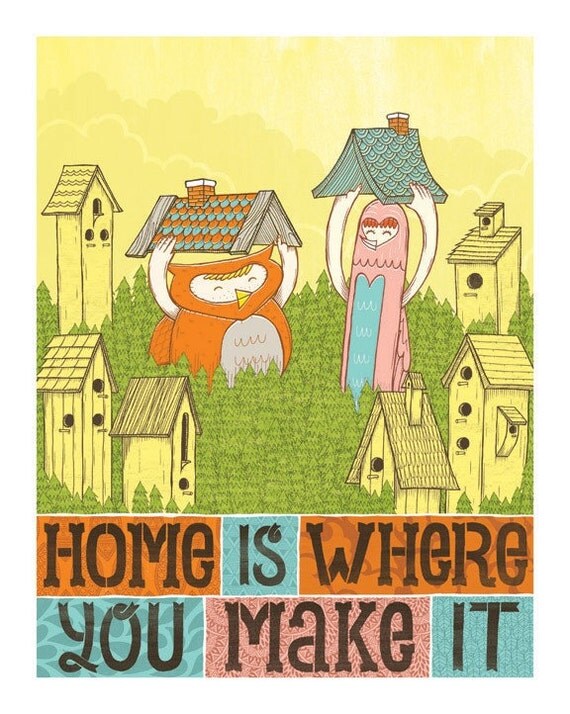
I was clearly eager to jump at the chance to create a mobile for Baby Nessie (so nicknamed after being conceived on a vacation in Scotland).  To start, Ali sent me links to some of the UBER-cute and super-fun art pieces for Baby Nessie's room.  The pieces are a bit all over the place in terms of characters and color schemes but I found a way to playfully bring them together. Nessie's parents are incredibly bold and are planning to move sometime very very soon (fingers crossed), so while I'm not sure what color her room will end up being, she's off to a great start with the art because it's all incredibly interesting and adorable too, and sure to captivate a baby's attention and imagination!!

Here are the art prints in the baby's room thus far:


See, they're all great, right? But they're all really different too. I love it.  Also included in room is a mix of Boston Terriers pups in honor of the house lady Muffaletta.  (Yes, she's named after the sandwich.)  Muffin has been Ali & Andy's baby for almost 6 years so she's the unofficial big sister around their house.  If you look below you'll see that Muffin is a pretty little girl.  I made sure that I mimicked her coloring (her socks in particular) in the figures where there were little legs showing!!

Just look at that cute face!! (Photo by her owners!)  

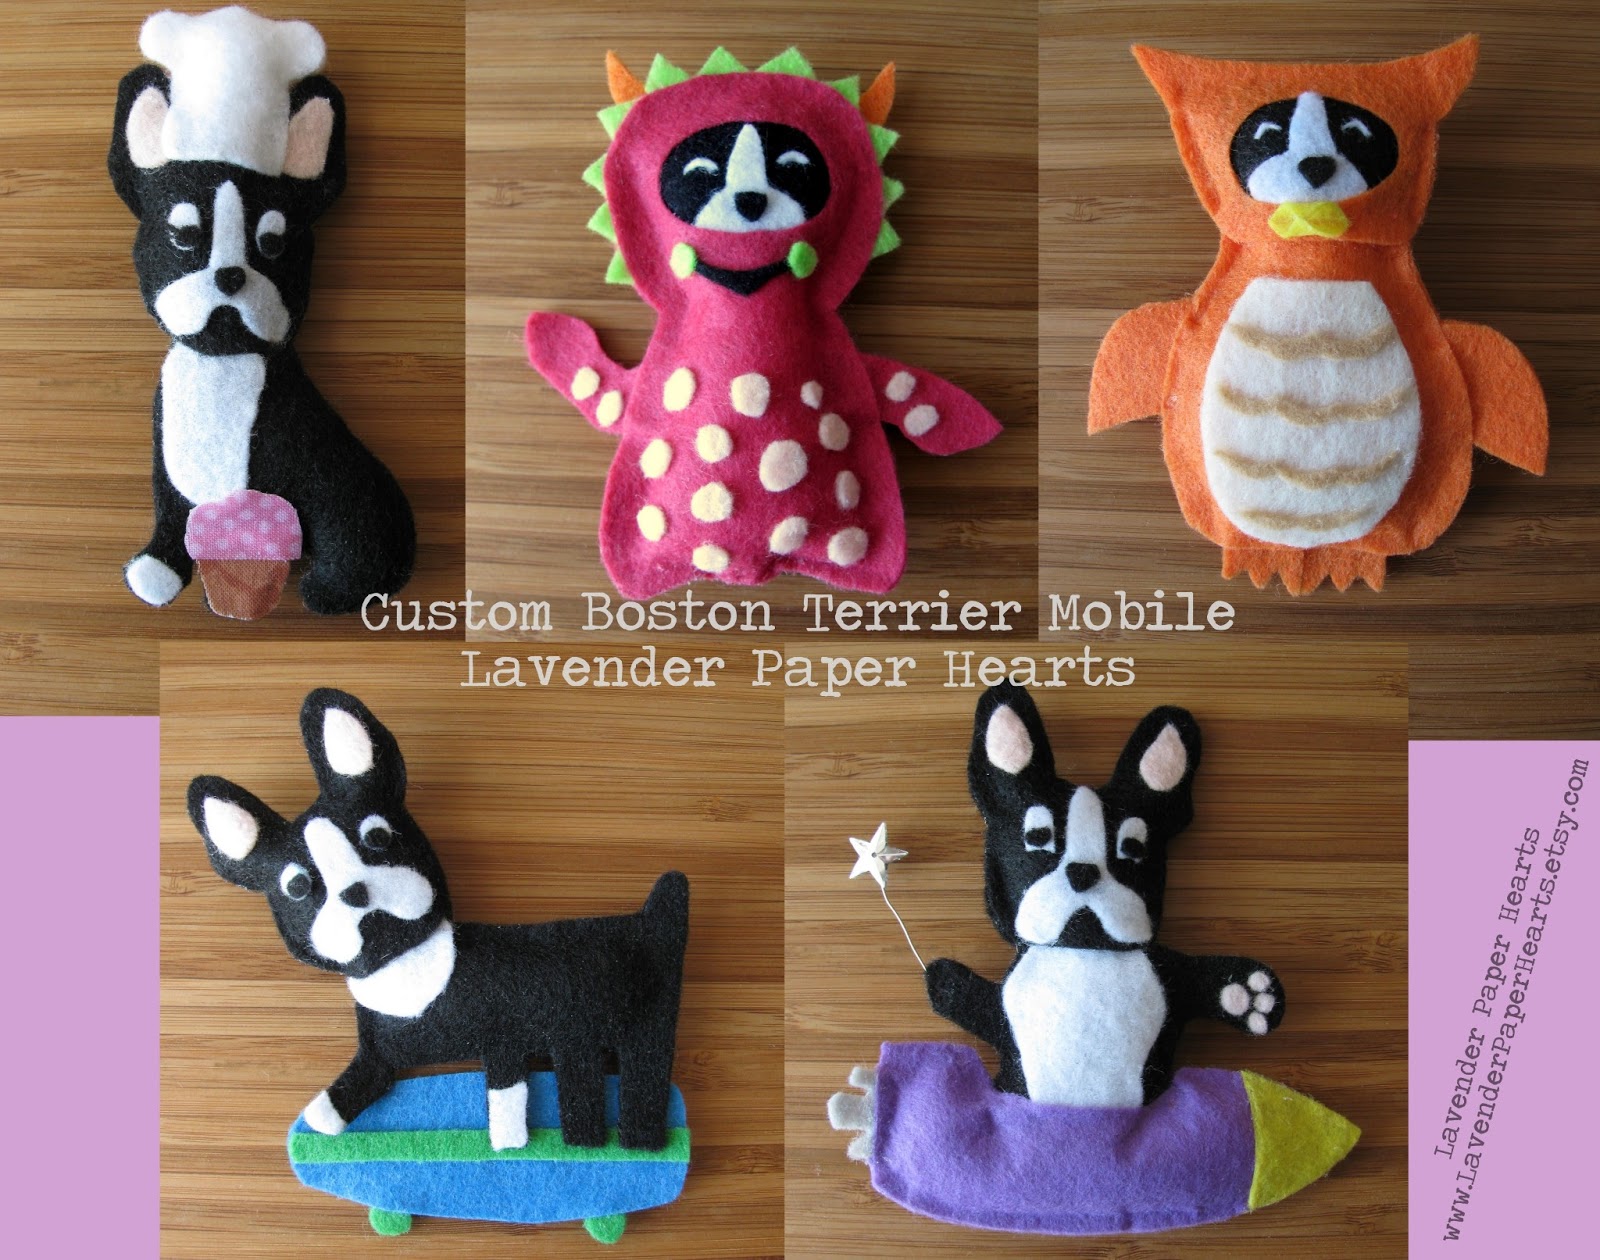
The final theme I came up with for the custom mobile was the idea of Boston Terriers playing dress-up.  You can see in the images below that I borrowed characters from each of the three art pieces and then incorporated both Ali and Andy's hobbies into the last two dogs to finish off the piece. 


Working clock wise:
1. Baking Boston - This was inspired by Ali. She makes amazingly delicious baked goodies. I even gave this plush eye lashes. The cupcake is made from extra material that Ali's sister Jen used in a quilt she made for baby Nessie. 
2. Monster Boston - I was inspired by the cute pink polka dot monster by Invisible Creatures. If you look at the monster on the left side hugging the tree that's my monster.
3. Owl Boston - The cute cuddly orange owl by Jolby is who this Boston is dressing up as. 
4. Skateboarding Boston - This plushy was for Andy! Andy likes to kick it old school at get out and about on his skateboard!  If you notice, the pups "socks" or legs are just like Muffin's!! 
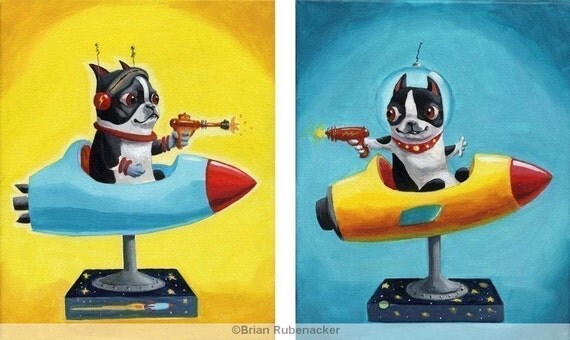
5. Astronaut Boston - This one was inspired by the Rubenacker art pieces. I gave it a bit of my own spin with the star balloon. 

Here's the mobile hanging in action.  I added some sparkly beads to give the mobile some eye catching sparkle and then added a few little extras here and there for more texture.  The owl has a branch floating just below her and the Astronaut Boston has a little planet.  I then added sky blue hearts to the tops and bottoms of the plush figures that didn't have any extras hanging.


I'm beyond excited to meet baby Nessie (and to learn her official name)!! I know that Ali and Andy are going to be great parents and Muffin will be sure to take very good care of her too.

 If you're interested in working with me to create the perfect baby mobile for your little one, or a little one in your life I'm always really excited to work with new customers. You can contact me about custom listings HERE.

Be sure to check back to the blog soon. I have a few more things I made for baby Nessie that I'll be sharing!!


<3