Tuesday, August 28, 2012

Soft White Hydrangea Heaven

I love hydrangeas.  They come in all kinds of colors and their blossoms are big and beautiful. The photo below are hydrangeas I grew in my garden early this summer. They sort of remind me of fluffy clouds or cotton candy.  They also make great flowers in weddings because depending on the color they're a really good deal for big luscious flowers (note: the purple and white flowers are the most expensive). 


One of the first pieces I ever sold in my shop was a custom hand-dyed blush hydrangea head band. It was modeled after this soft white hydrangea headband fascinator with silver tulle leaves: 


I've also made a rounder version without the leaves to mix it up a bit and this piece was really popular at the beginning of this summer.  A customer suggested the combination of the pearls in the hair piece featured below.  I like it as an alternative to sparkly rhinestones.  The pearls add a subtle beauty to the piece overall. 


Today's a big day, we're about to have another Doctor in the family!! <3


Friday, August 24, 2012

Baking: Apple Hand Pies

Apple handpies for the birthday girl!!

They'll be served with salted caramel sauce and homemade whipped cream... drool.

Cheater tip: You can makes the pie crusts from empanada shells.  They taste yummy and work great if you don't have a lot of time and or don't feel like making crust from scratch. You can usually find them in the "ethnic" section of your grocery store if your grocery store carries Goya products.


Apple Hand Pies

Crust:
2 cups Flour
1 tsp Salt
3/4 cup Shortening
4-8 tbsp Cold Water

Filling
4 Apples, peeled, cored & chopped
1/4 cup Brown sugar
1/8 cup Granulated Sugar
1/8 cup Flour
3/4 tsp Cinnamon
1/8 tsp Nutmeg
1/2 tsp Vanilla
A pinch of Salt

For Golden Crust:
1/8th cup heavy cream
Sugar for sprinkling on top

Pre-heat oven to 350.


If you're not using the cheater crusts, mix together the flours and salt and then cut in the shortening using a pastry cutter if you have one (or forks).  Slowly add the water, only adding enough until you can form a ball with the dough.  Let the dough chill for about 20 minutes in the fridge and then come back to it.

Prepare apple filling by chopping up apples into small pieces. I usually aim for roughly 1 cm squared pieces, that way they’ll get soft, but not turn to mush while baking.  Toss in apples, throw other filling ingredients on top, and mix together.

Non-cheater crusts: Remove your dough from the fridge, throw some flour on the counter and roll out the dough.  Using a bowl cut out your circles. I recommend circles 5-6 inches in diameter.


Depending on the size of your crusts fill with as much apple filling as you can fit in the crust while still being able to close it. For me this was about 3 Tbs.  You can use some water around the edge of the crust to help seal it, but I don’t always do this step.  To do this dip your finger in water and drag around the edge of the pie crust, then pinch the crust closed with a fork.  Once the pies are ready for the oven brush them with heavy cream and sprinkle sugar on top.

If you’re using 5-6 inch circles the filling will fill about 14 hand pies.  Bake for 25-30 minutes or until the pies are golden brown.  Set them on a cooling rack.  If you're serving them later don't cover with cling wrap until they're completely cool. 

If you have extra filling, have no fear, just throw it in a small casserole dish, make some streusel apple pie topping and revel in the leftovers. Breakfast of champions. 


Tuesday, August 21, 2012

Three Cheers for Baby Buffalo!!

So this past weekend, one of my best friends, Jen, had her baby shower in California!! I'm so sad I couldn't be there to celebrate.  My mom went to join in the fun and she brought along some more gifts from me.  I know that Ali & Lauren threw her a rockin' good time!!

That said, I thought I'd share a few of the gifts I made for Baby Buffalo (thus named because his sonogram looked like a lil' buffalo hanging out in there)!!

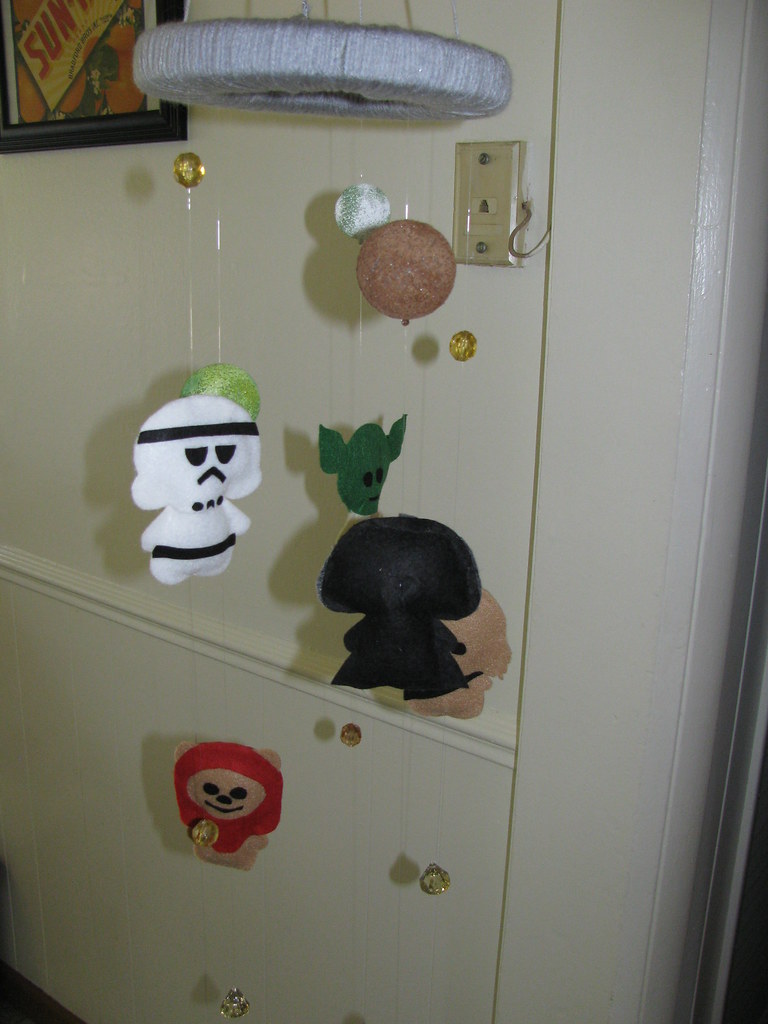
Since BB's room is Star Wars themed I knew right away that that would direct the theme for the mobile I made for his room!!  I learned in doing this project that I know NOTHING about Star Wars. I mean, I knew some of the characters, but I didn't know how they necessarily related to one another (beyond the "bad guys" and the "good guys").  I asked the mama-to-be which would be some of the top characters she'd want to possibly see in the mobile and then I went from there by picking - haha - well, the characters I thought were the cutest.

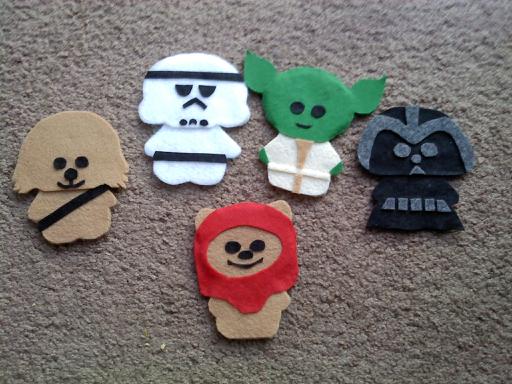
Here are the characters I picked:

Chewy, Storm Trooper, Yoda, Darth Vader, and an Ewok
This mobile is now available in my Etsy Shop. You can find it HERE

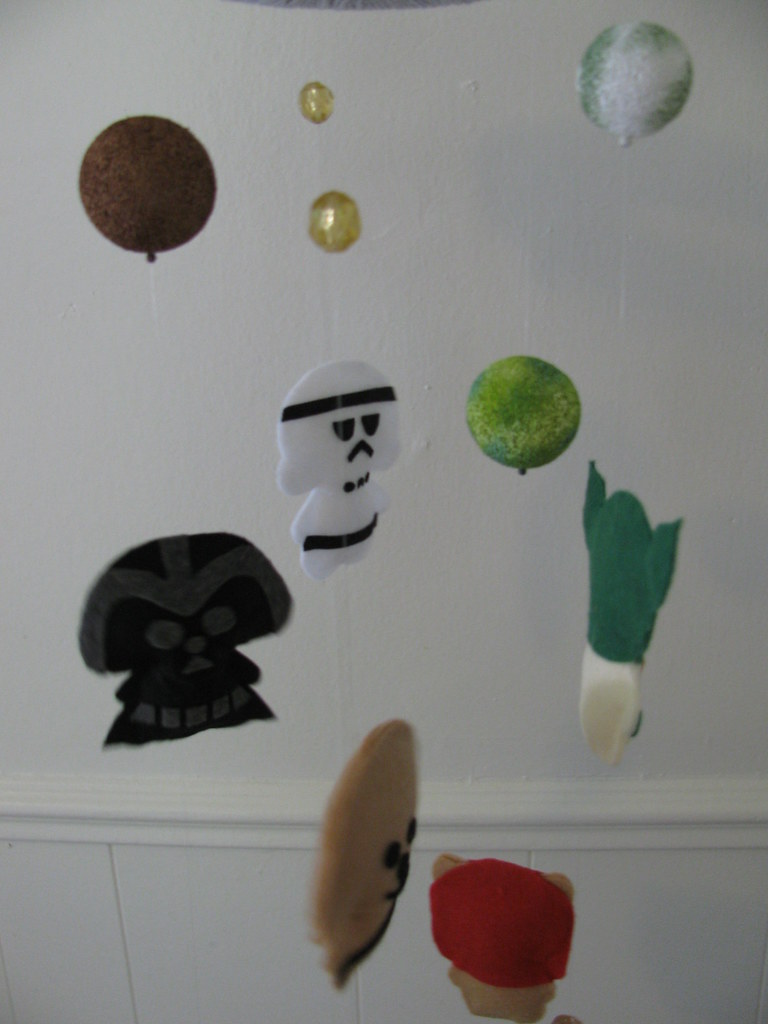
I usually try to add depth to my mobile so the baby has a lot to look at so I knew I wanted to add some planets.  I did my best to try and research who came from where and then picked the planets I figured I could replicate the easiest.
  • Bespin hung above Vader and it's the planet where Vader and Luke Skywalker dueled. 
  • Dagobah is above Yoda, because it's where Yoda trained Luke Skywalker. 
  • Endor hung above my Ewok because that's where the Ewoks are from!! 


Here are a few more shots of the mobile. It's hard to capture each character since the darn thing kept swinging around, but that is the point after all.


Then, because I kinda couldn't help myself, I made him some stylin' duds. 


I know babies don't really need shoes, but he'll need to keep his toes warm, right?!! Also, these shoes were so cute I basically couldn't stop because of cuteness overload.  I picked out the checker print as it reminded me of slip-on vans.  This is a bad cell phone picture and I think it was too hot out when I made these and my brain was melting a bit because I really should have taken a picture of them from the front too.  You get the basic idea though. 

Here's to wishing Jen & Jeff the healthiest, happiest, bouncing baby boy come September!! He's not even here yet, and I can't wait to snuggle this little one sometime soon!!


Again, the Star Wars Mobile can be found in my Etsy Shop HERE.

Tuesday, August 7, 2012

Quirky Bobbles


I was looking for some cute buttons to jazz up my black winter coat a year ago and in my endless searching on Ebay and Etsy I came across a random large lot of buttons.  Of course I ended up getting way more buttons than I needed in order to get the few buttons I wanted, but it worked out because the buttons in the collection are really cute.  I started using some of them as quirky little centers for some of my hair pieces and I think they look pretty darn cute, if I do say so myself. 


Don't like the button I've put in there? Well the centers can always be mixed up.  Check out some of the other precious buttons available!


Friday, August 3, 2012

Flowers in Action: Congratulations!!

From time to time I hope to share flowers in action - or rather pictures of my customers in their hair pieces!! One of the greatest elements of creating hair pieces is knowing that they will most likely be worn by people during really happy times or activities.  I've had the opportunity to create custom hair pieces for brides to wear on their big day as well as fun and funky pieces for prom.

Today I wanted to feature my friend Jen! Jen and I met while we were both working on our Master's degrees at the University of Massachusetts Boston. The two of us used to get up to all kinds of crazy fun adventures all over Boston!! Shortly after I made a Facebook shop page earlier this year Jen JUMPED on buying a hair piece which was so incredibly sweet of her.  Like literally jumped on it - I posted it and went to bed and when I woke up she'd already placed an order - that girl is ON TOP of Facebook postings! :)

 Jen & her now hubs CJ had a sweet and intimate courthouse ceremony in February with a few close friends and are planning a church ceremony and reception in April 2013! Knowing Jen, I'm sure it will be an absolute blast!!
Congrats to Jen & CJ!!