

It's officially starting to look like fall here in New England so I feel like it's finally appropriate to share this awesome DIY!! A month ago, the weather was being particularly wonky. It seemed like fall already because it was cold and grey, even though it was still technically August. I was at my local Dollar Tree one weekend when I found some fantastic supplies which inspired me to gear up for the new season!! (Yes, this has been hanging on our door for a month already - we're good like that!) I purchased 1 wood wreath, and 8 bunches of leaves and in about 30 minutes came up with a beautiful wreath for our front door. The best part of this DIY is that it only cost $9. Yes, $9!!
This DIY is so easy. Here's what you'll need:
1 wreath form
8 leave bunches (you may need more, you may need less)
Glue gun & extra glue
Scissors
Small bit of wire or soda top to glue on the wreath to hang it up
Iron
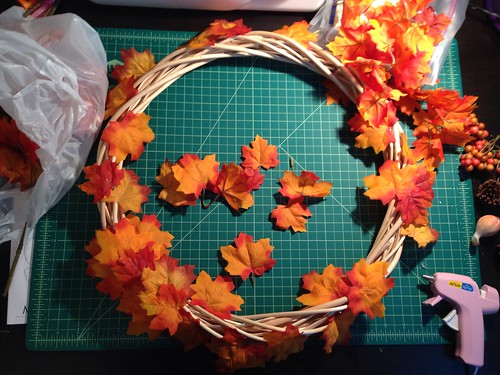
Plug in your glue gun and pull apart your first bunch of leaves. Separate your big leaves from your small leaves. If you've got different shades in your leaves you might want to sort that too. I had some that were a bit more brown and some that were a bit more orange so I made sure I spread them out throughout the wreath. If you've picked leaf bunches with extras (mine had awesome squash, little balls, and pine cones) put those off to the side - you'll use those last. Here you also might want to use your scissors to cut off the "stem" part on your leaves.

I started my wreath by scattering big leaves around the wreath and hot gluing them in place. For some of the leaves that were bent (you can see some in the bottom left of this photo) you can easily iron them flat by setting your iron to a medium temperature and pushing quickly and firmly on the leaves. Keep your iron moving though because the vein parts of the leaves are plastic and will melt. Keep that side down and away from direct contact with the iron.
After I'd scattered about 15 leaves all over - inside the circle and outside the circle. I decided to switch strategies and work from section to section. Layer your big and little leaves. You can always go back and add leaves if you feel like a section is a bit thin. I also kept most leaves going the same direction but occasionally added a few small leaves on the very top layer that went the other direction. It's up to you.
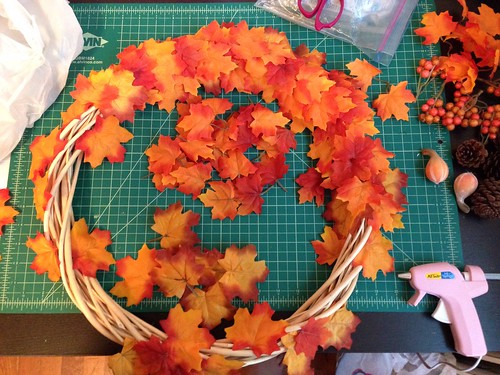
Keep adding.
And adding some more until you're filled in!

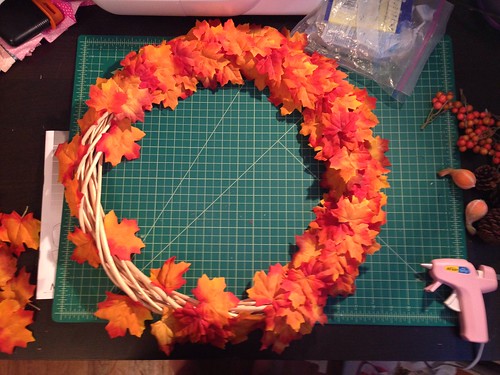
Now use your extra bits and glue them around your wreath at your discretion. I had some extra pieces left over that I didn't end up using. I also got to a point where I felt like I needed to hang up the wreath to see where the last few extras should be tucked in. My door happens to be right near an outlet so I just glued on the last few extras as it was on the door. Do what works best for you.
Here's how I added a hanging loop: I used some wire, looped it around a few times on my fingers, and then hot glued the loop to the back of the wreath. If I'd had a soda can I would have used the pop top and glued it on to the wreath. Either one works. Once the glue is cooled - make sure it's cool or it'll fall off your door - you can hang up your wreath!

Admire your work, because you're done!!
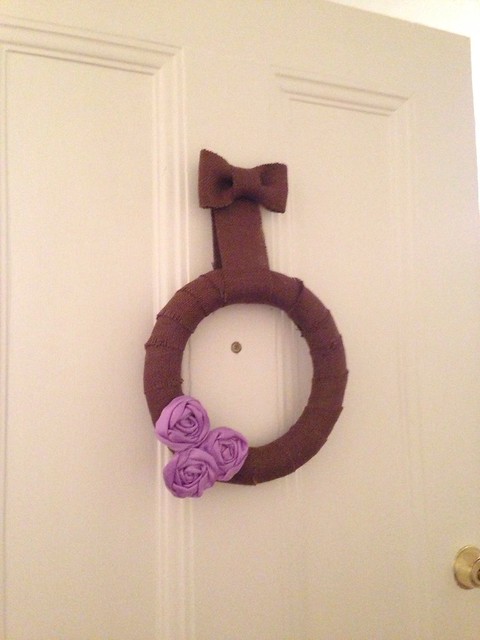
Wreath-y bonus: I had an extra foam ring and some burlap lying around so I whipped up this wreath for our other door. It's inside and on a door nobody technically ever uses, but I know it's there. Here's how I made this one: I cut strips of burlap, frayed one side, and then glued them to the wreath. I had some wrap flowers from another project in a craft box so I quickly hot glued those on. Added a burlap hanging ribbon, a bow, and boom - done.
Bonus-Bonus: My husband fell in love with this crocheted pumpkin when were were at a craft fair a few weeks ago. It's paired here with an AWESOME skull candy dish I picked up from the Dollar Tree a few years ago.

No comments:
Post a Comment